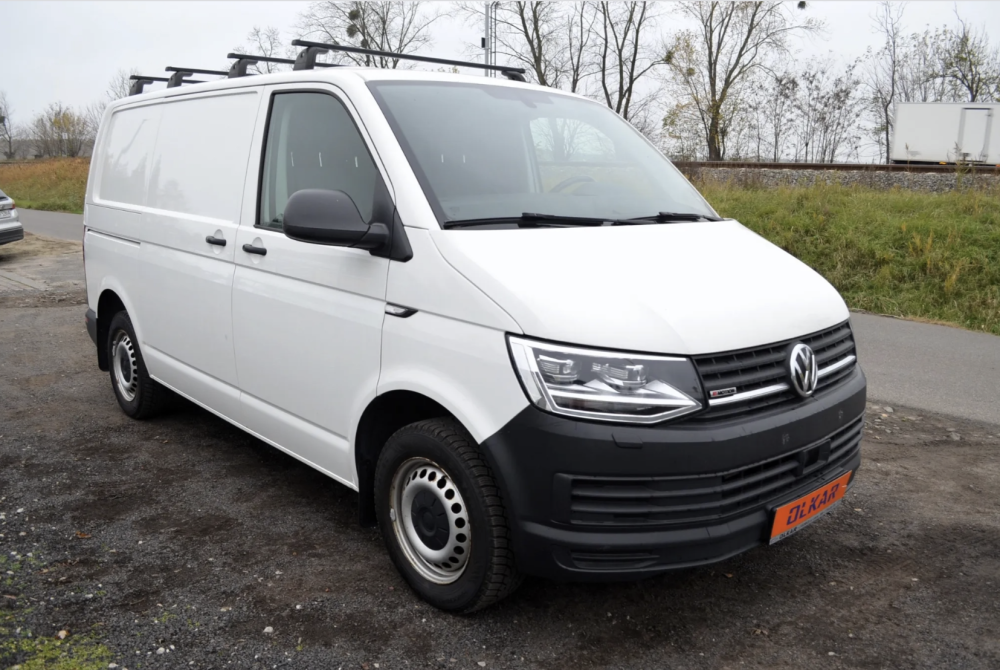
From start to finish, this is the detailed build thread
Creating this thread to share photos on progress of the build and to share ideas. Been various forums around the world and learning all I can as well as incorporating my experience of remote Overlanding around the African continent over the past 15 years. The build is leaning towards an offroad capable, offgrid ready yet comfortable daily driver. I am originally from South Africa and living/ working in Europe (My parents are from Poland).
The Planned Build:
- Swamper Alloys + AT Tyres (Summer wheels) – These will likely be 17″… Maybe an 18″ depending if they will fit.
- 18″ Winterwheels (Kumho WinterCraft 235/55/18)
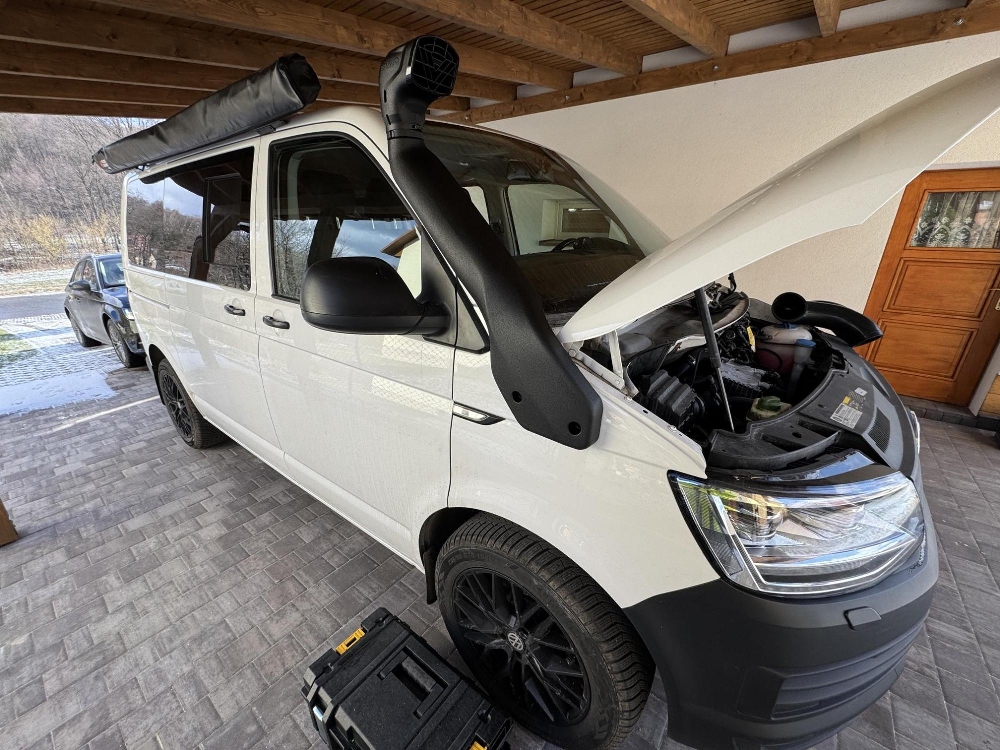
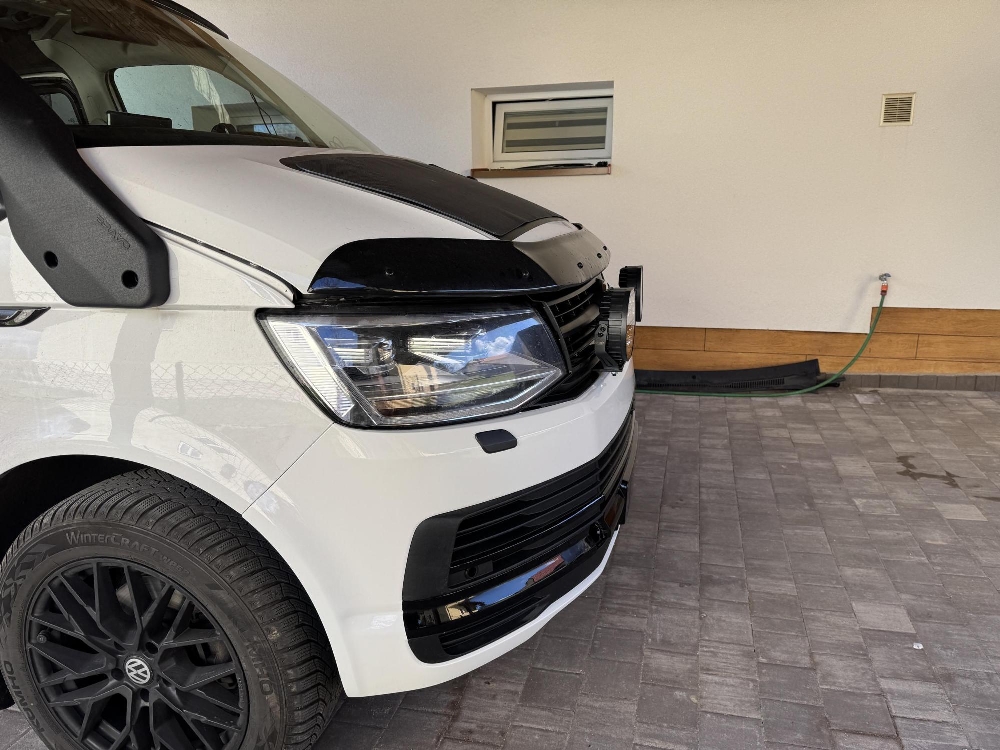
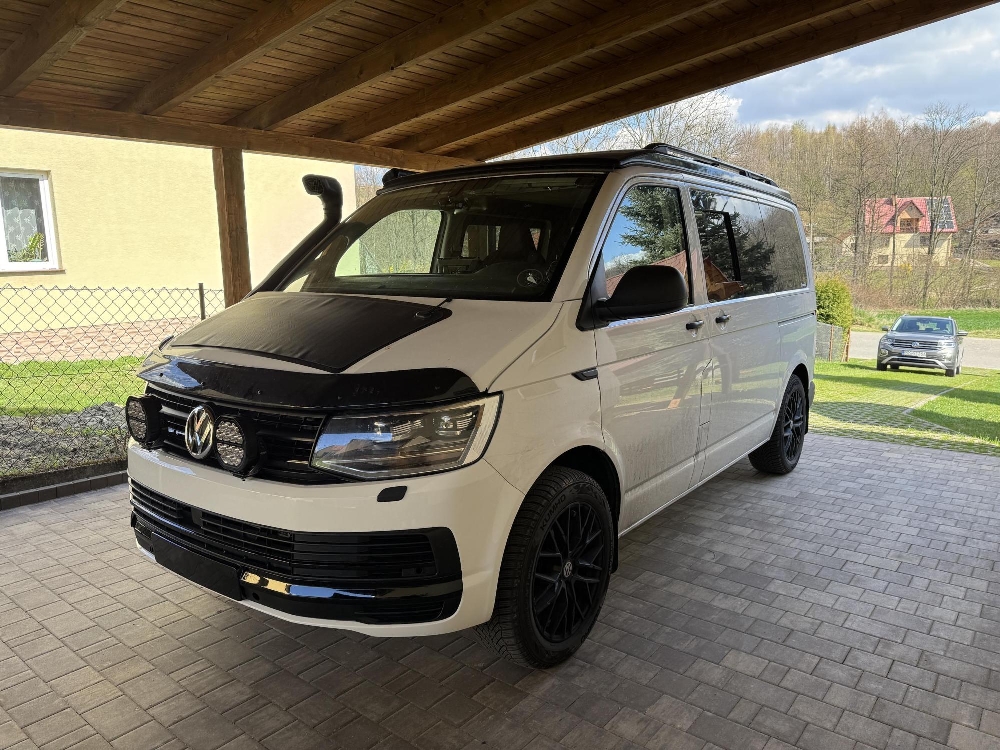
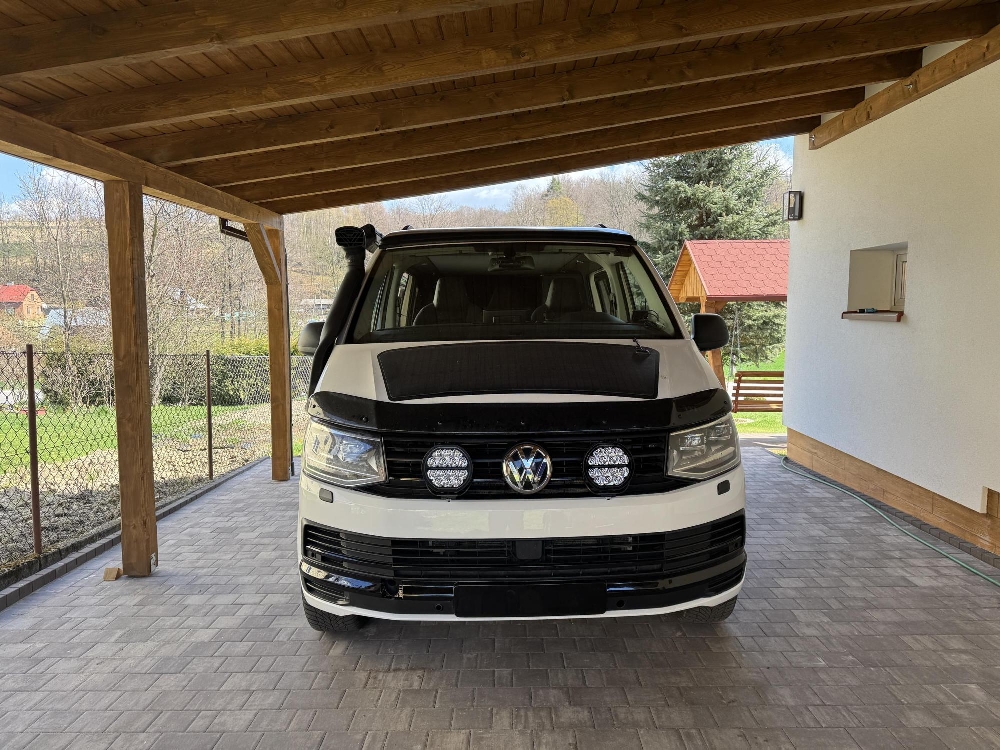
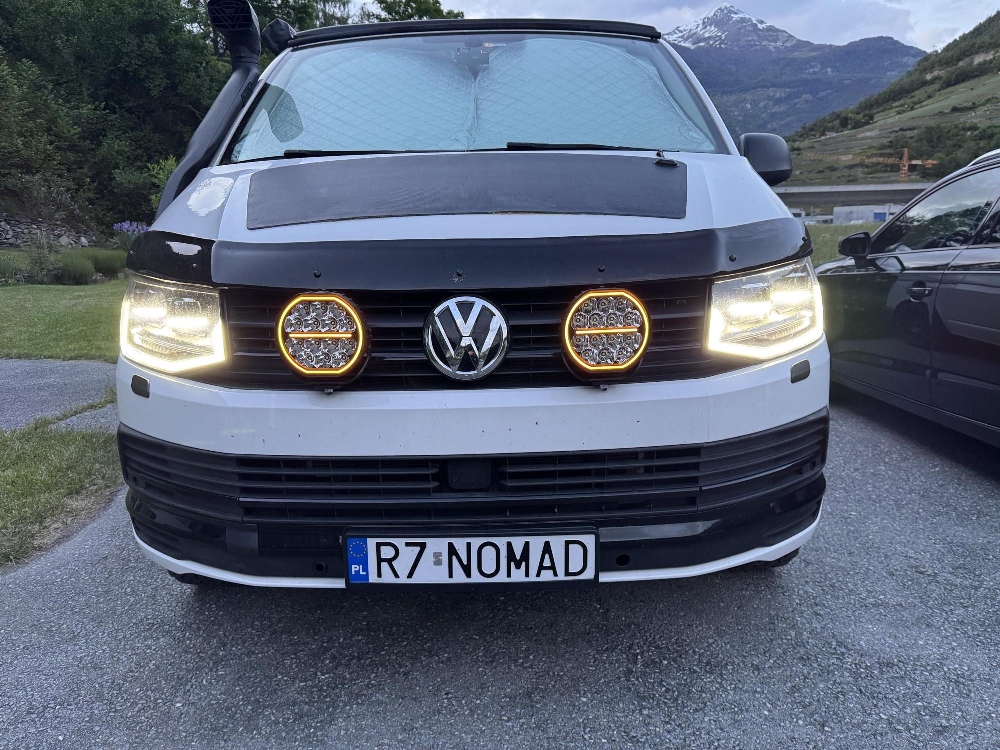
- Bravo Snorkel
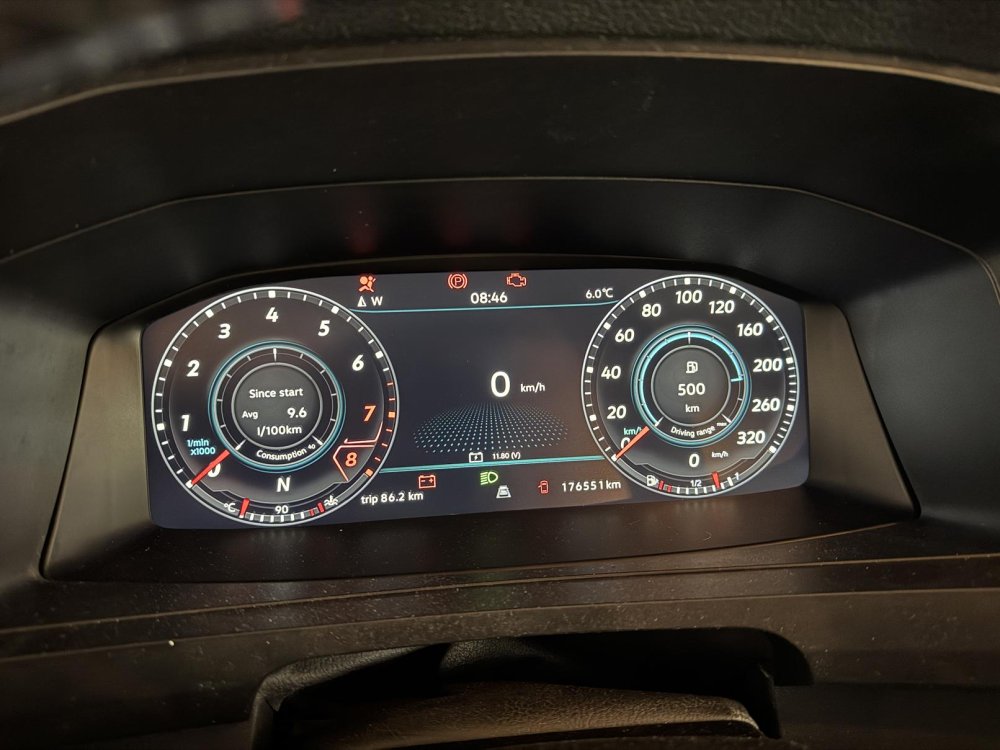
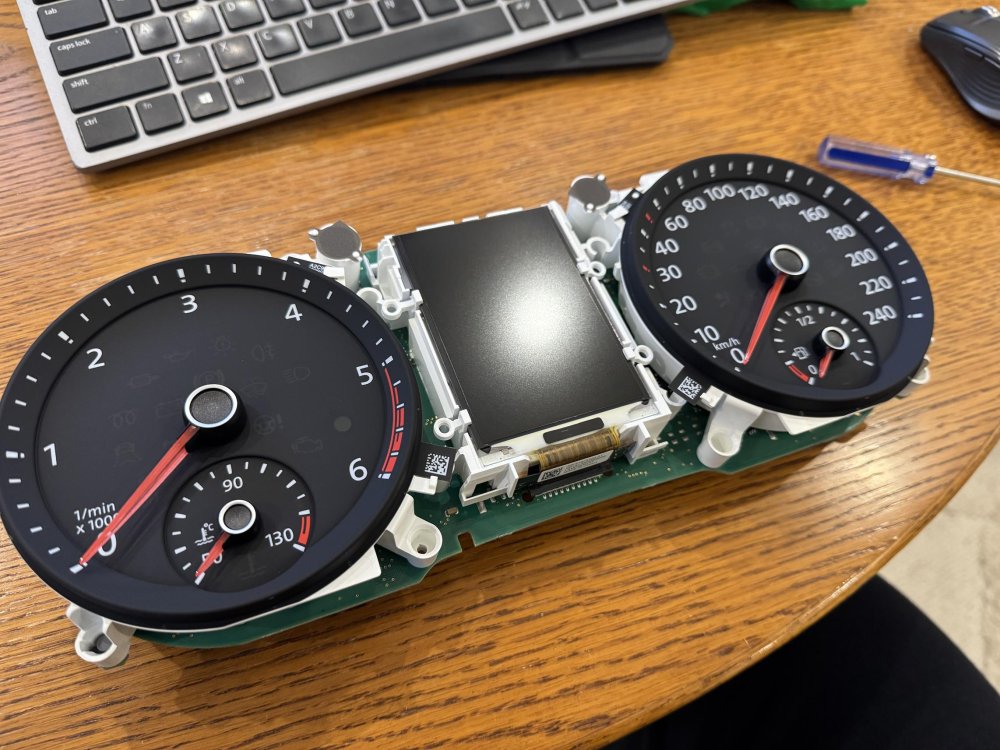
45mm30mm Lift- Digital Instrument Cluster
- Smart Rear view mirror (I will 3D print a holder for the rear camera and will stick it to the top of the Tailgate)
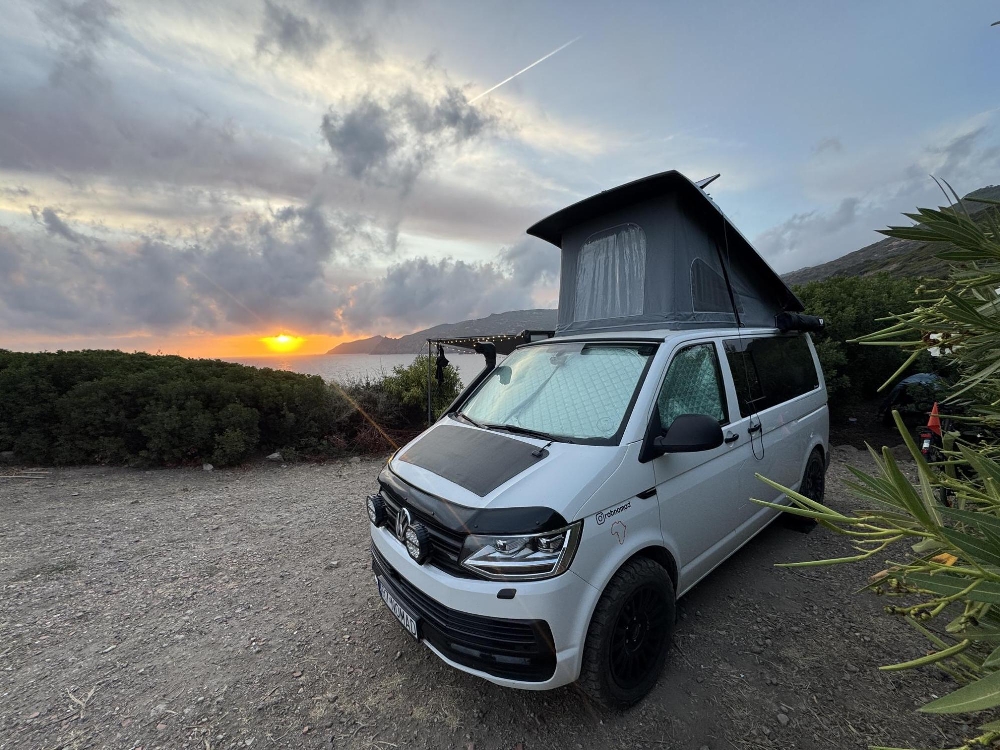
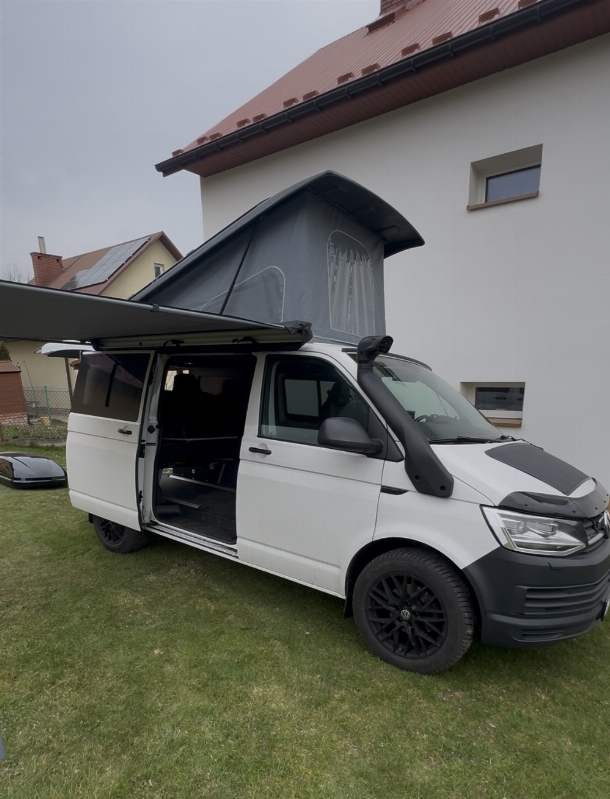
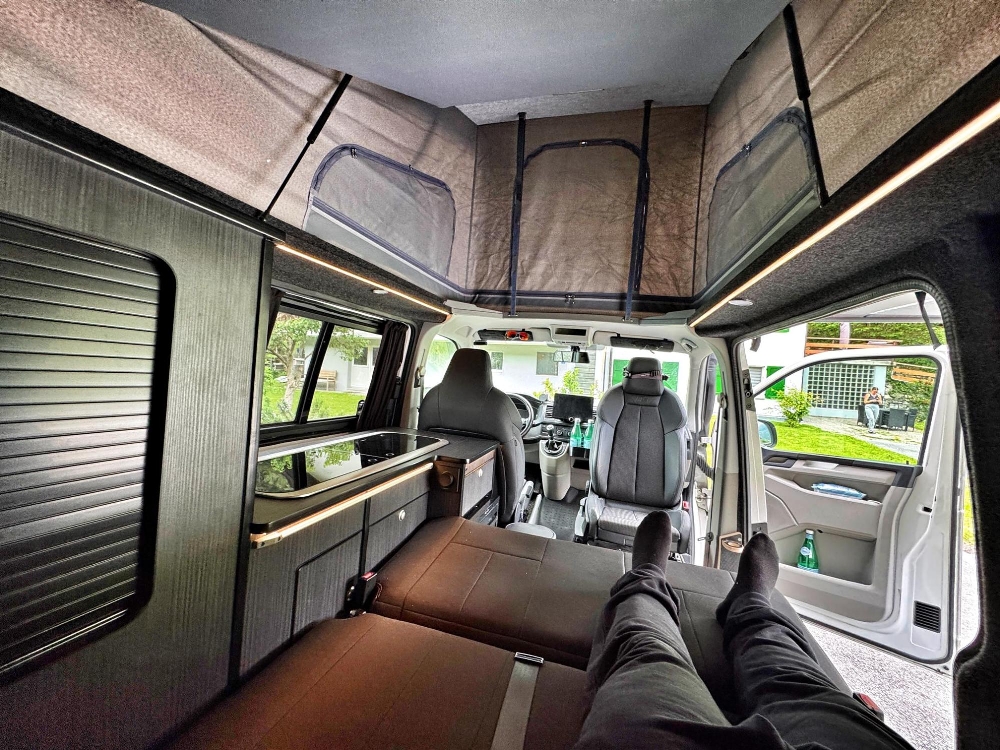
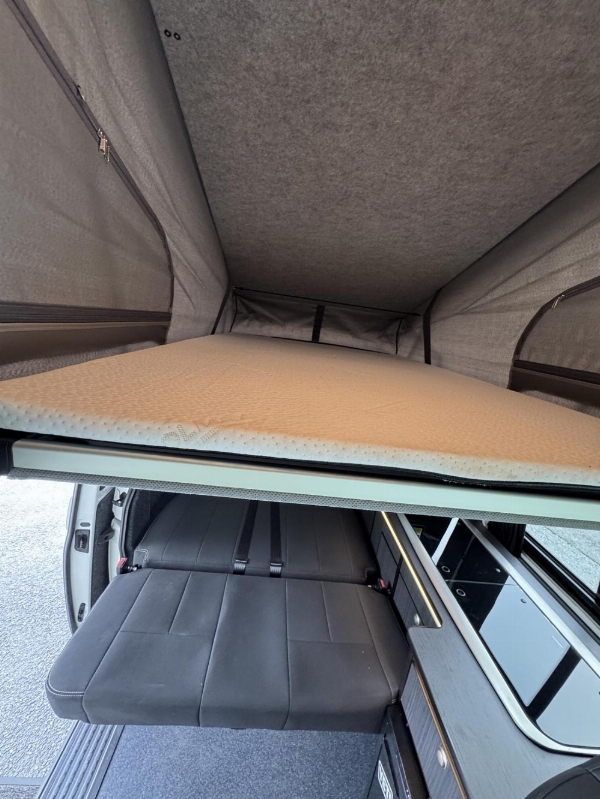
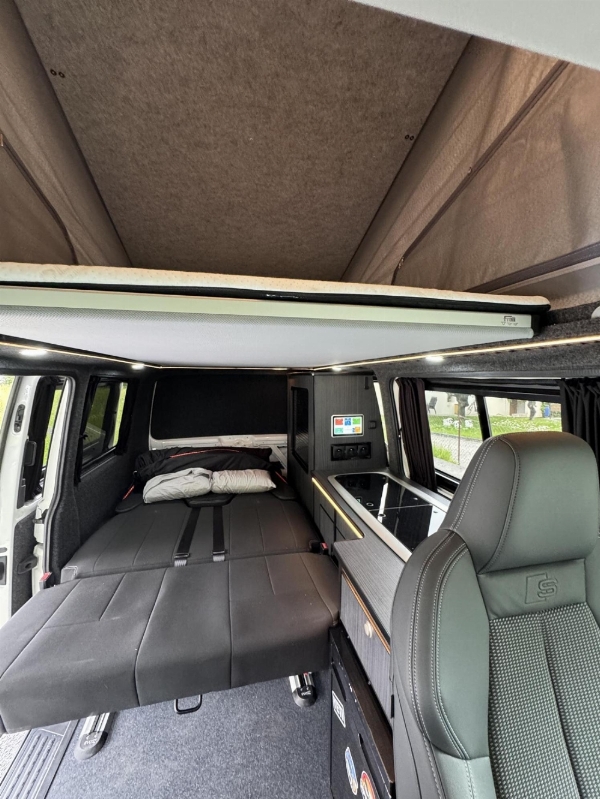
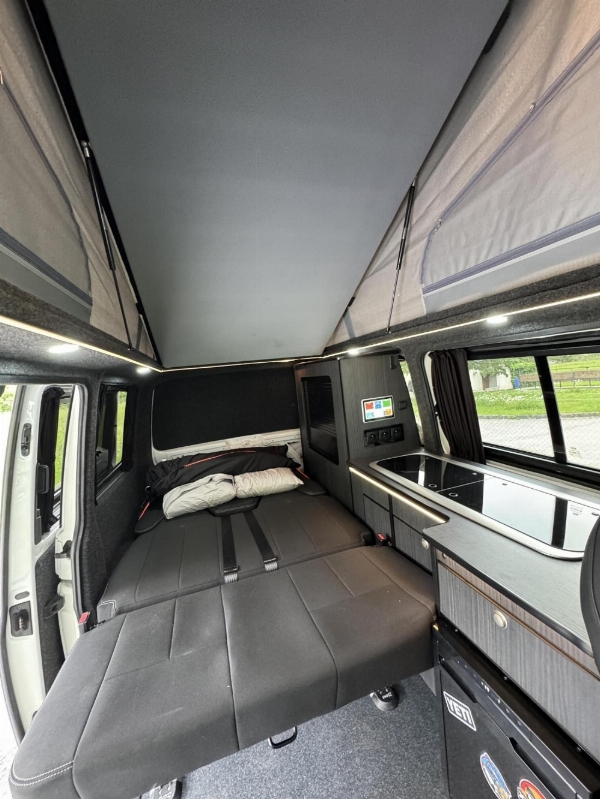
- Pop Top tent
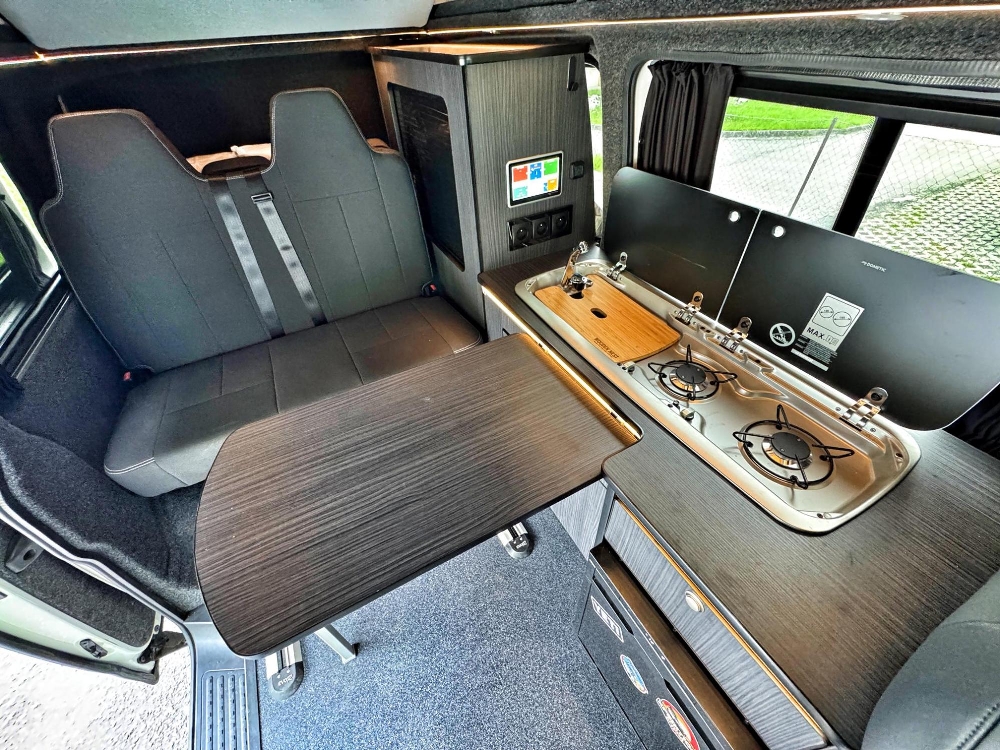
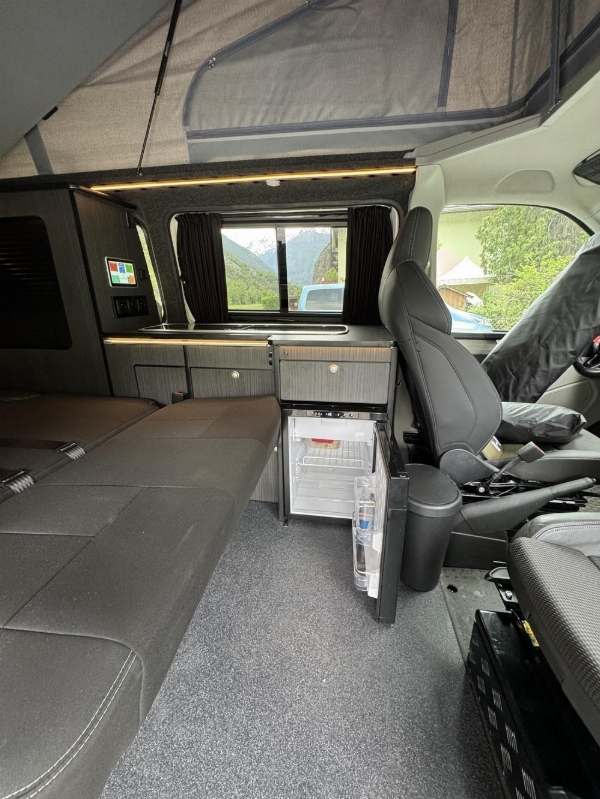
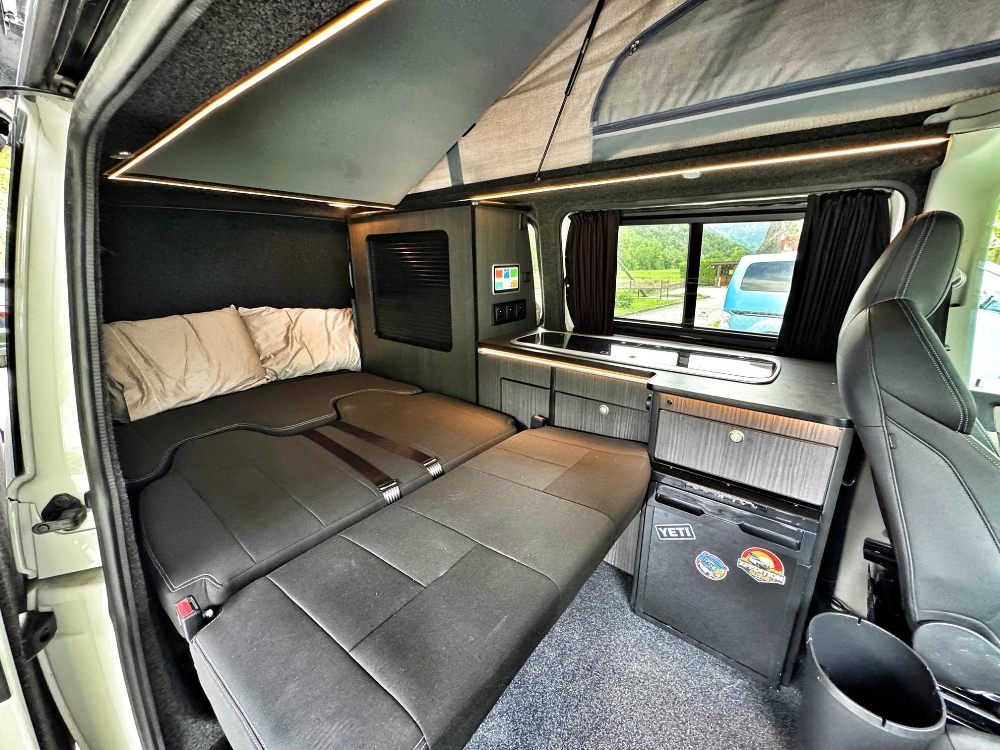
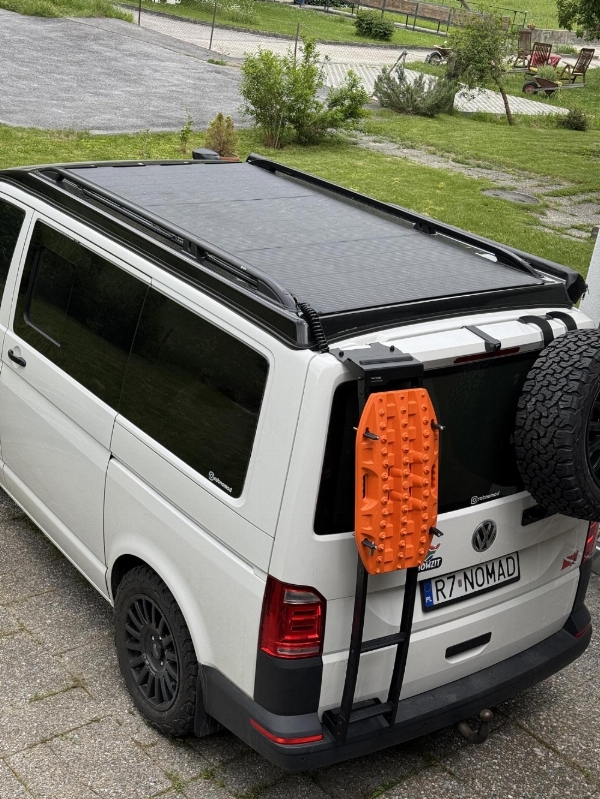
2 x 120W3 x 175w Semi-flex Solar Panels on the roof- Kitchen Unit + Domentic Sink/ Gas hob + Fridge
- Safari Style popup windows on both sides
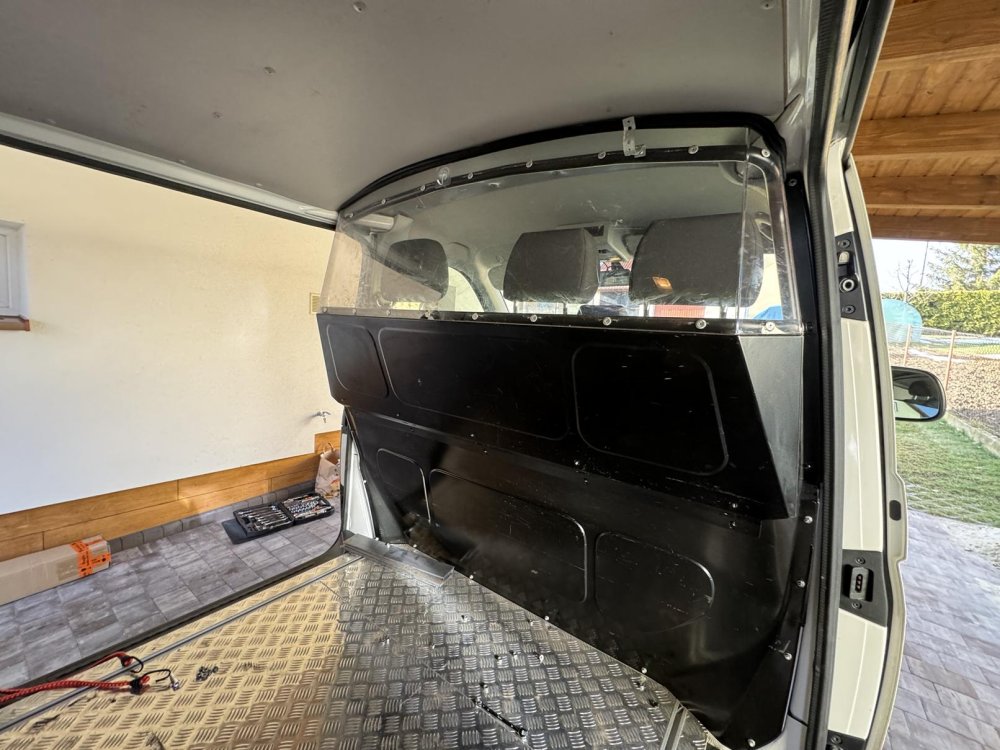
- Glass install on rear quarter windows, Fake window on the back
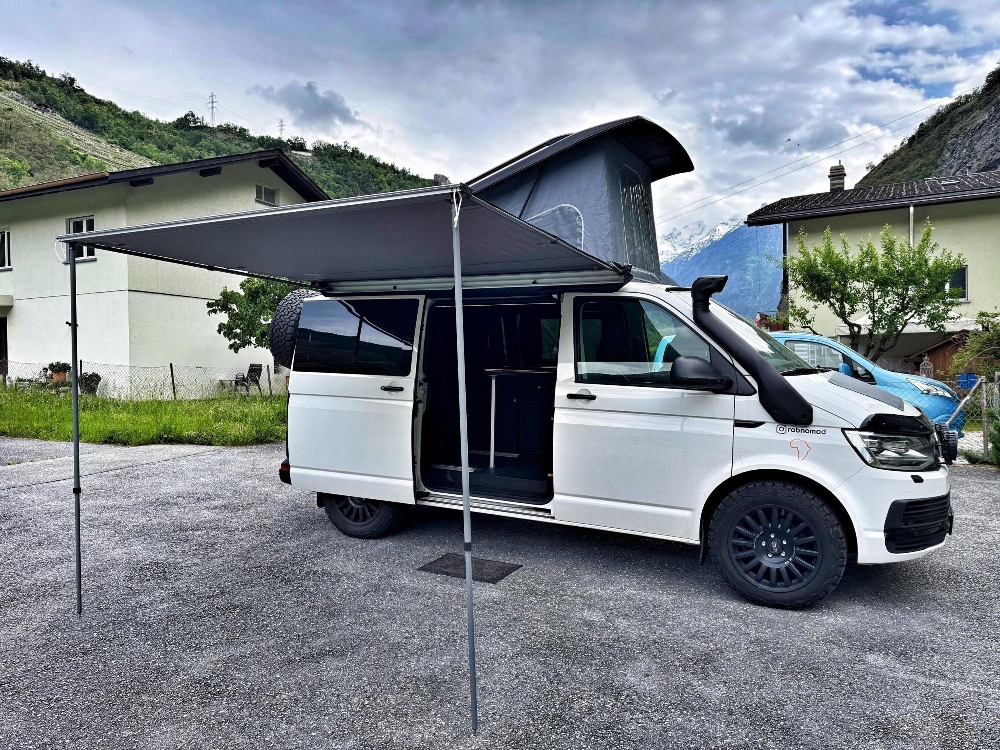
Vamoose Awning Rail +Frontrunner Pull out awning with sides- 3/4 Rock n Roll bed
- Bonnet mount Solar Panel
- Underbody Water tank
- Underbody Fuel Tank
- Underbody Protection
- Spotlights / Lazer lamps
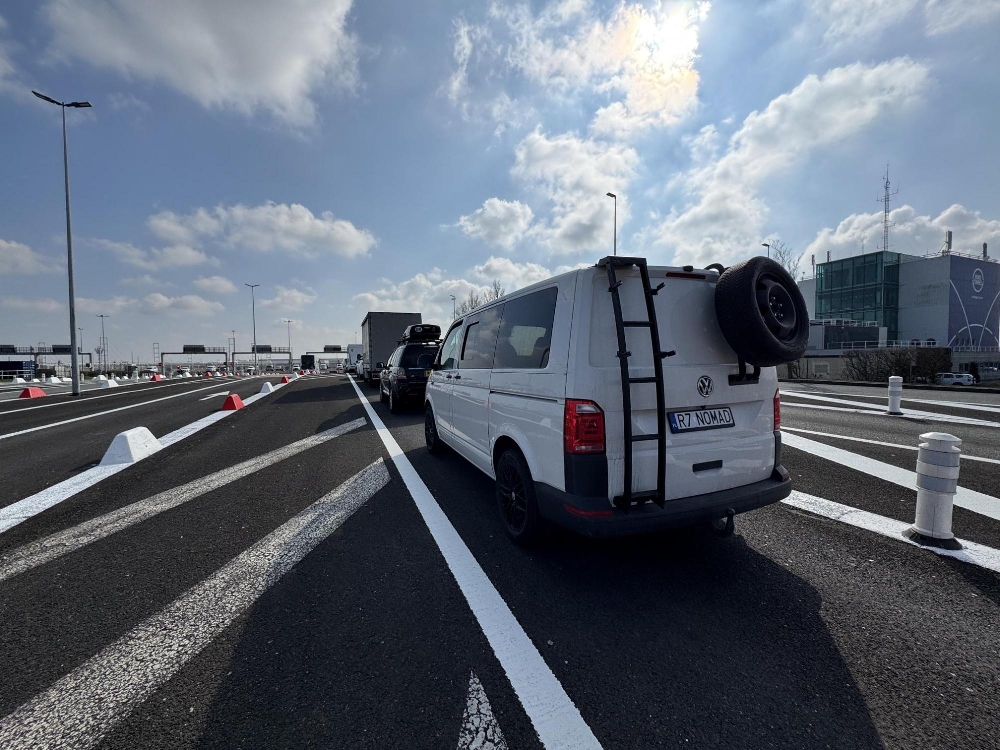
- Spare wheel carrier
- Change all engine bay piping to silicone
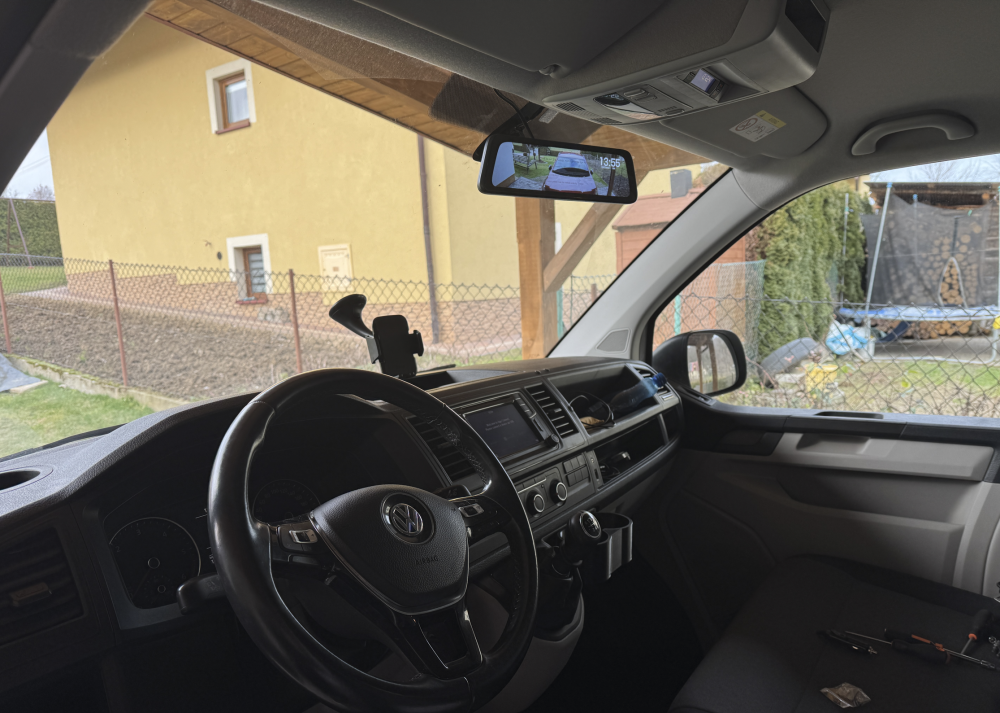
One of the first modifications was to correct the rear view, as this is a panel van – the rear view mirror is mostly useless. Having installed the same mirror in my African adventure ready Toyota Hilux, I opted to install the same in the van. The brand is AutoVox T9 mirror. Fantastic quality.
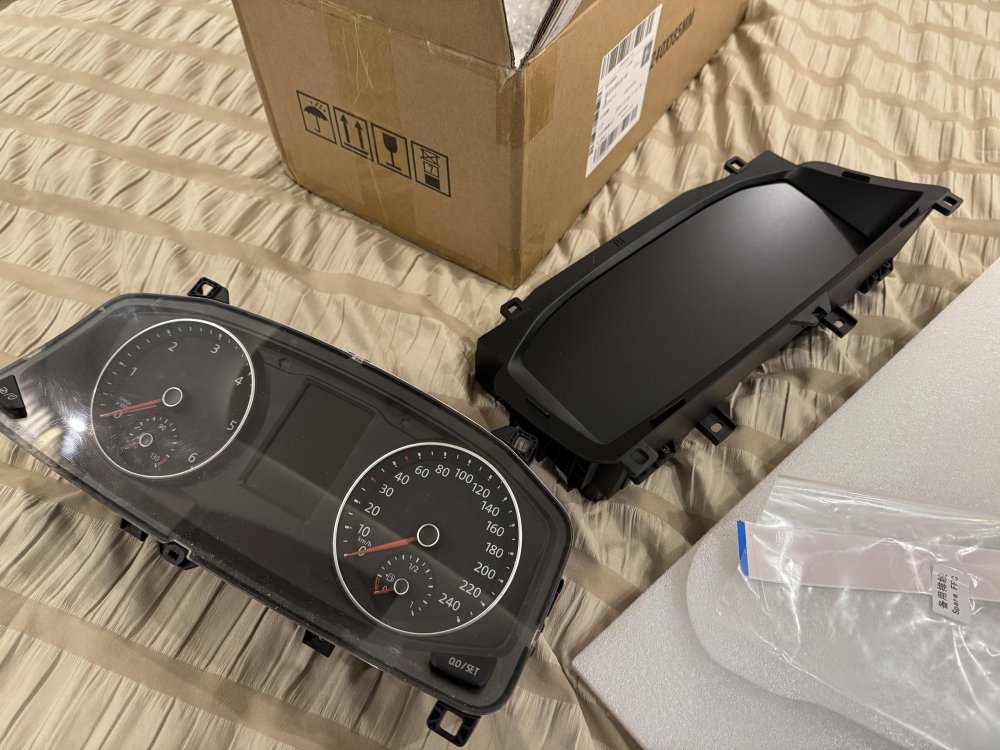
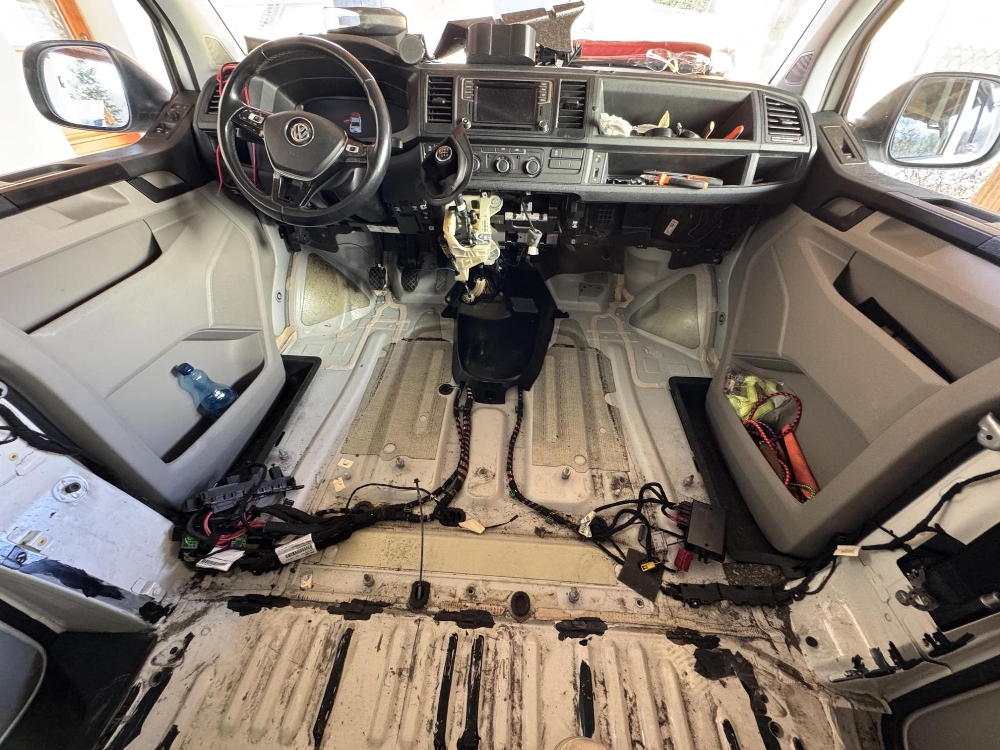
The next modification was to upgrade the analog instrument cluster into a digital one. This process was fairly straight forward and required the removal of the internal control unit and transfer it across into the digital one. This ensured that none of the key VW data was lost, mileage remained the same and all functionality worked.
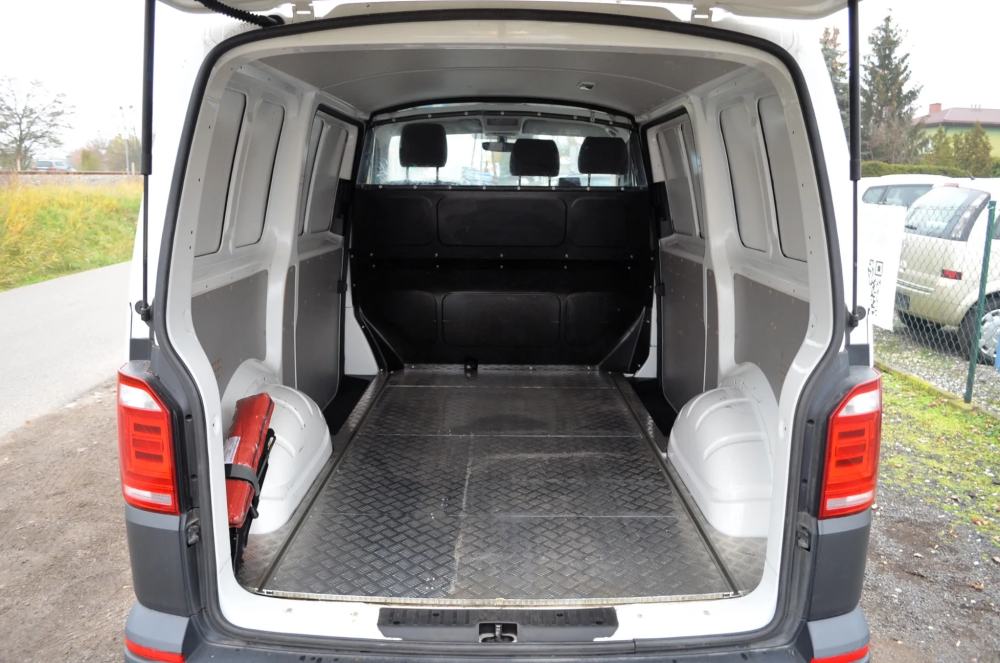
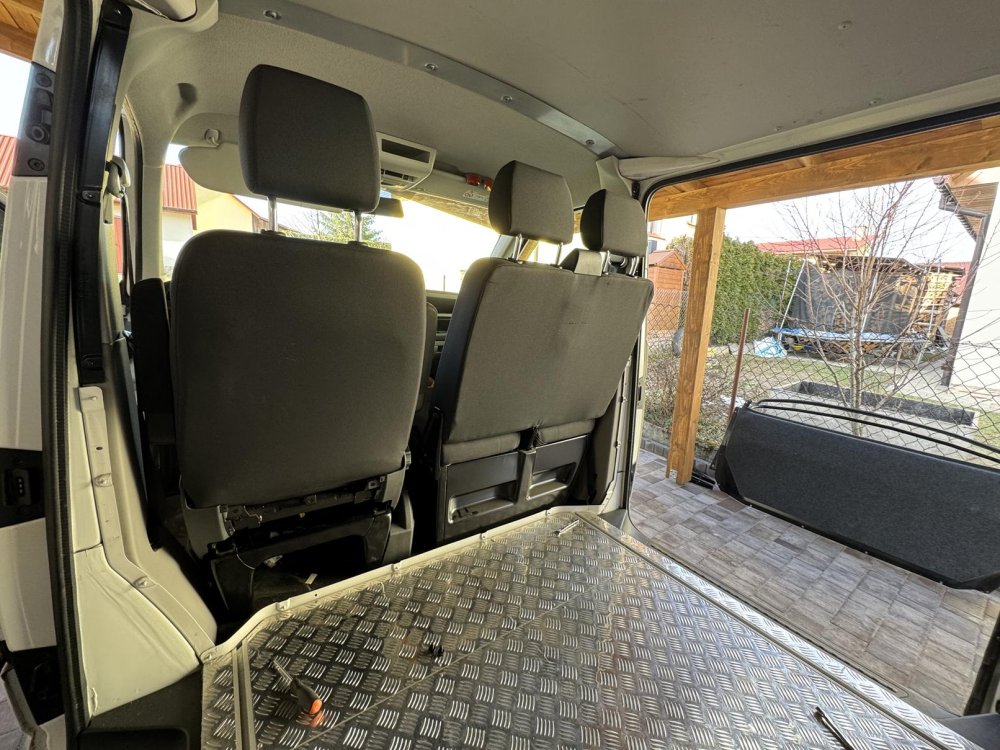
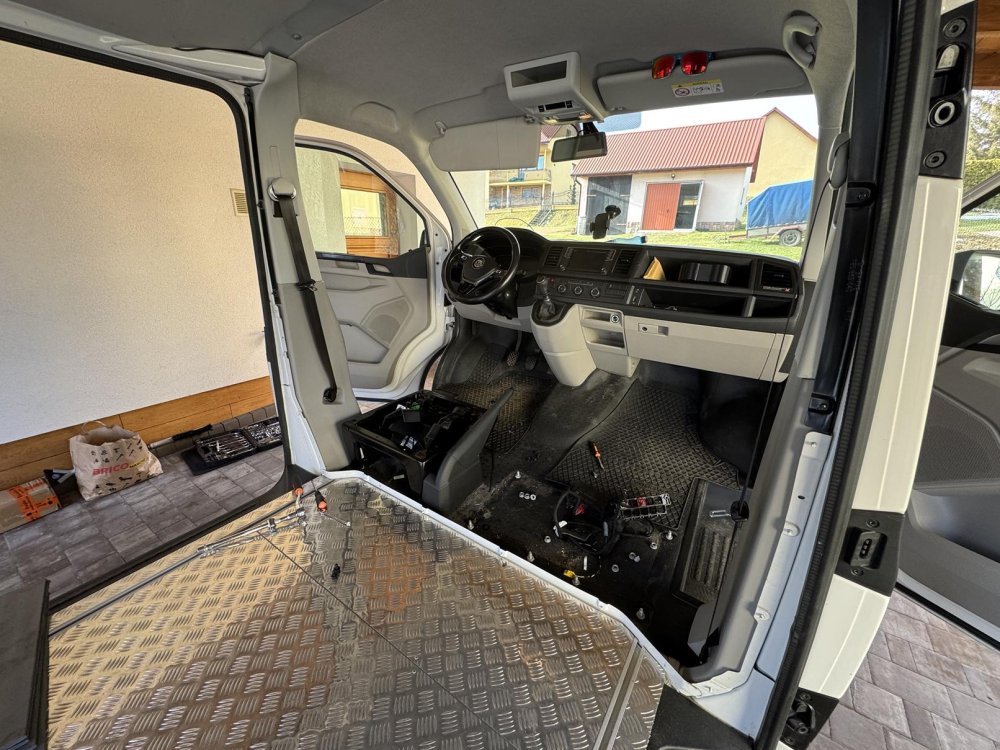
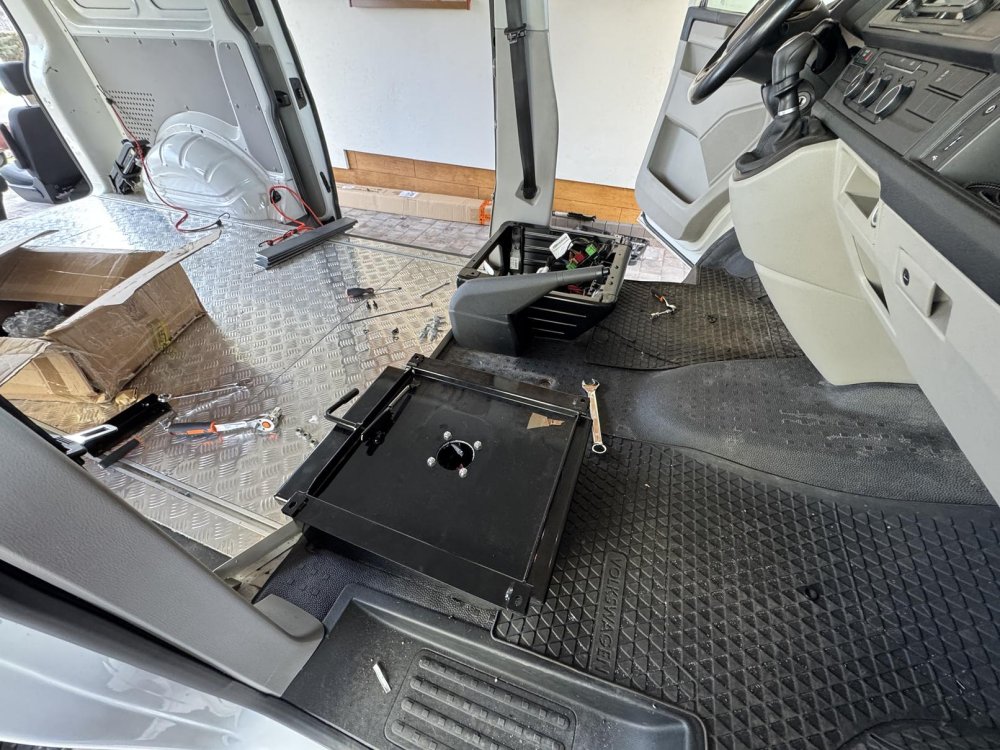
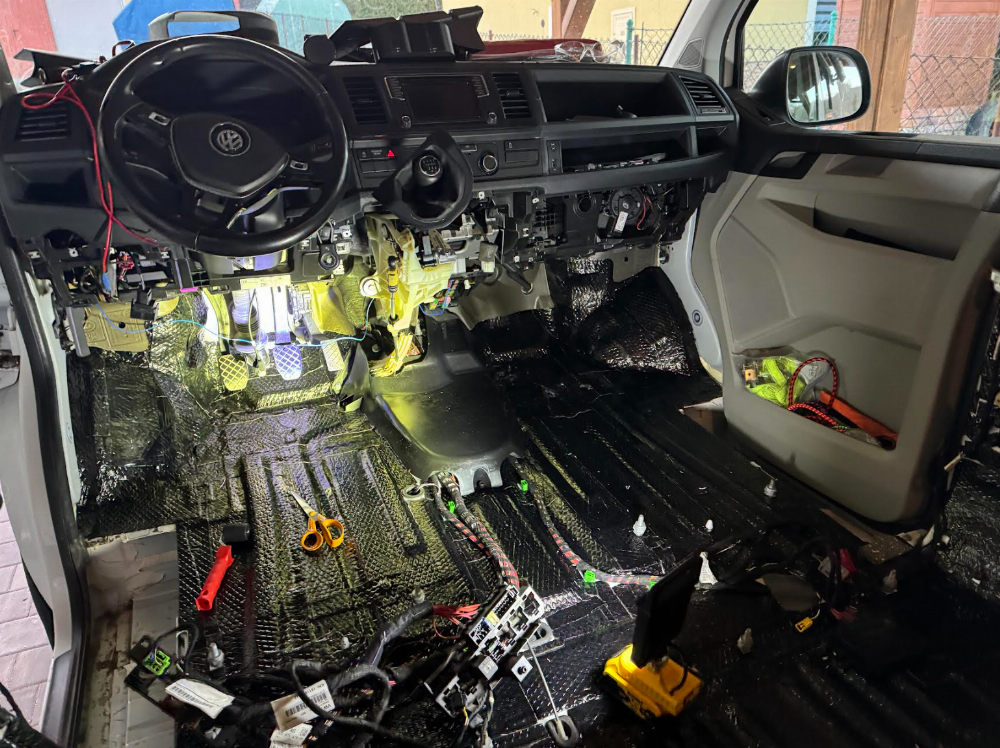
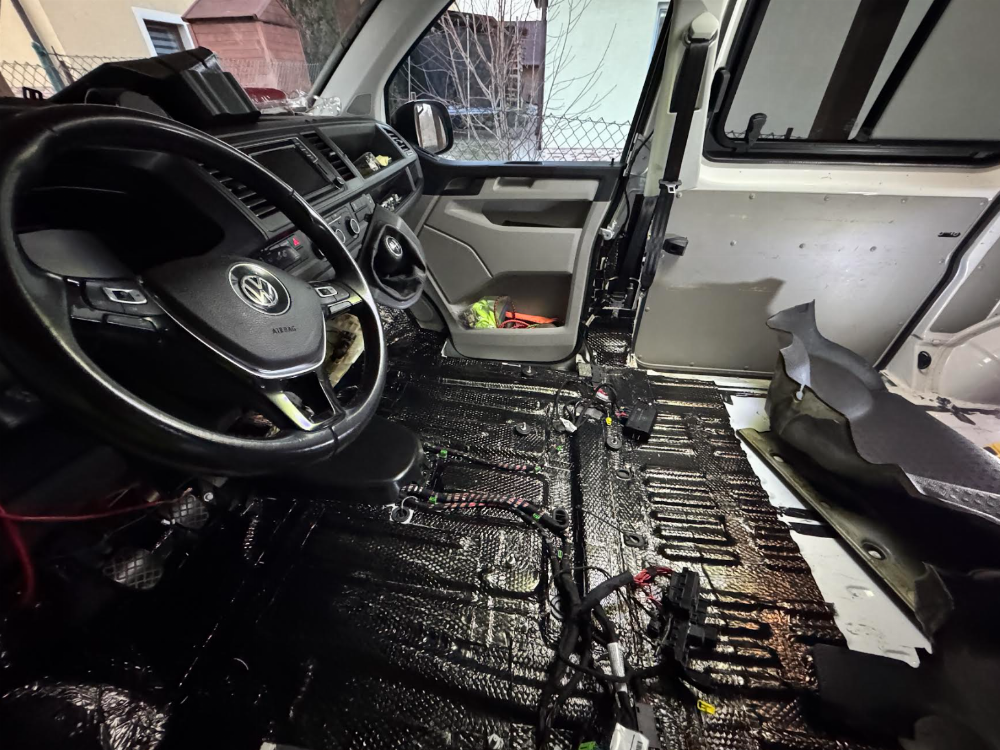
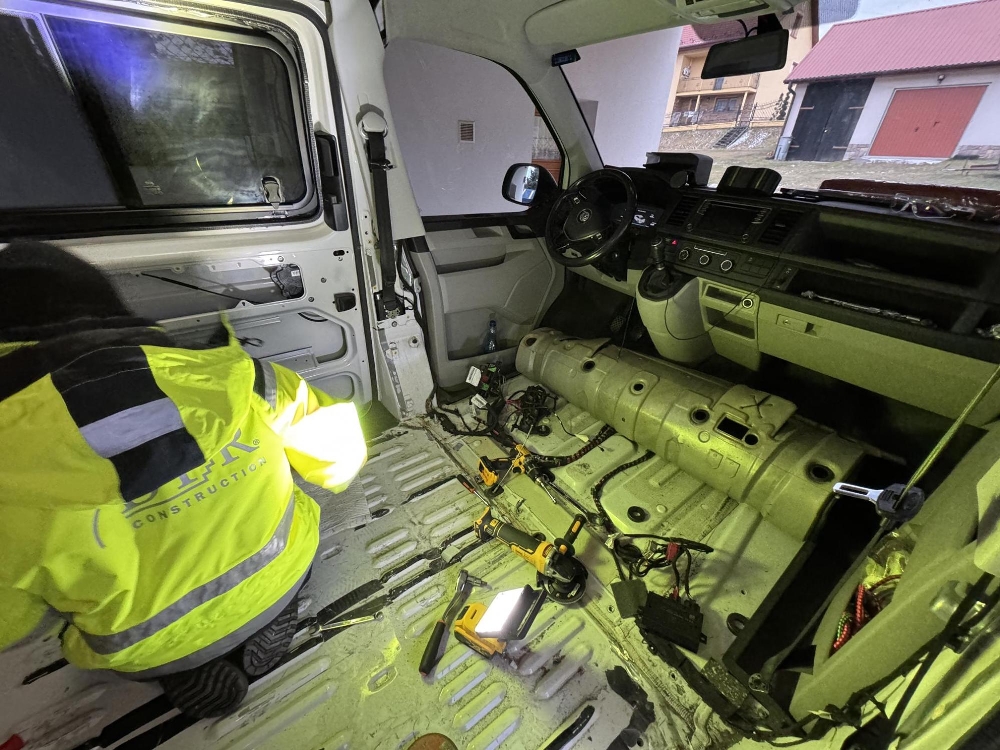
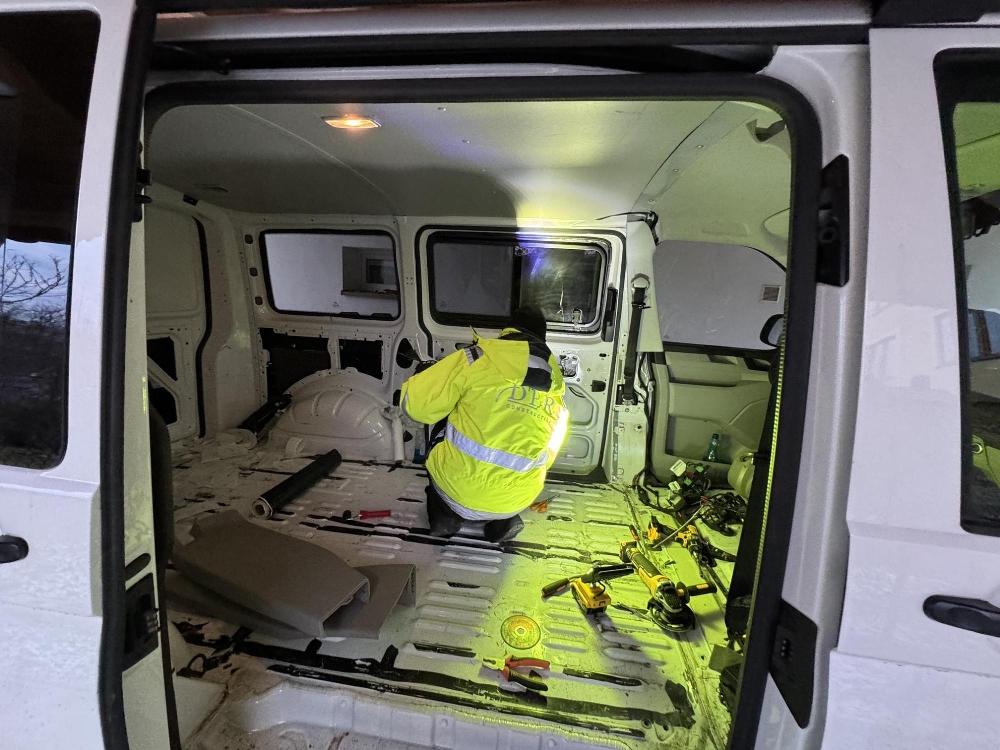
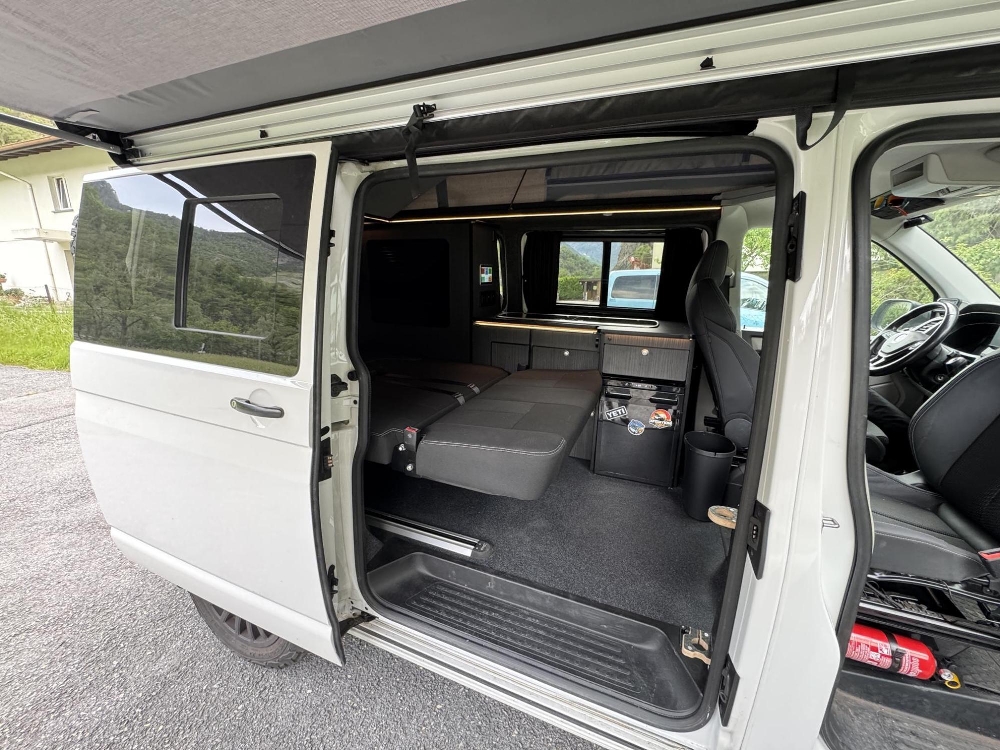
Once we completed the electric side, it’s now time to start with the main structural work. We began by removing the factory-installed bulkhead which made it into a delivery van called ‘Furgon’.
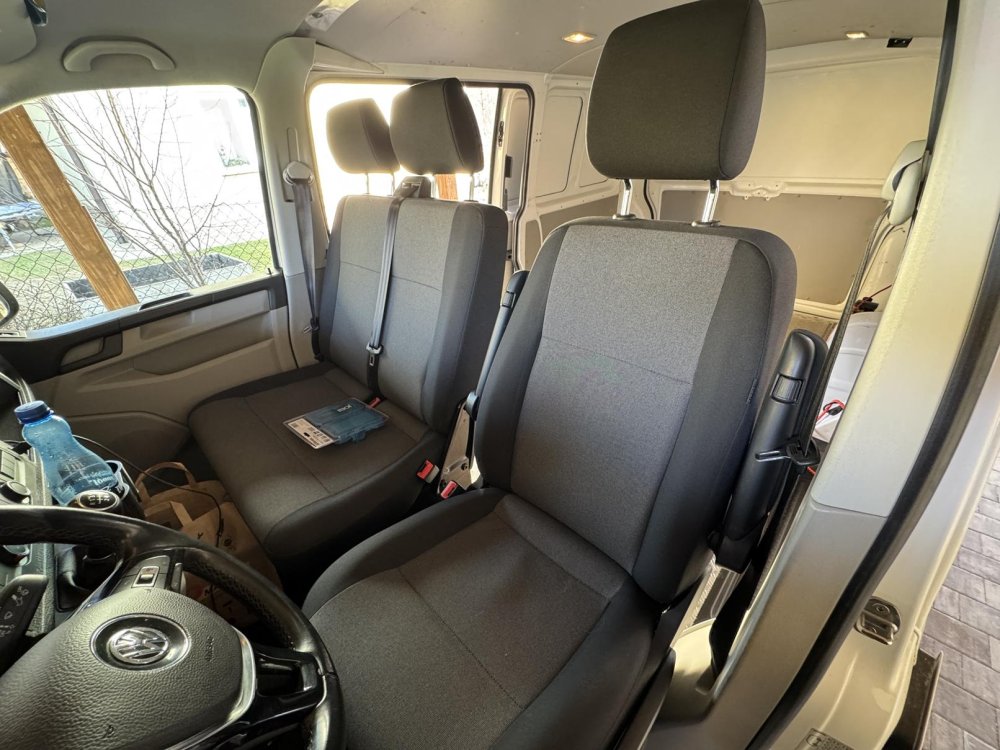
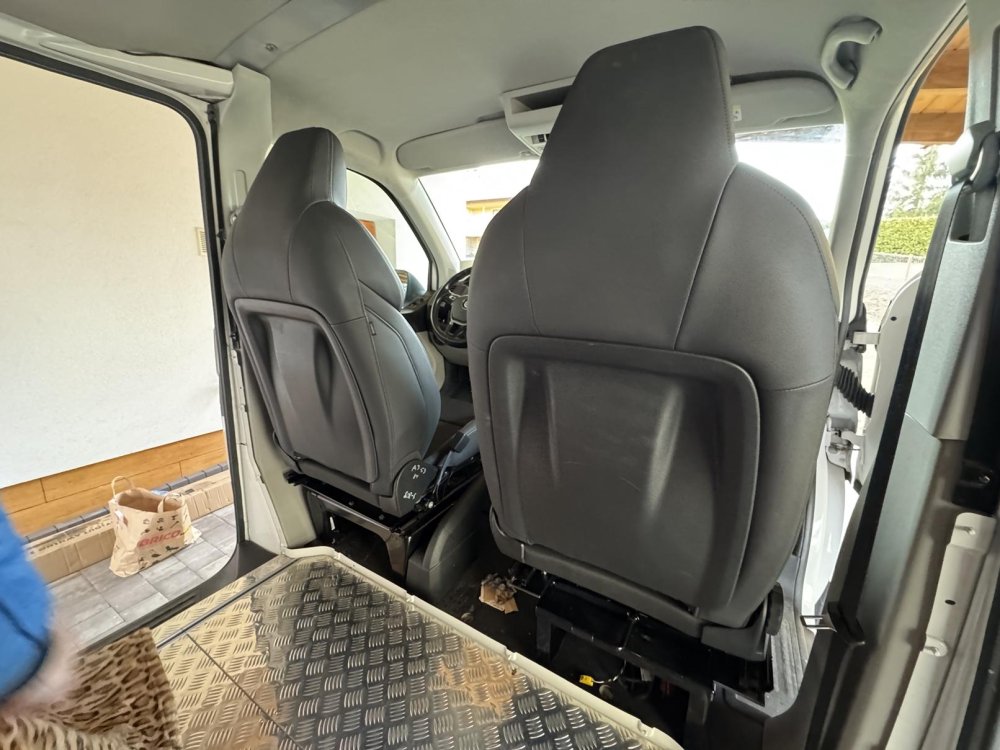
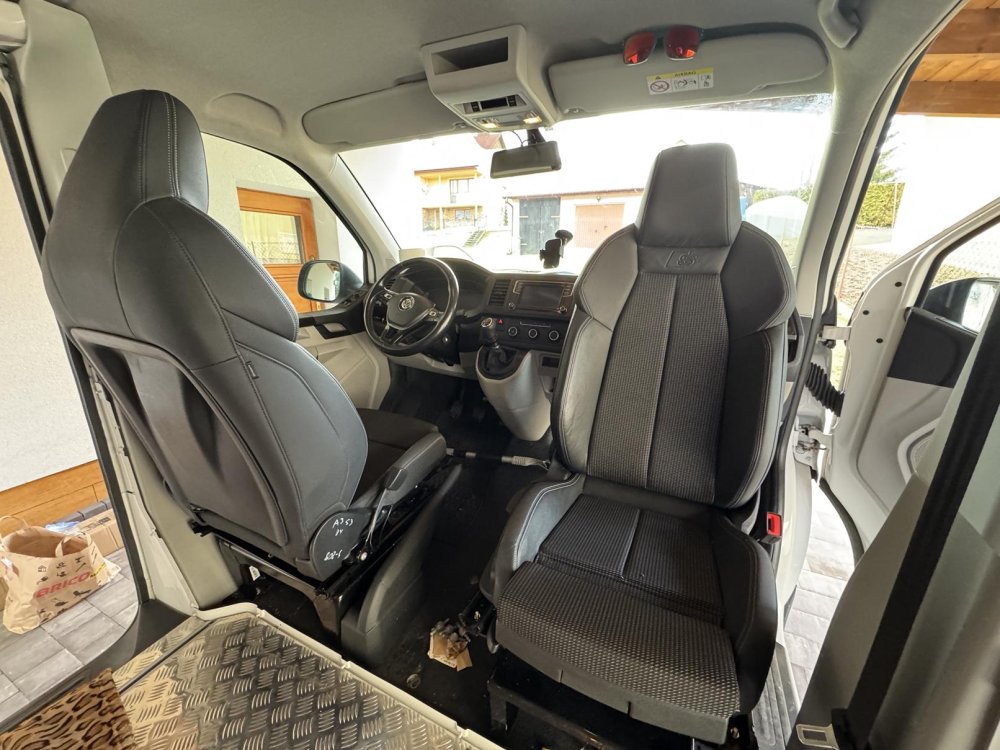
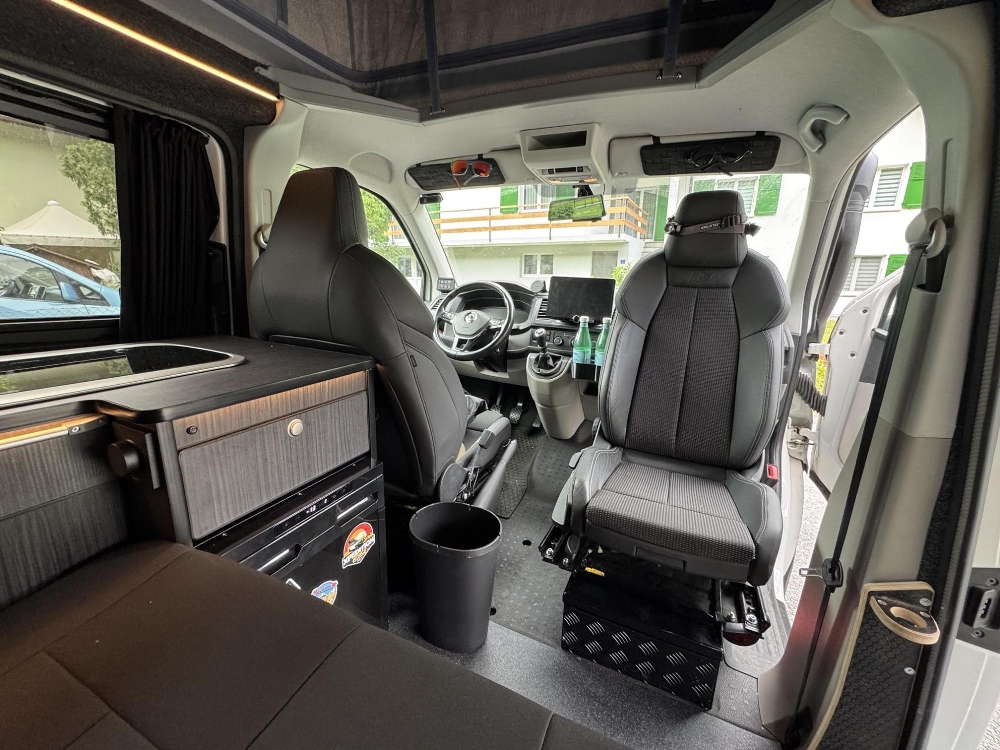
Once we made space in the cabin, we wanted to fit a Swivel base seat and of course some nice sporty looking Audi seats. In hindsight, this was probably not the best idea as the bucket seats are not comfortable over long distances. We find ourselves tired and stiff after a couple of hours on the road. Either way, I think they look great! It was a bit of a struggle to adapt the Audi seats to the VW but with the help of some adapter plates, the drivers seat fits perfectly. The swivel base was already configured to hold all VAG seats.
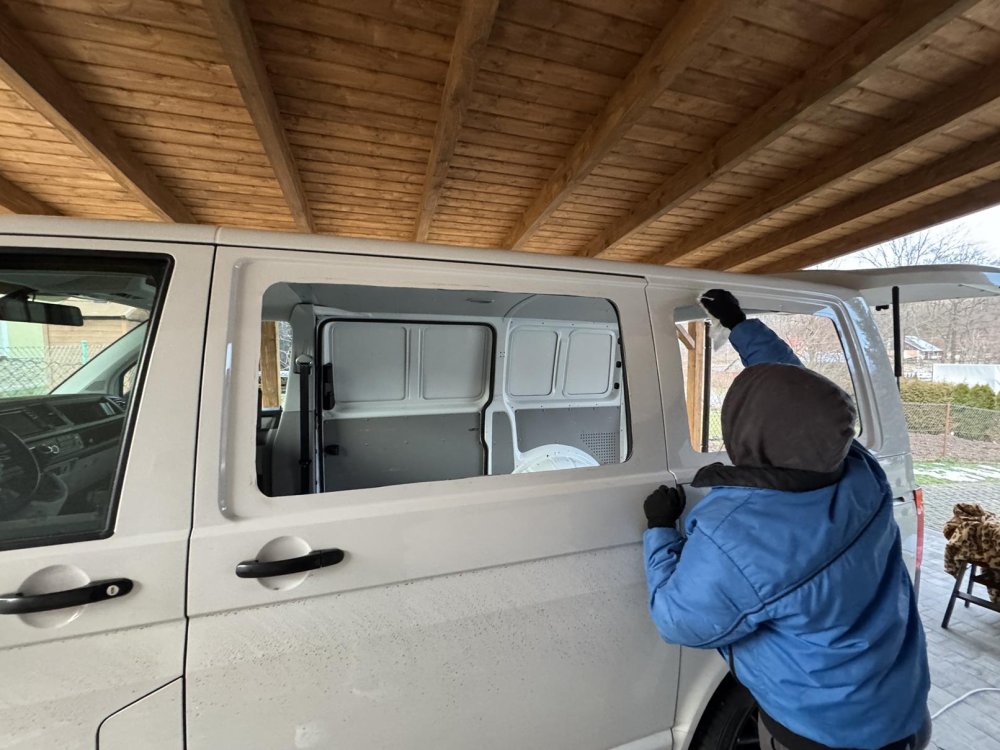
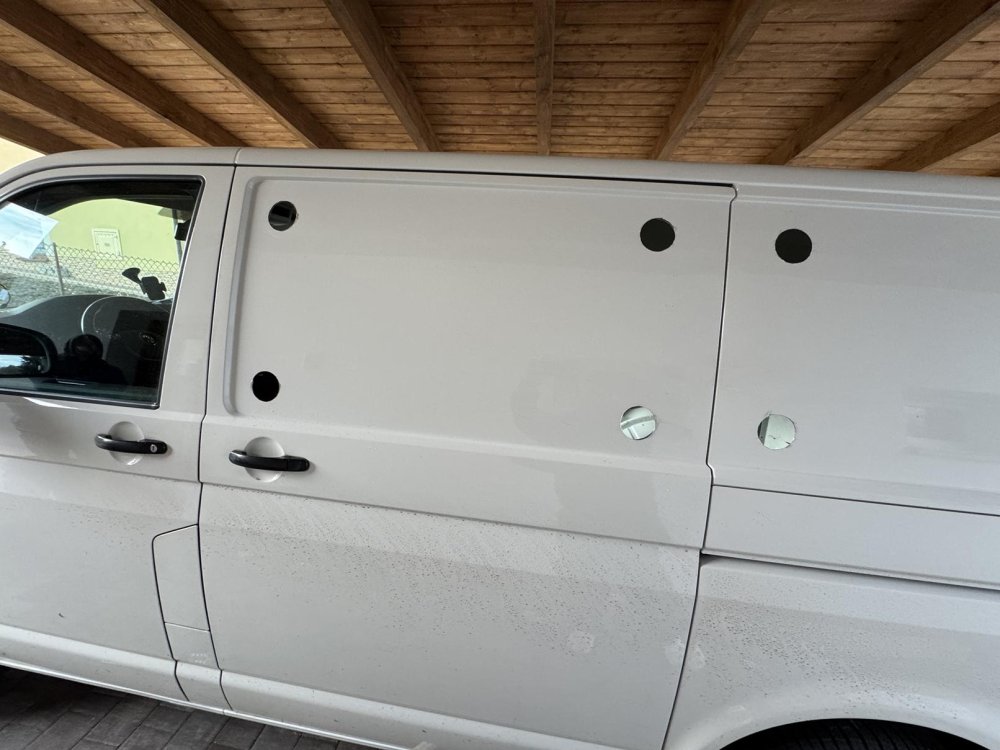
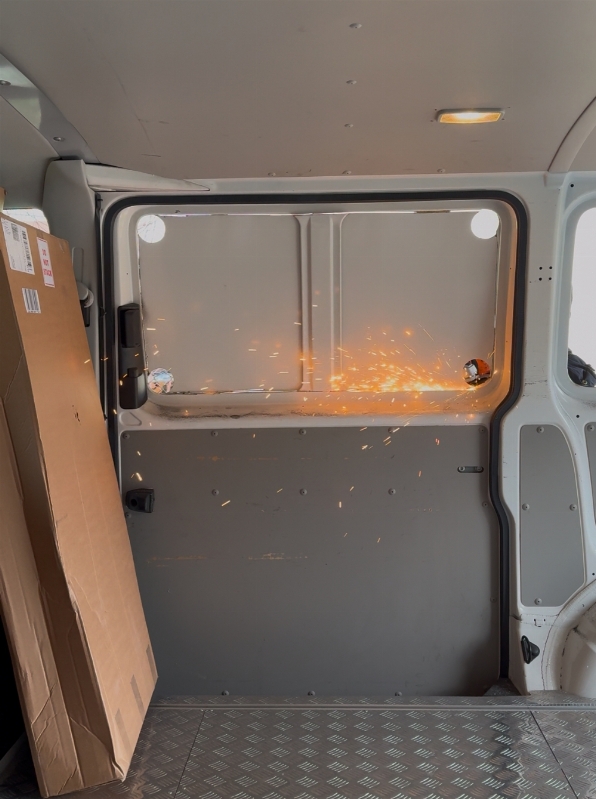
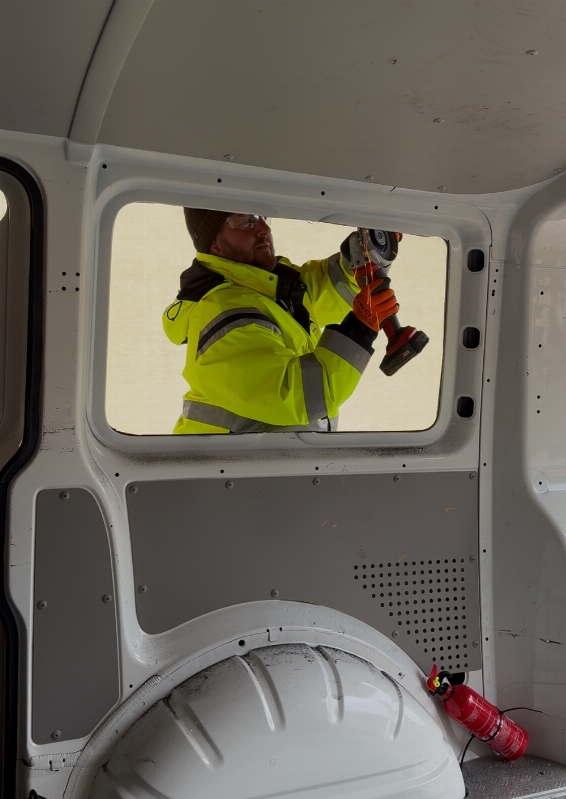
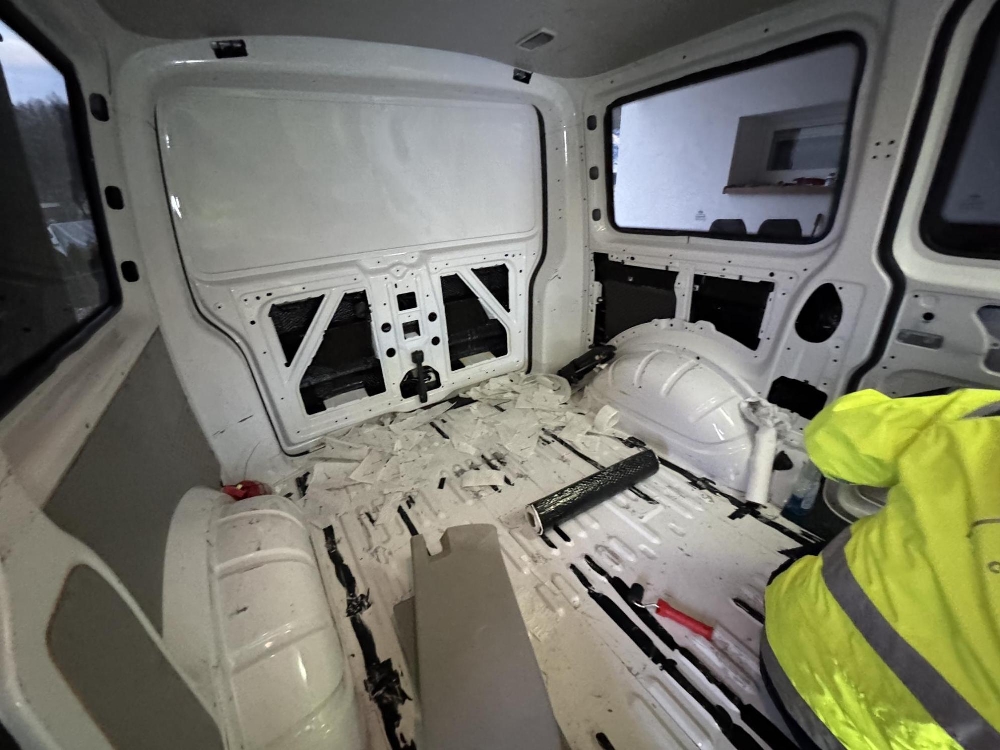
One of the scarier modifications was installing the windows. This required us to cut physical sections out of the body, its a 1 way ticket and the smallest mistake could be detrimental to the build. As most electricians say “measure twice, cut once” – this was the philosophy we applied, and ended up measuring 3 or 4 times. We ordered our windows from a company called Kiravans, their glass is great quality and the windows came with an installation kit which was great! YouTube was consulted several times on how to fit and install windows.
We then drew lines, used a sabre saw and cut the holes out for the left side of the windows. I had to use my angle grinder to fix up those cuts to put the beading in. For record, We decided to do one side first so that we could line them up which was one of the little tips we got online.


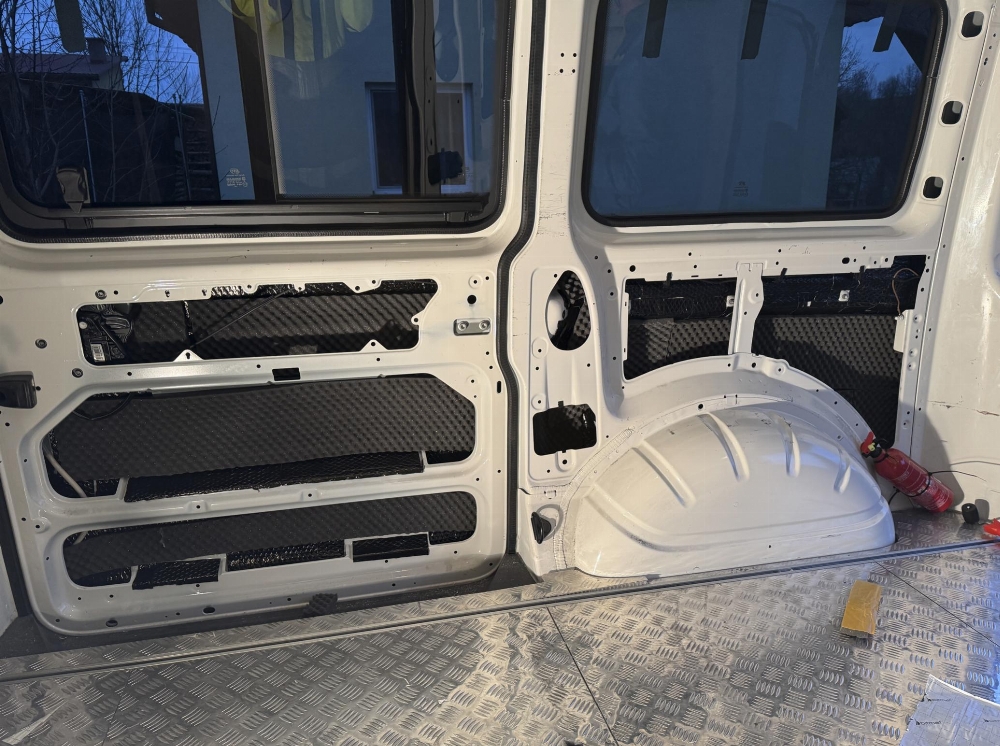
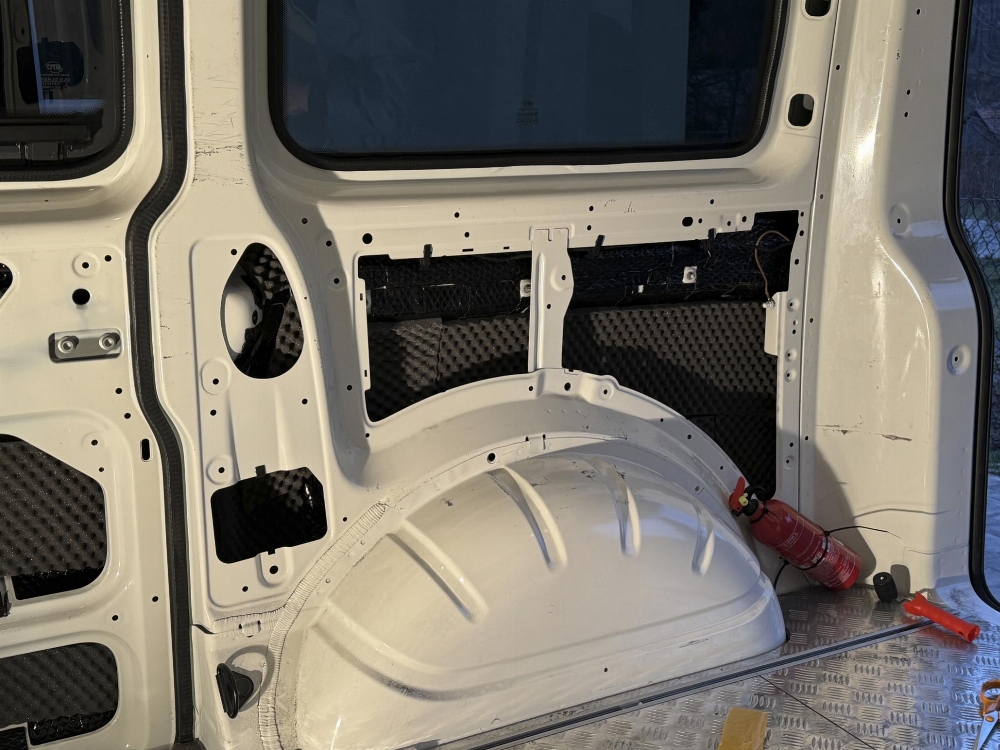
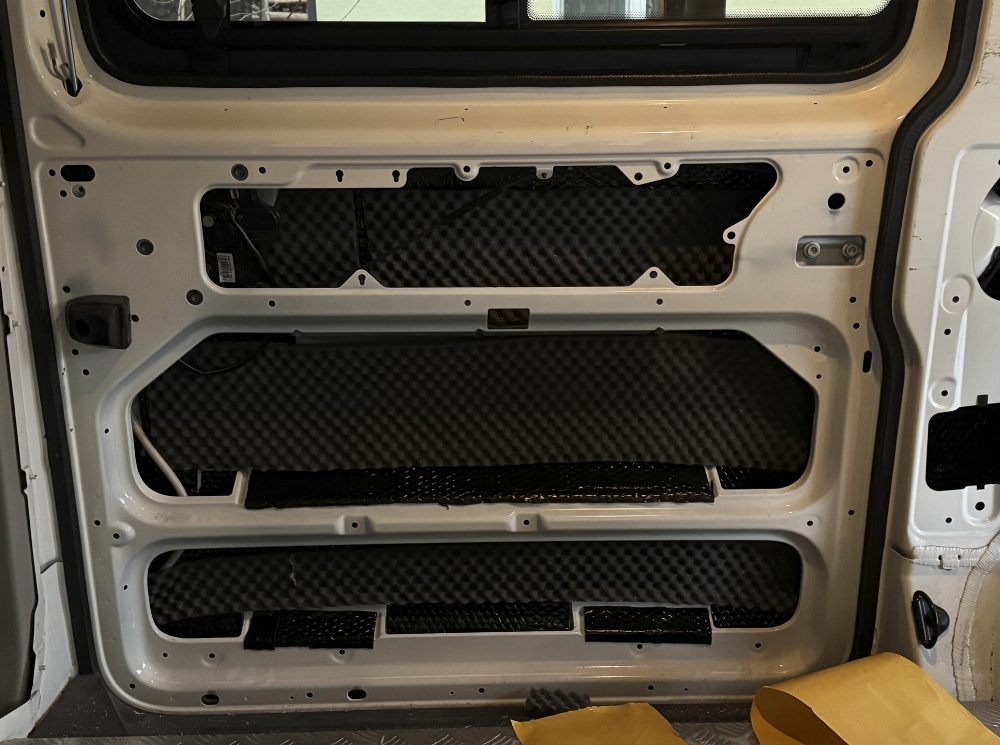
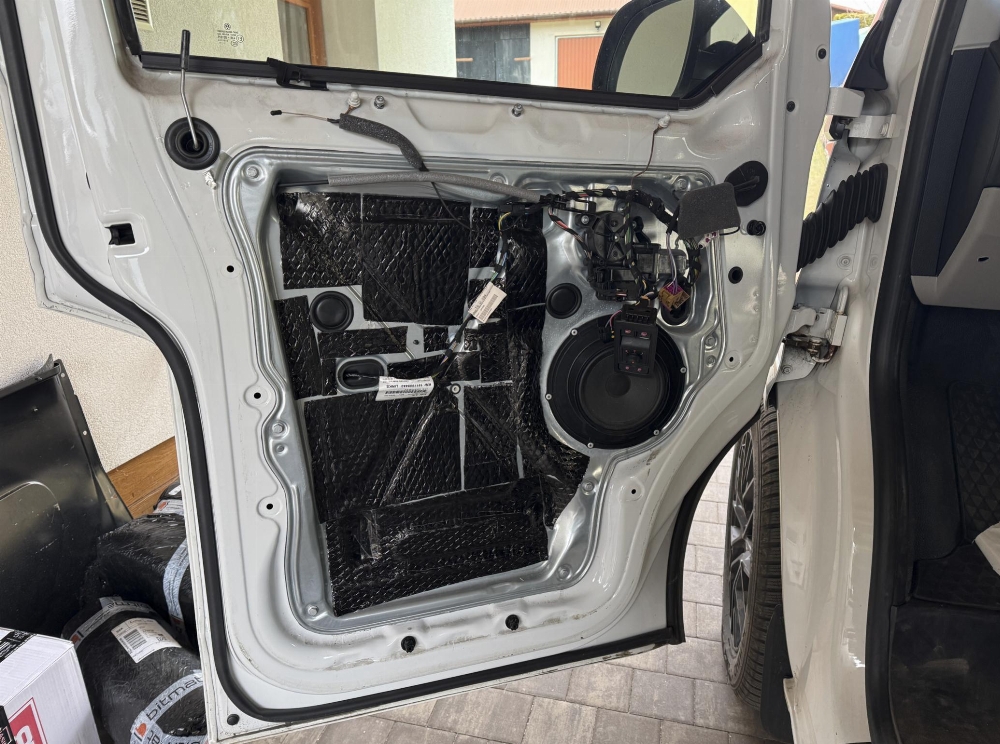
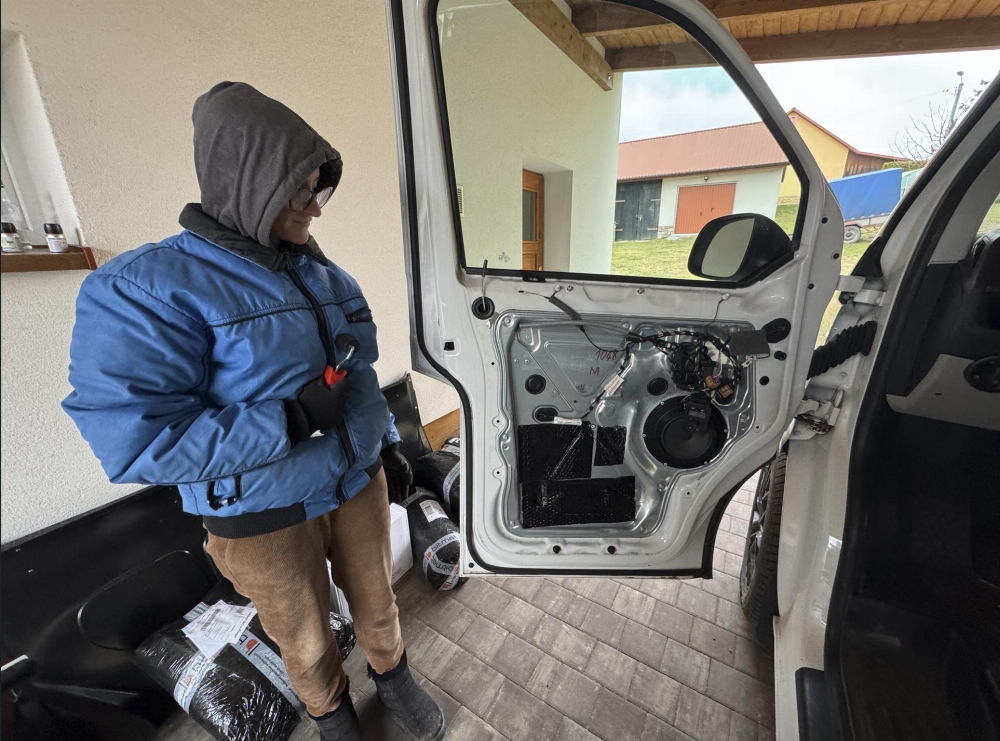
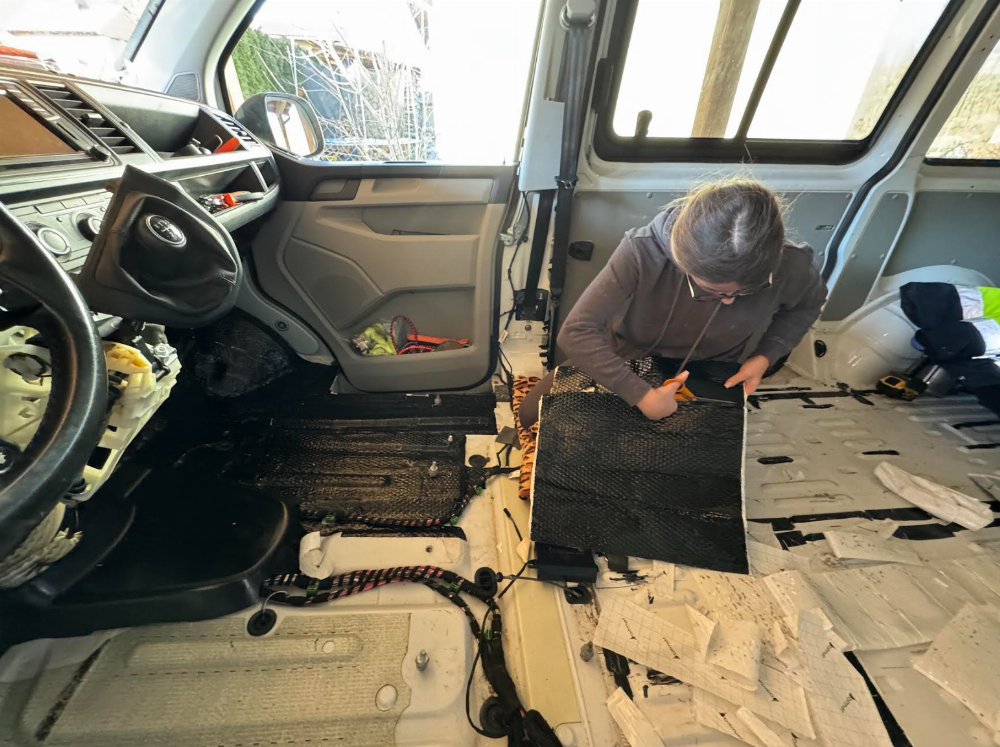
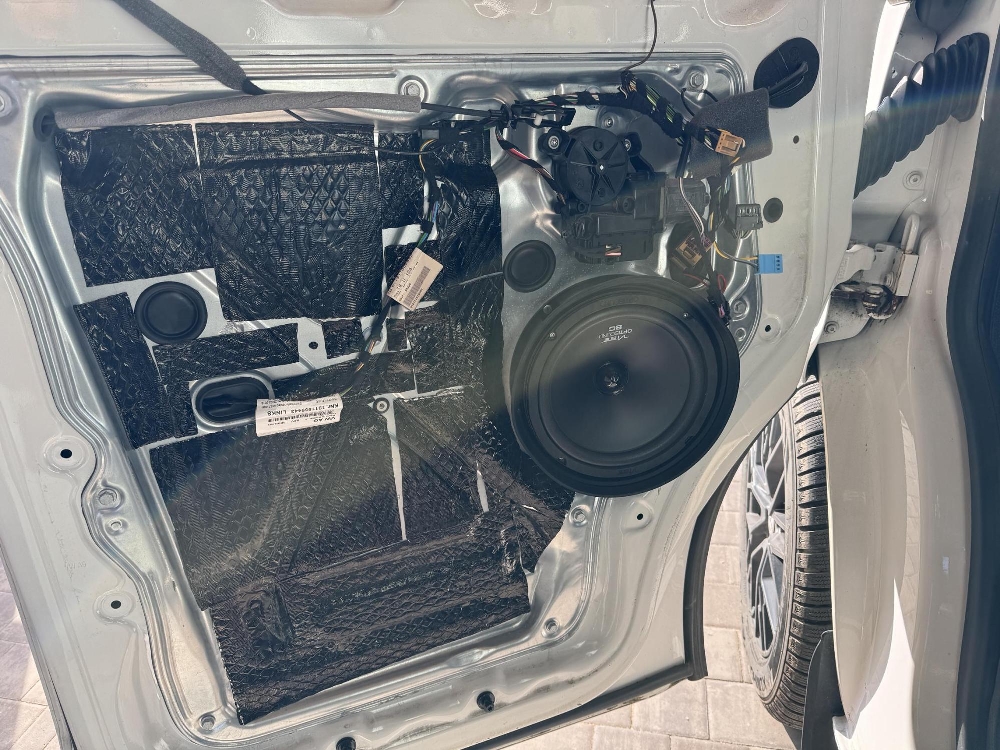
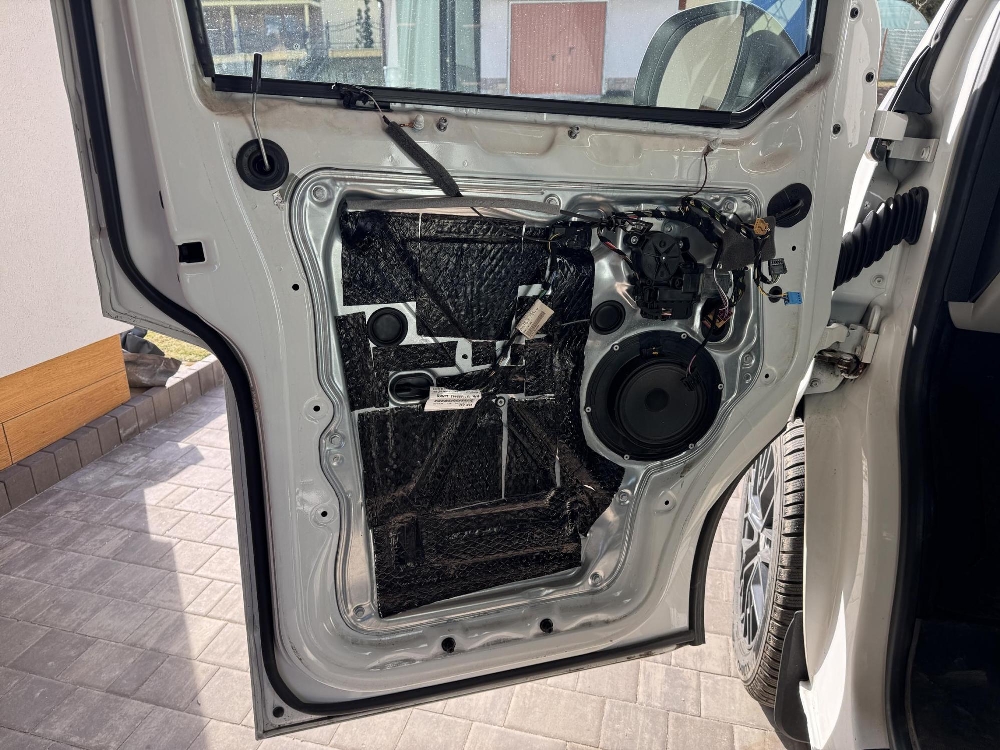
One thing we hated with a passion was how ‘tinny’ the van sounded. It made me think of an empty Coca-Cola can being kicked down the road. We bought a large amount of Dynamat, Sound deadening and insulation wool. The first step was to clean the steel skin so that the Dynamat would stick, then on top of that we stuck the sound deadening and then the wool. It changed how much noise came into the cabin.
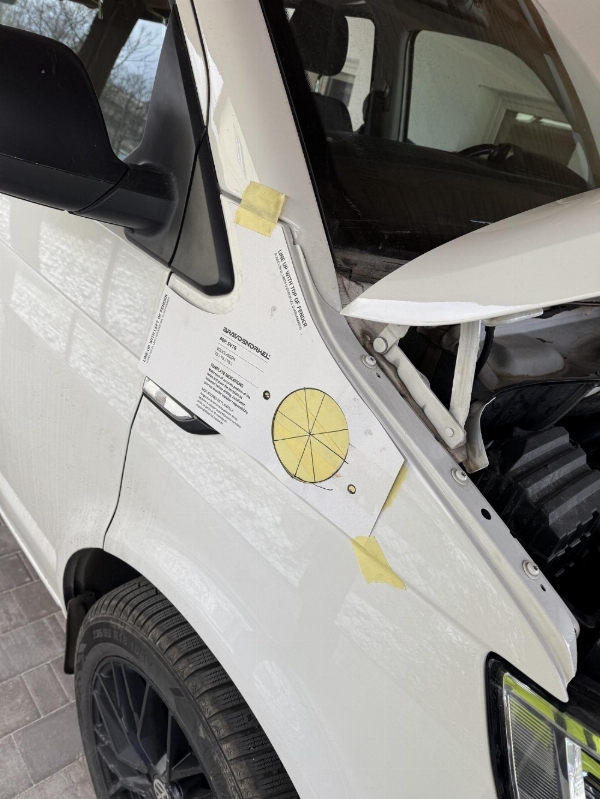
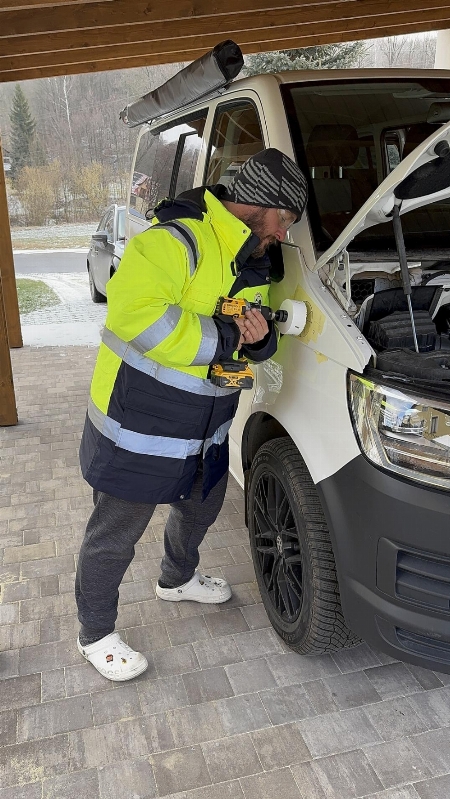
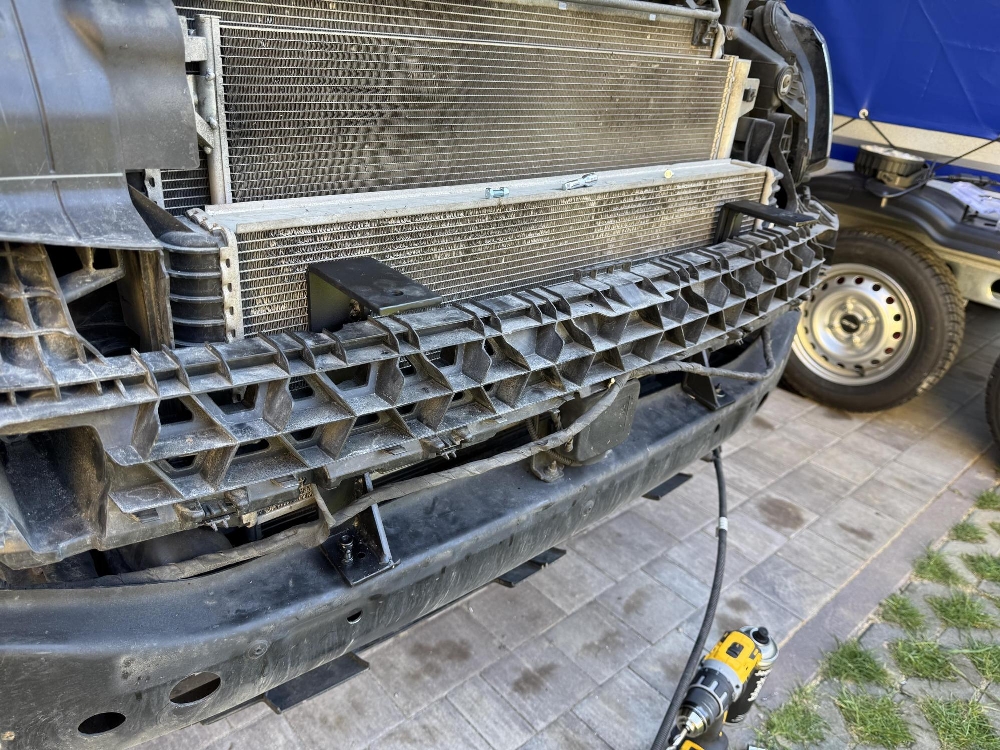
Another modification thats once again scary is drilling a big hole in the front fender & installing the Snorkel. We had the choice of buying a cheapie no name brand version or the more premium Bravo Snorkel. What I have learned from my kit outs in Africa is that companies that produce Snorkels, invest heavily into R&D and subsequently their products work better.

One of the longest modifications time wise was stripping the interior panels, cleaning the metal base and installing the deadening mat. This once again proved to be a worth while modification and it substantially quietened down the inside of the van. I downloaded a DB meter app on my phone to check before and after, and the noise level went down by 9DB.
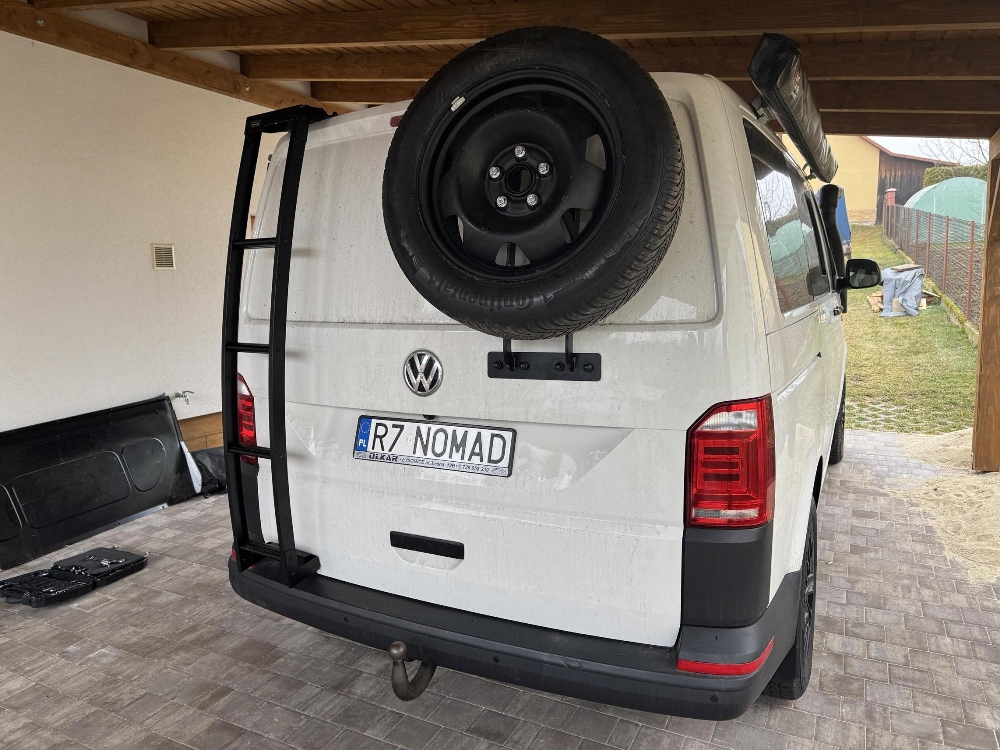
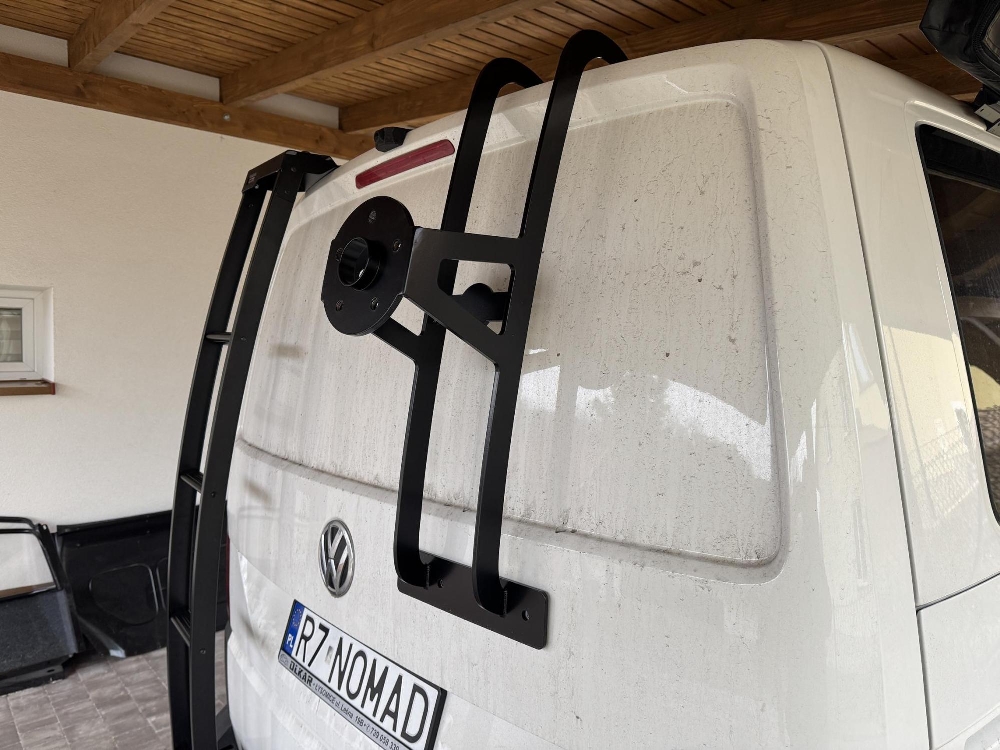
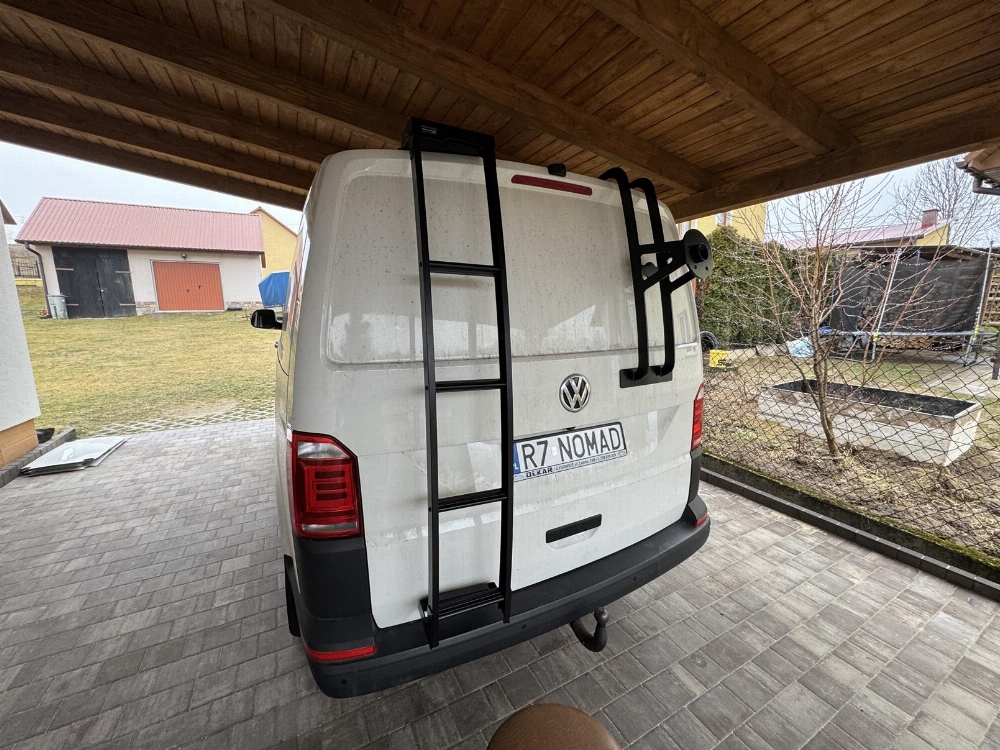
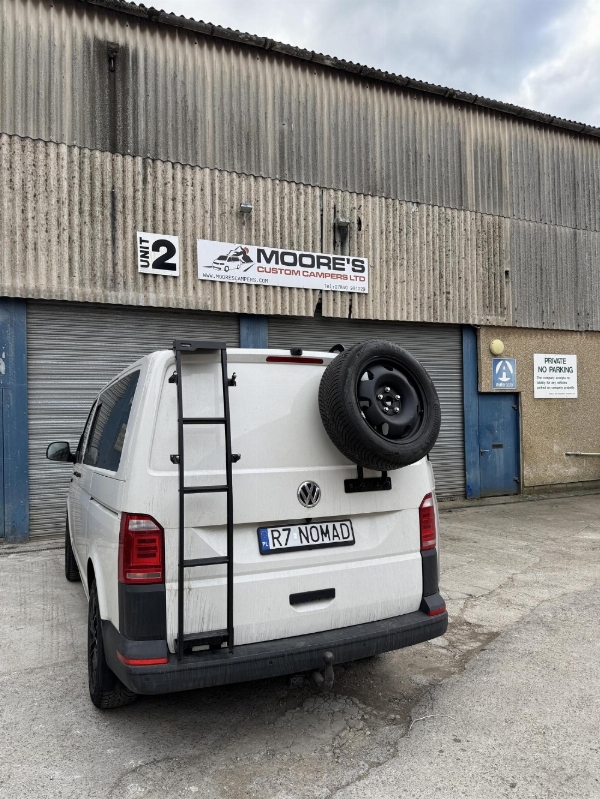
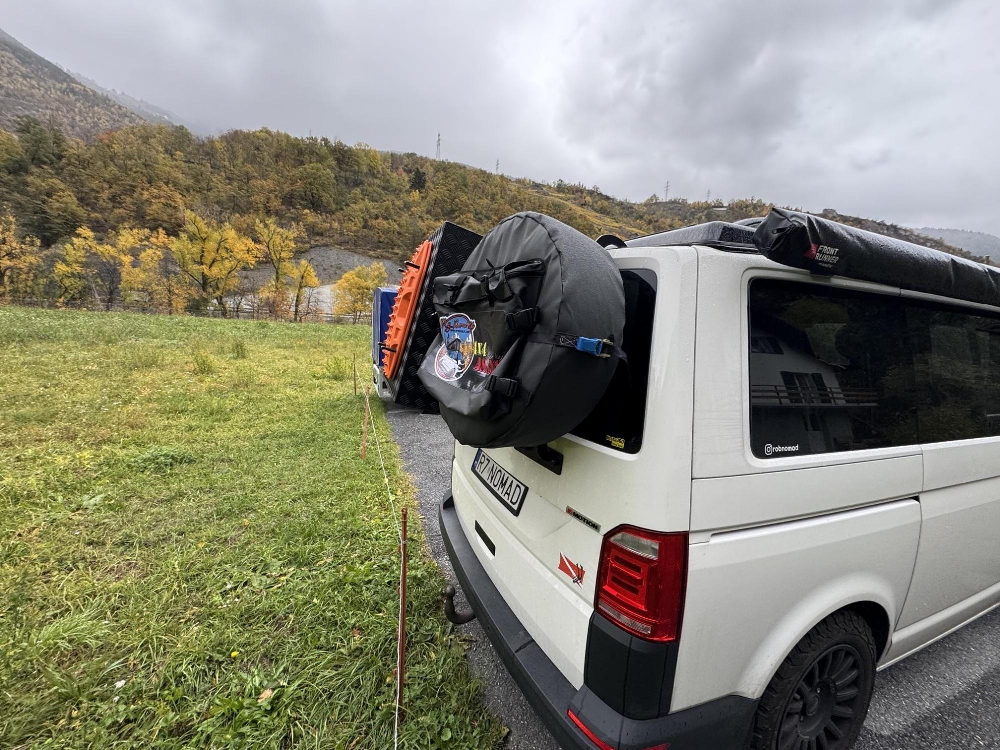
To make space for an underbody water tank, this meant that the spare wheel needs to be moved the back of the van. The decision whether to mount a permanent wheel carrier vs a bicycle rack with an adaption for a wheel took a lot of thinking through. In the end we decided that the van is purpose built for adventure so why fit a temporary mount. We ended up buying an UB components wheel carrier, its sturdy and well built. Again this was a bit of a stressful modification as it meant that holes needed to be drilled in the tailgate, a one way ticket if you may. Also part of the order we opted to purchase the more expensive Heavy Duty struts kit from UB, also a well engineered bit of kit. More about this later.
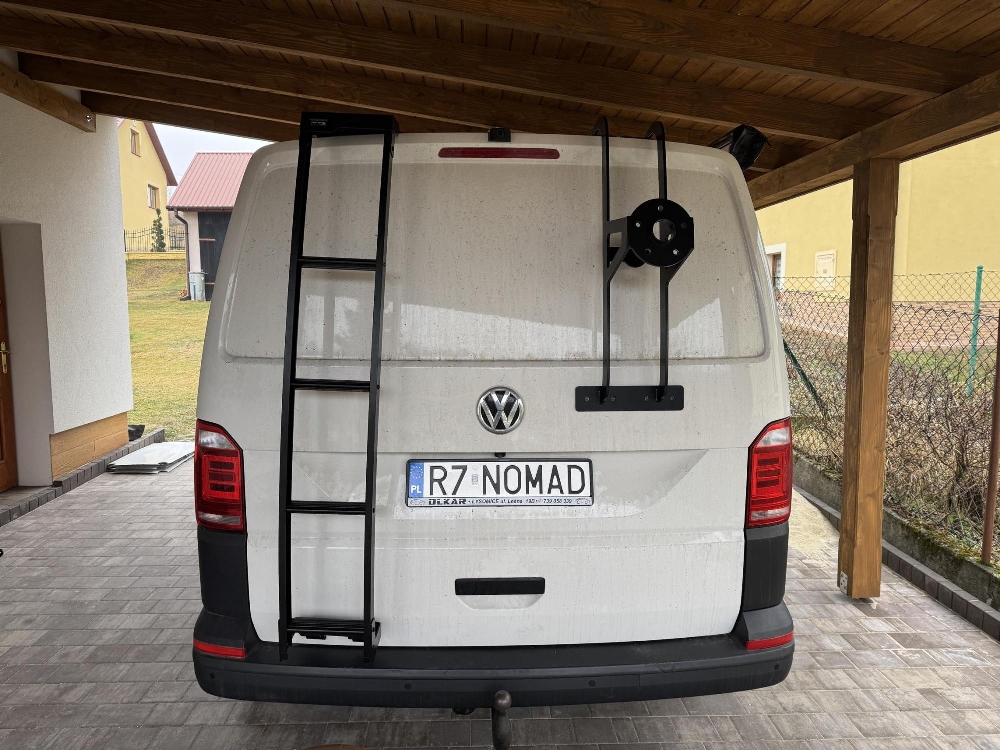
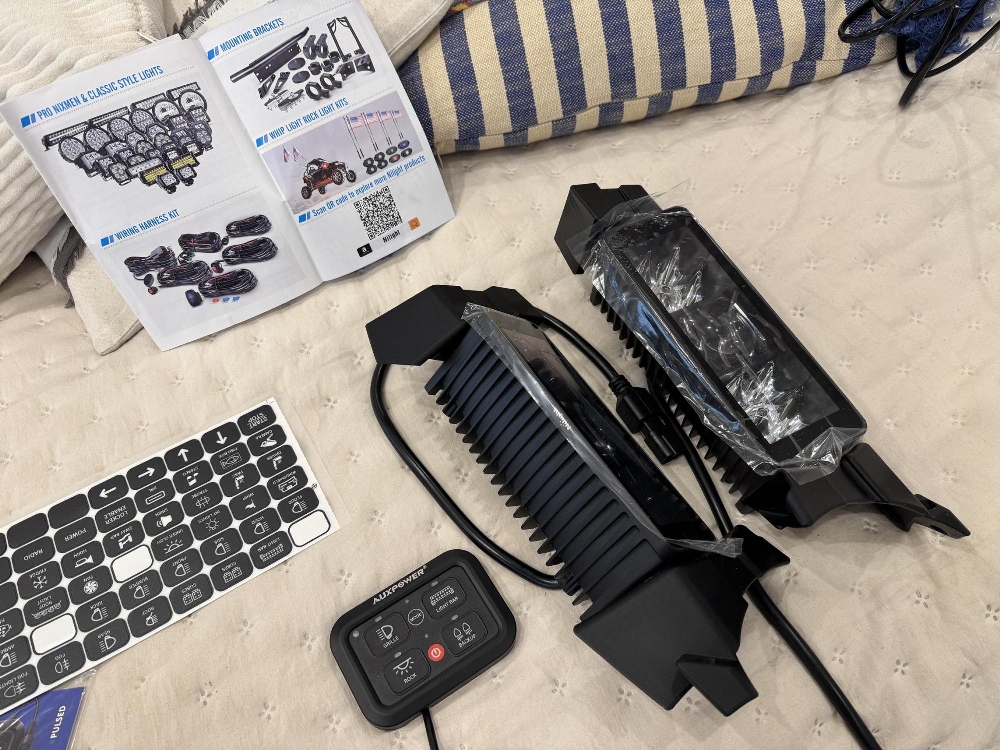
Lighting is another vital upgrade as we are planning to do the nordic regions, so I have been looking at various spotlights and fitments etc. but couldn’t justify the cost of the Lazer lamps. There is so much disparity in the laws about spots in Europe so figured these would be just fine to add an extra bit of light. Still deciding whether to get the Hess Lightbar brackets and fit a 52″ Curved bar on the roof and risk it…
So in the mean time I managed to get a hold of the Lazer lamps brackets, and got some nice Nilight spots to fit.
Next need to take the heat gun to some perspex and mold the bracket to hold the 4 Gang Auxbeam switch panel.


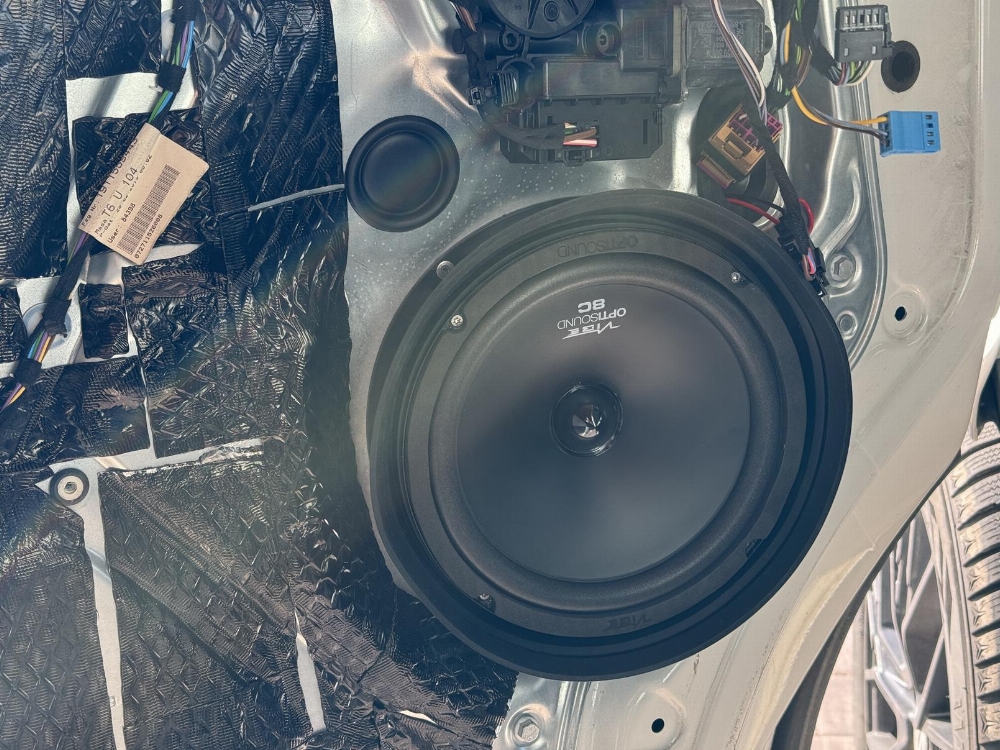
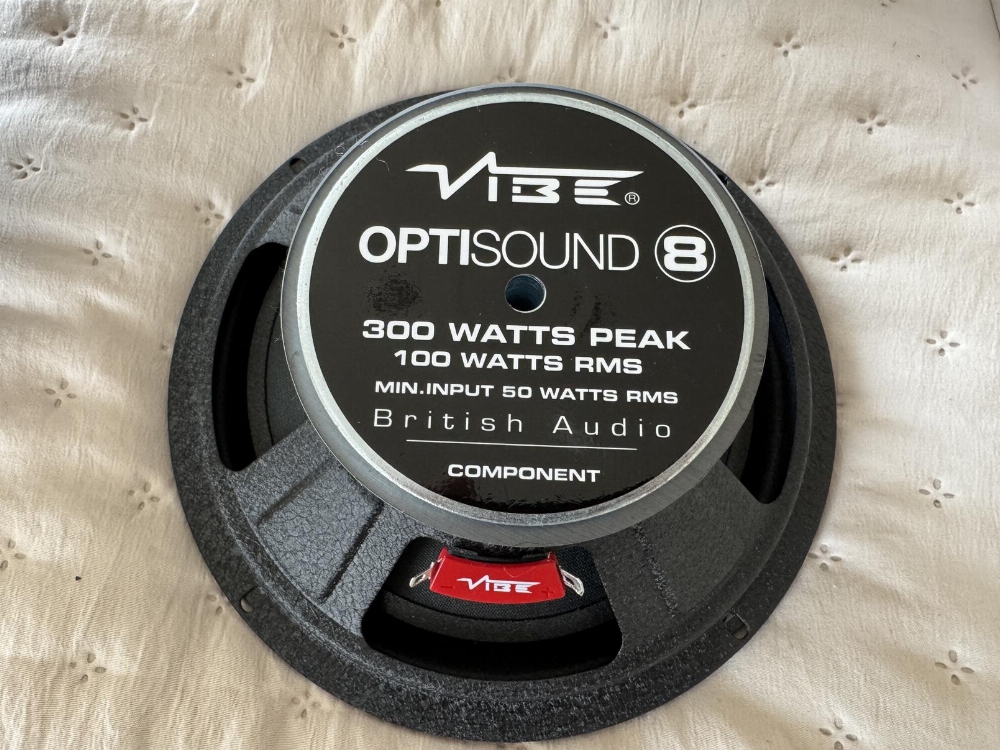
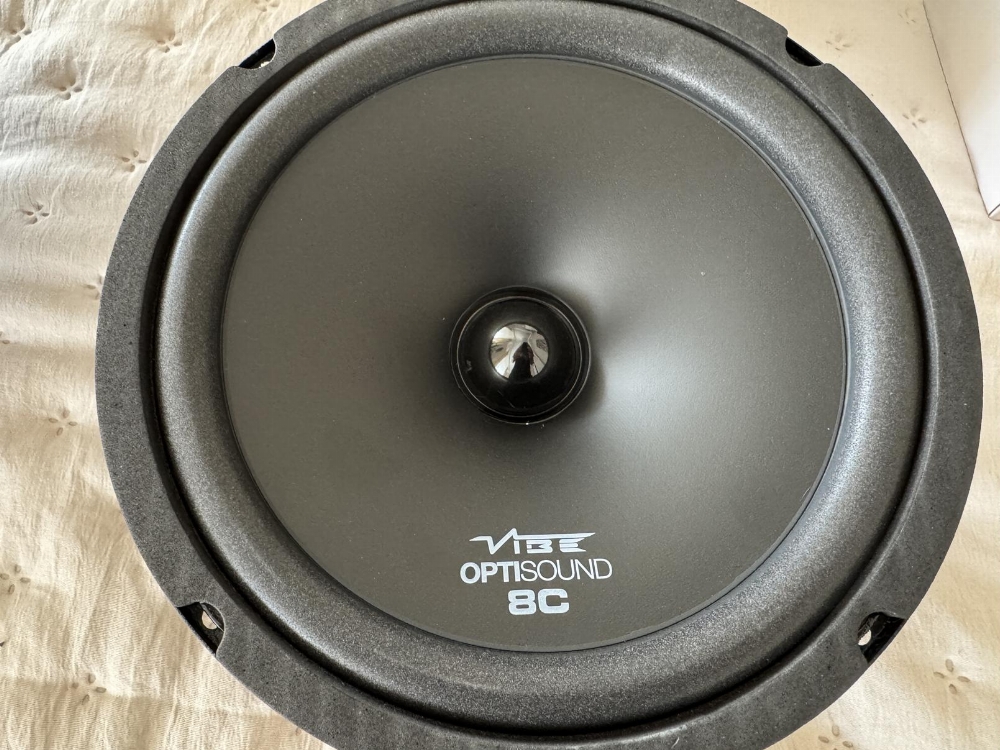
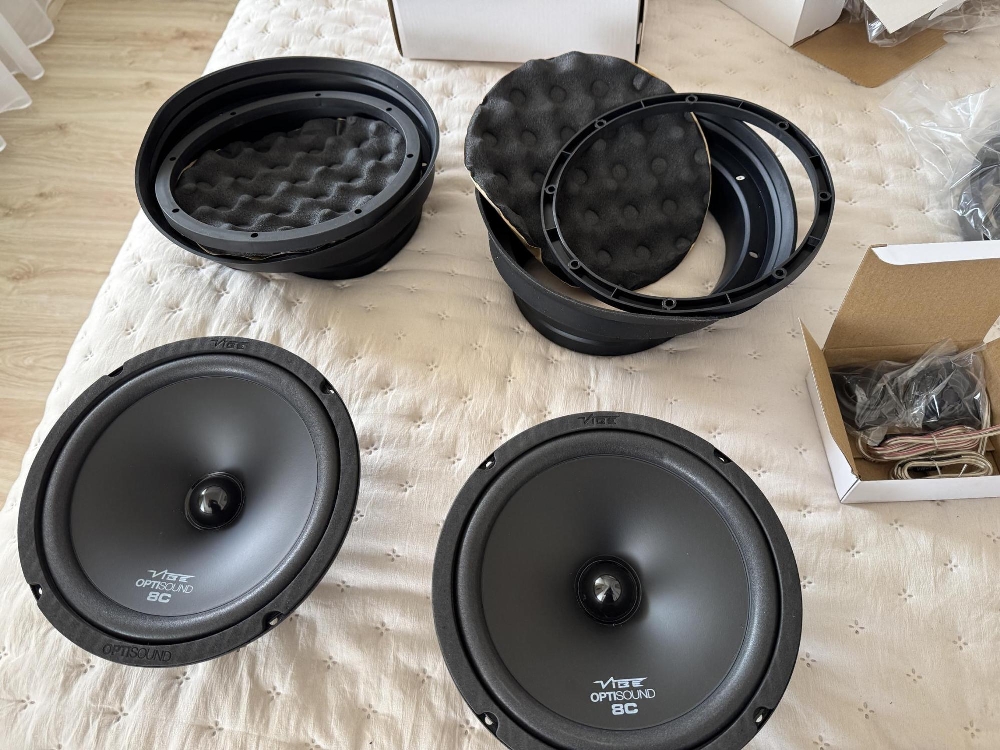
Now that the van has been quietened, I wanted better sound quality. The Starline has the worst audio system.. On the THQ website, new 8″ Vibe Audio speakers were found. They are fantastic, no amplifier needed. They do lack a bit of bass but this will be solved later on with an underseat integrated subwoofer.
With the insulation and sound deadening complete, the next major stage of the build was tackling the big ticket items: the pop top roof, Rock n Roll bed, Altro flooring and full carpet lining.
This phase involved a huge amount of research and decision making. There were countless options to consider, from colours and finishes to brands and specifications. More than anything, though, compliance and safety testing were non negotiable. We knew the pop top tent had to be TÜV approved, which immediately narrowed the field.
After weighing up the options, we settled on Austops for the roof, opting for their Deluxe mattress purely from a comfort point of view. When it came to the Rock n Roll bed, the requirements were just as strict. It needed to be approved, tested and top quality, as it forms a key part of the homologation process when converting the vehicle from a delivery van into a certified camper.
We chose Smart Beds and their rail based Rock n Roll bed system. The bed is TÜV approved and crash tested, which meant it fully met our compliance requirements while also giving flexibility in layout.
To carry out all of this work, we went with a small company in Bristol called Moores Campers. They are a family run business, husband and wife, and after a bit of very light social media stalking we noticed they also have two kids. That mattered to us. We wanted to support the little guy rather than a big production line converter. The bed was delivered directly to them and they handled the installation alongside the rest of the conversion work.
This stage might not be the most glamorous part of the build, but it is one of the most important foundations of the whole conversion.
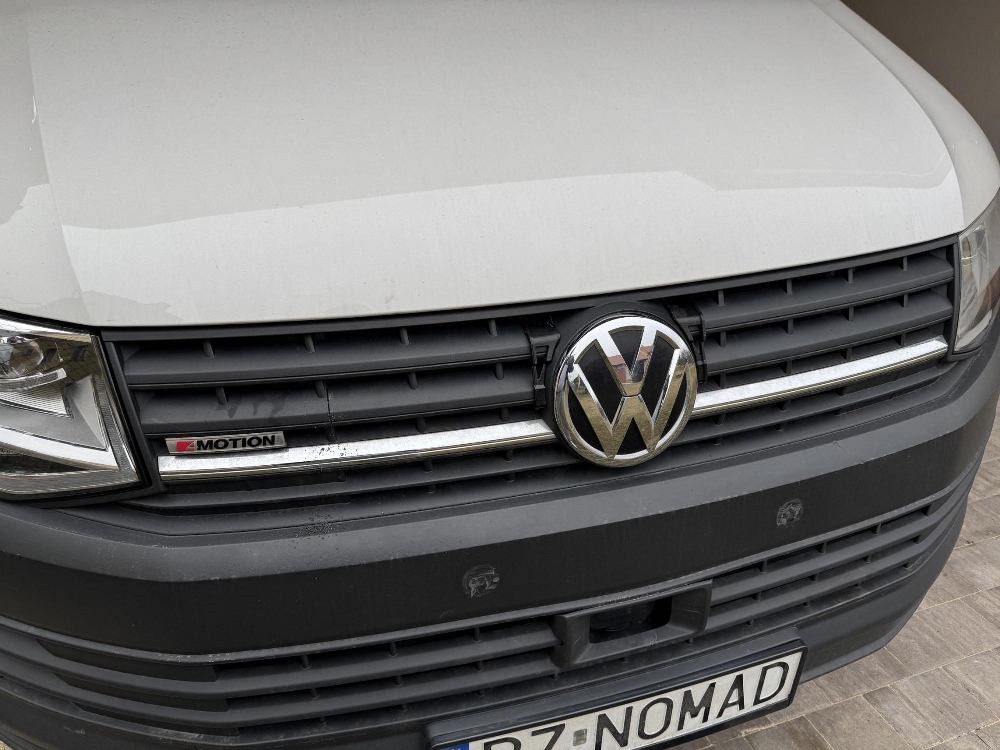
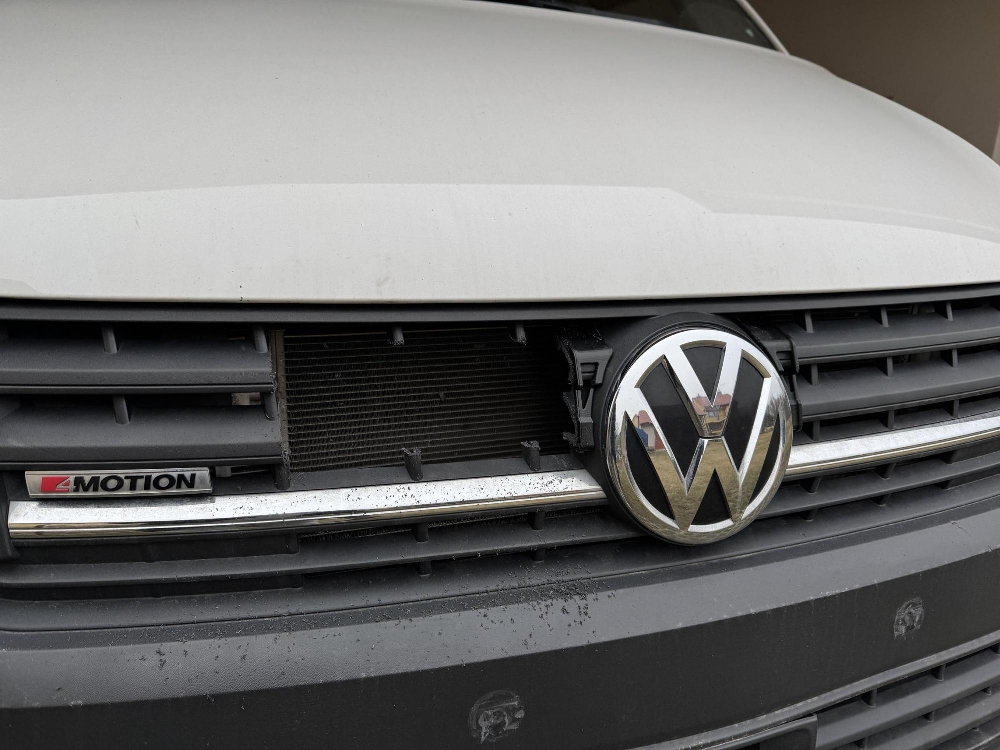
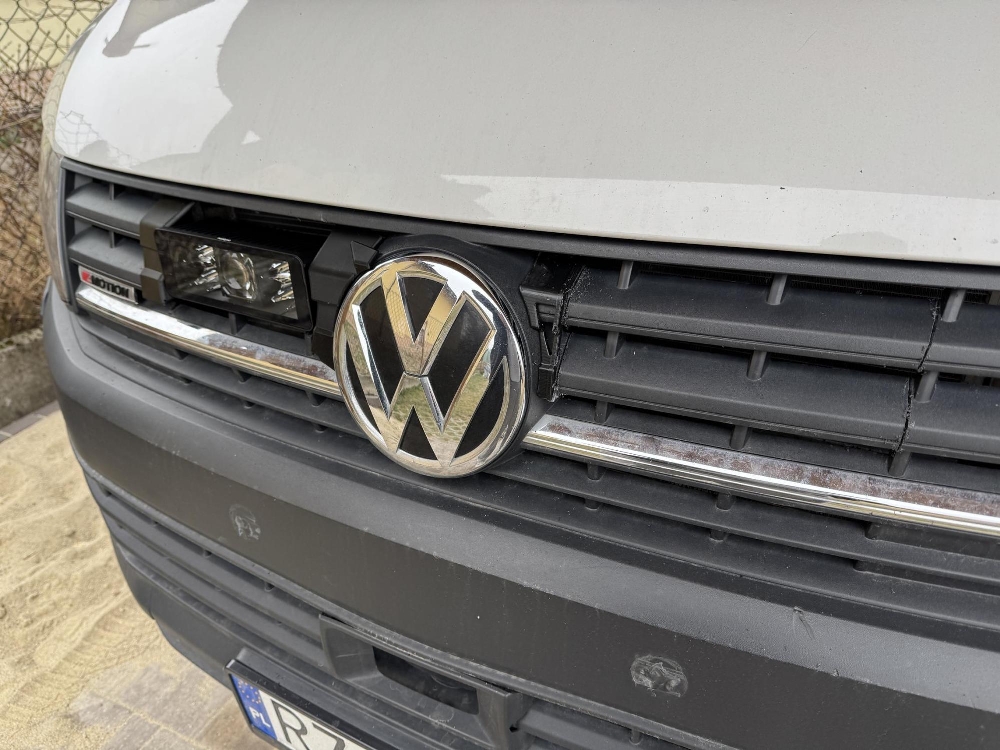
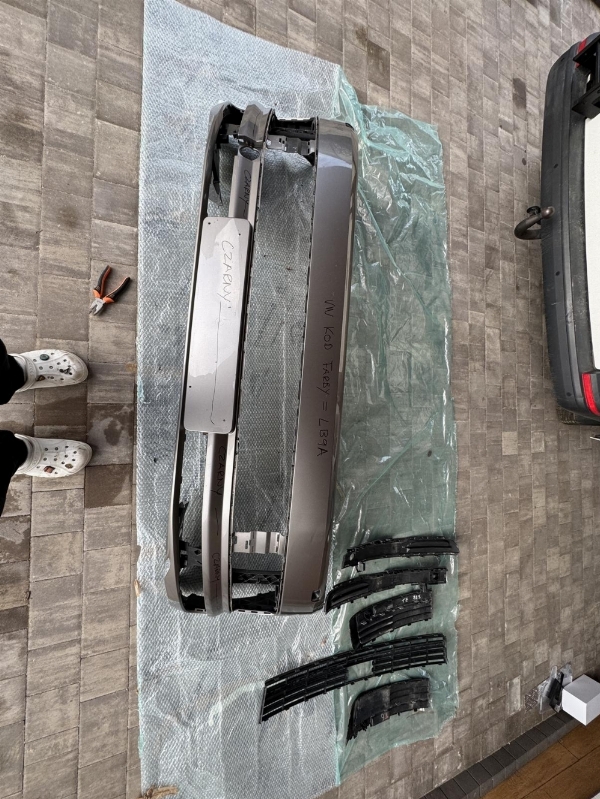
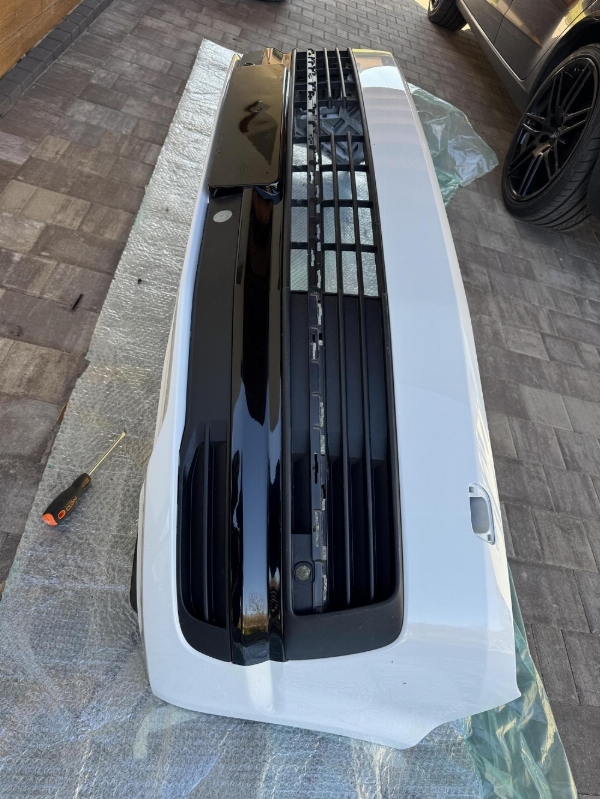
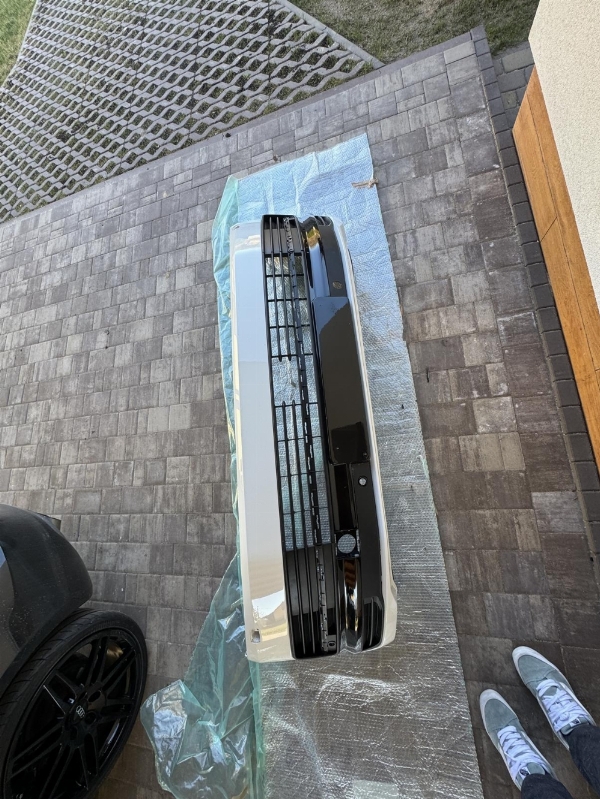
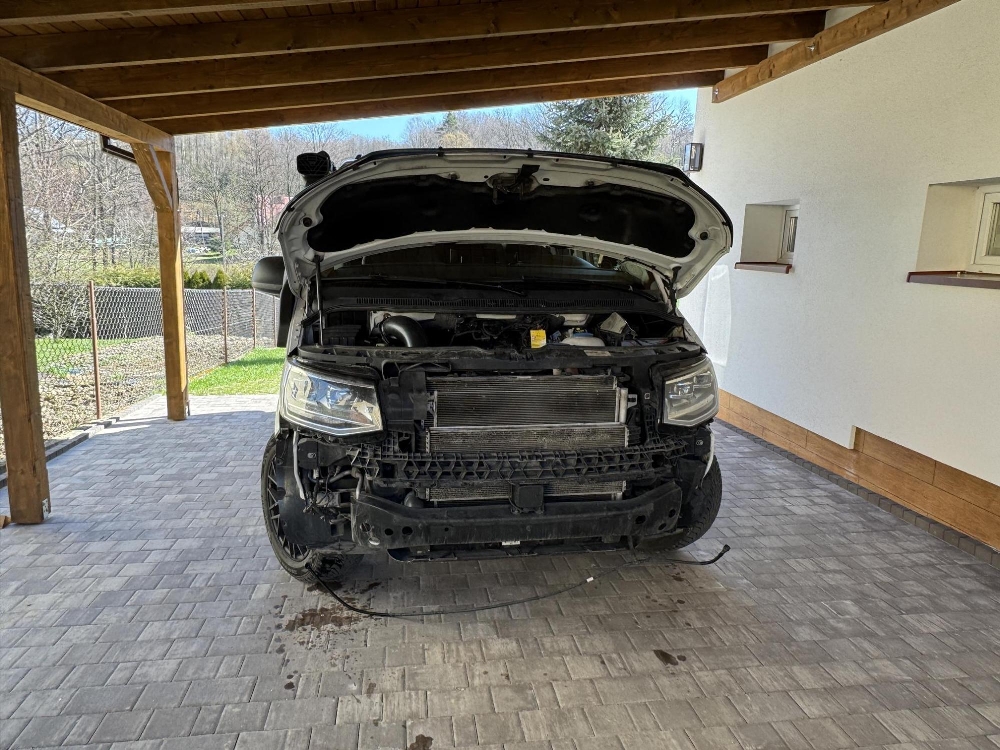
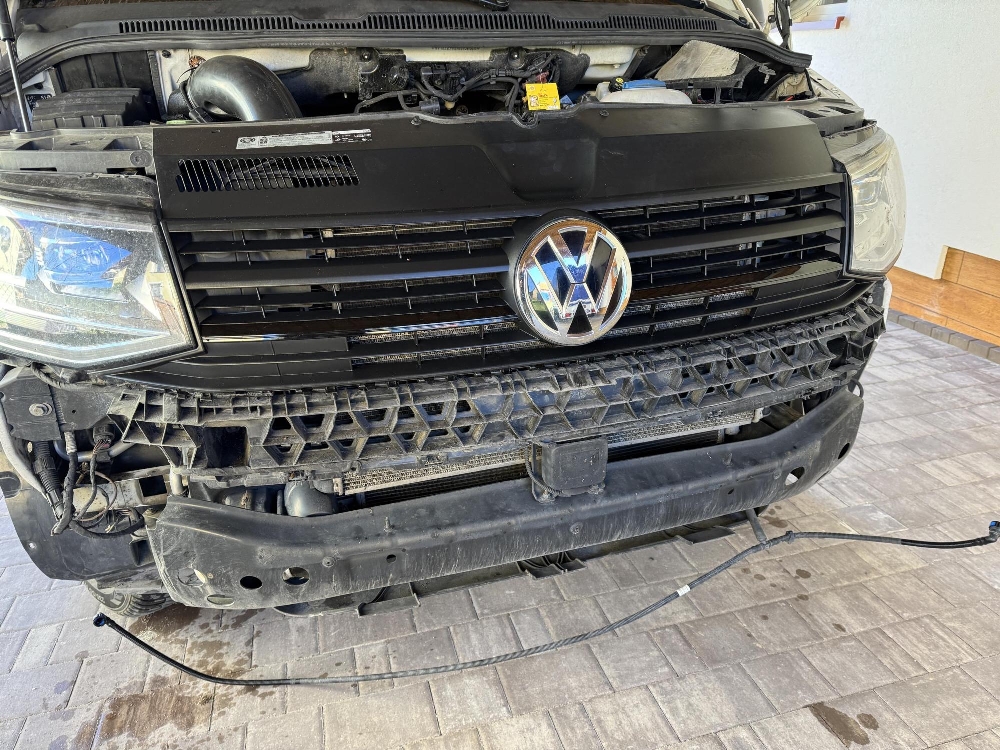
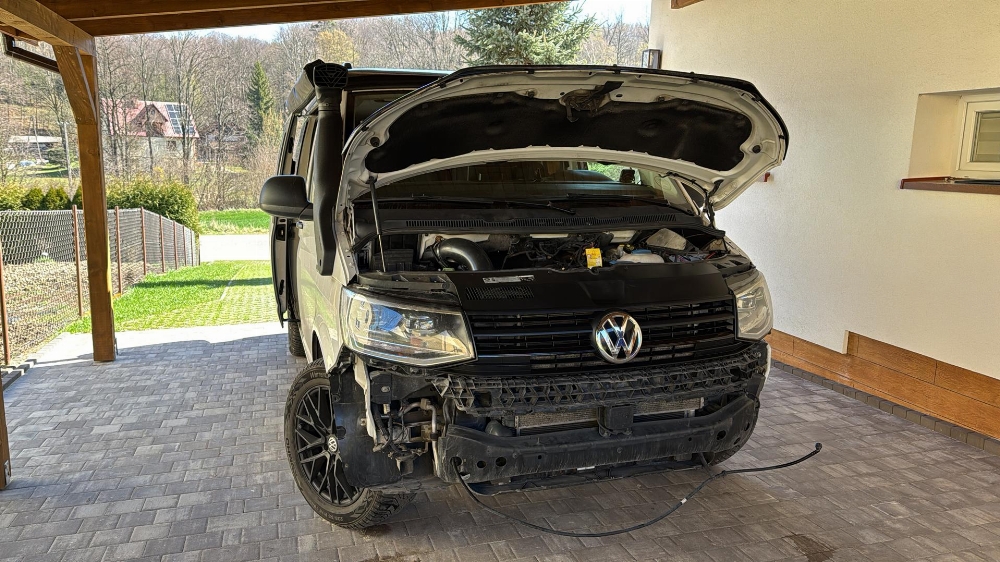
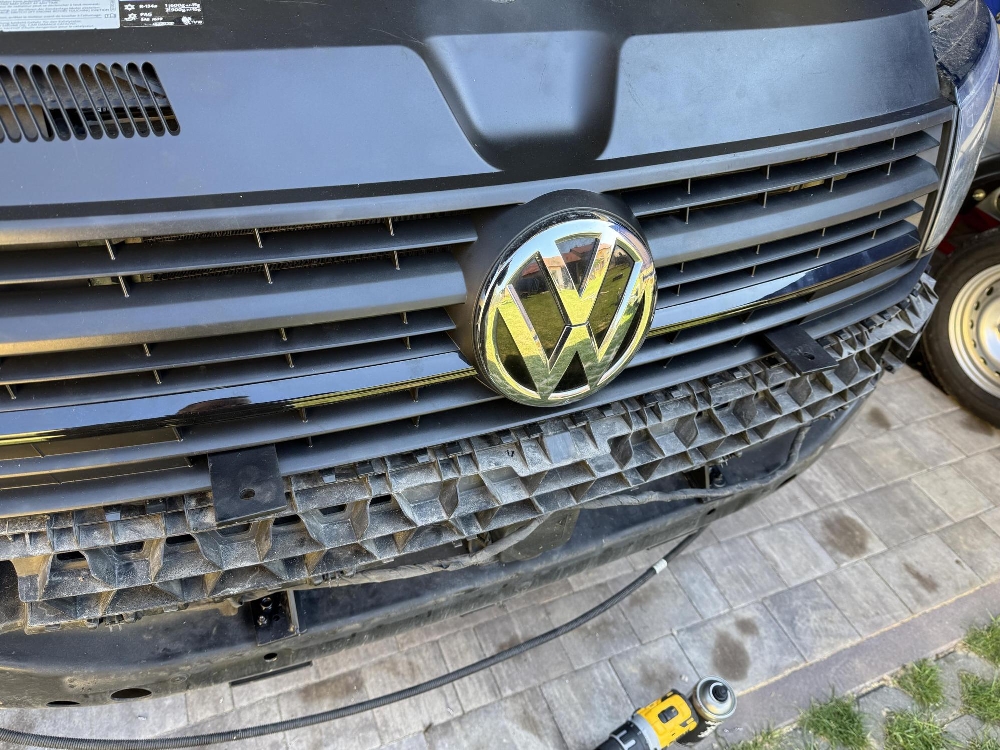
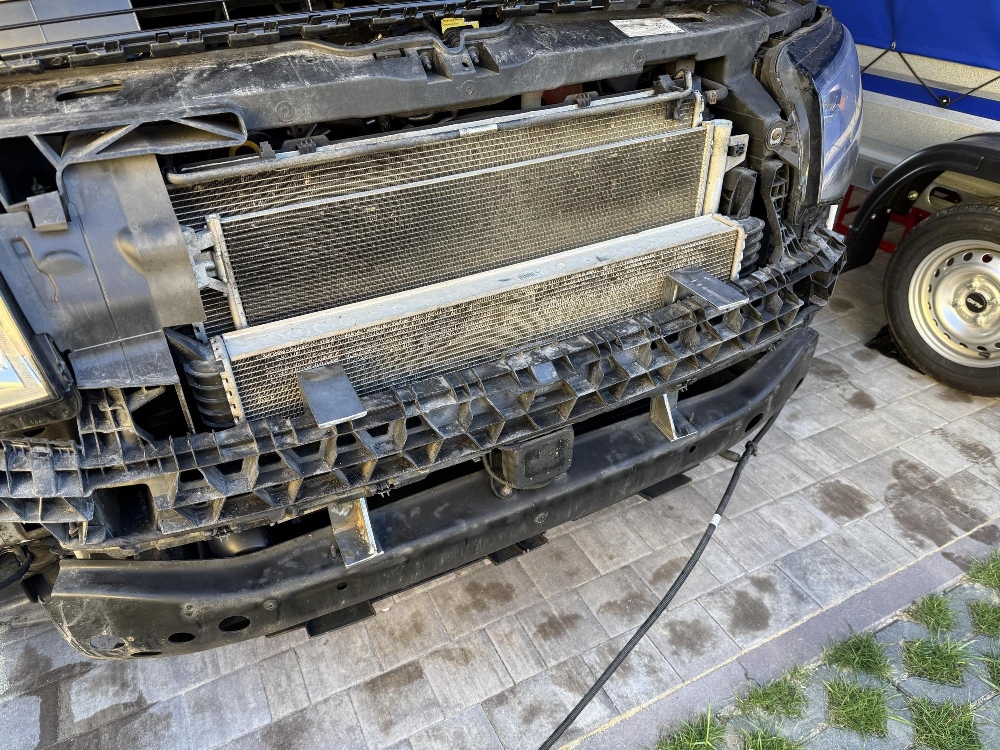
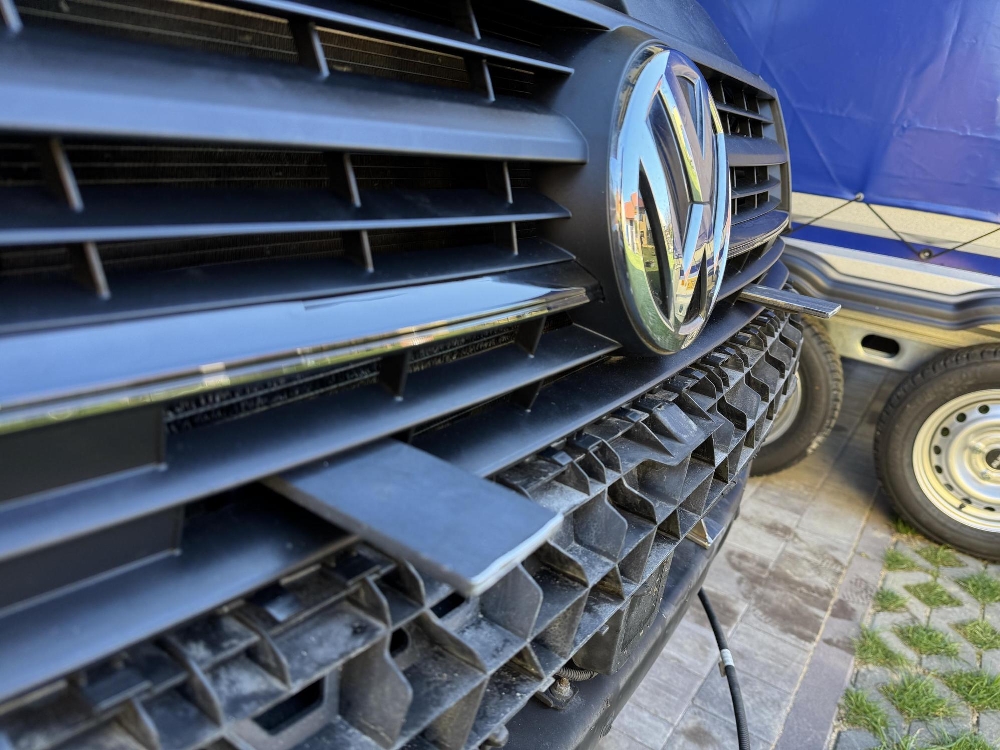
While the van was being converted in the UK, we flew back to Poland and the hunt began for a new front bumper. I was never fully happy with how the Lazer lamps sat, something about the look just felt off. Because the Startline front bumper is a single moulded unit, swapping just the grille was not an option.
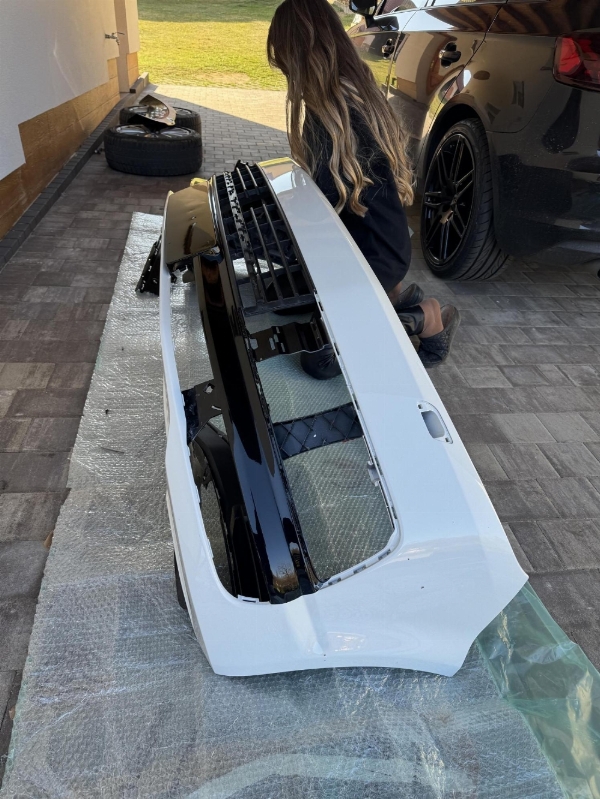
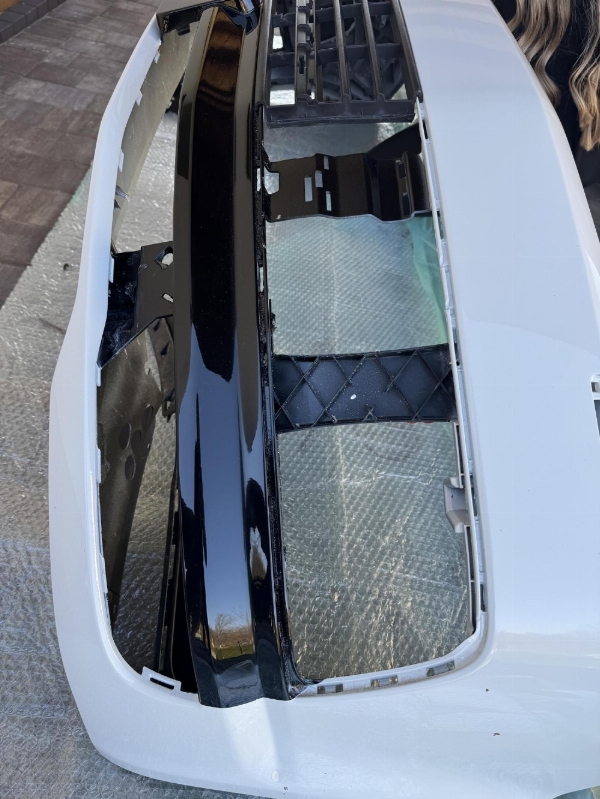
After a bit of searching online, I found a silver bumper that really clicked. A few days later it was delivered, and that is when the fun started. Armed with a permanent marker, I literally drew out the colour breaks and design directly onto the bumper before dropping it off at the paint shop.
When it came back finished, I was genuinely blown away. The idea in my head translated perfectly into reality, and I instantly knew it had been the right call.

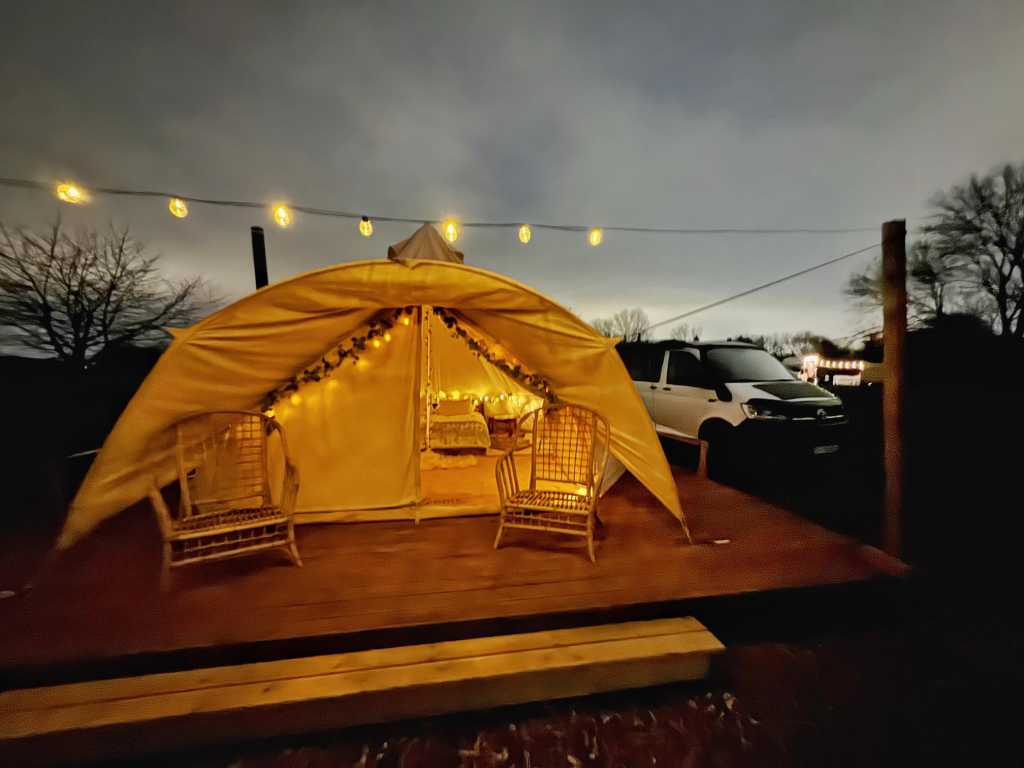
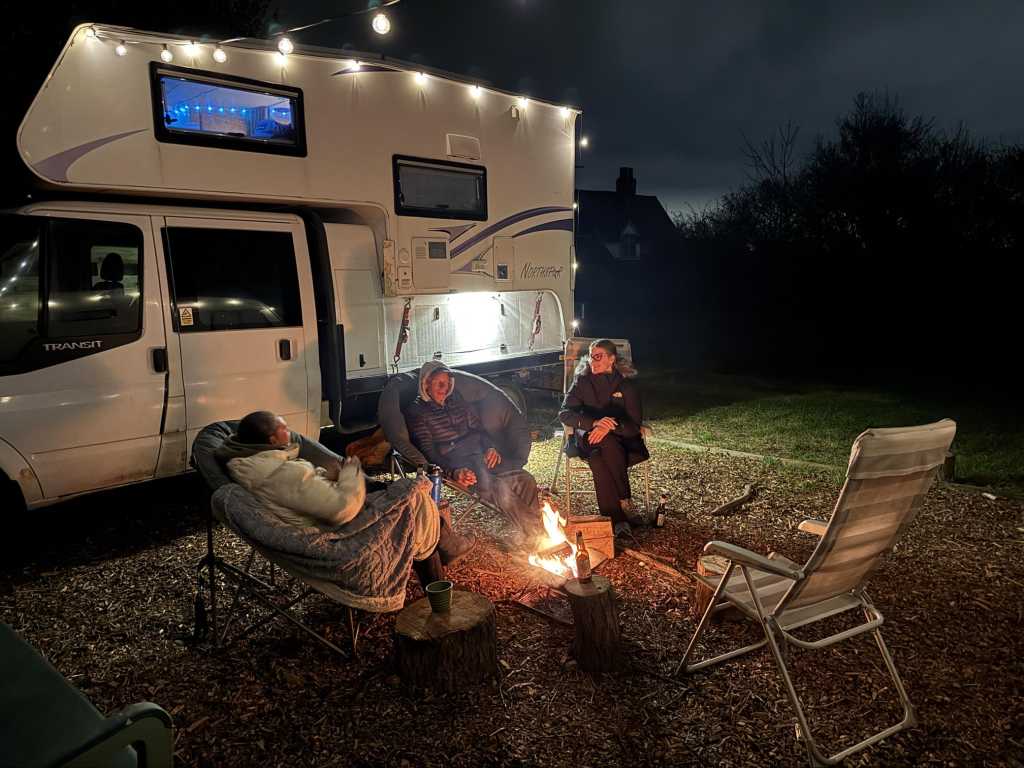
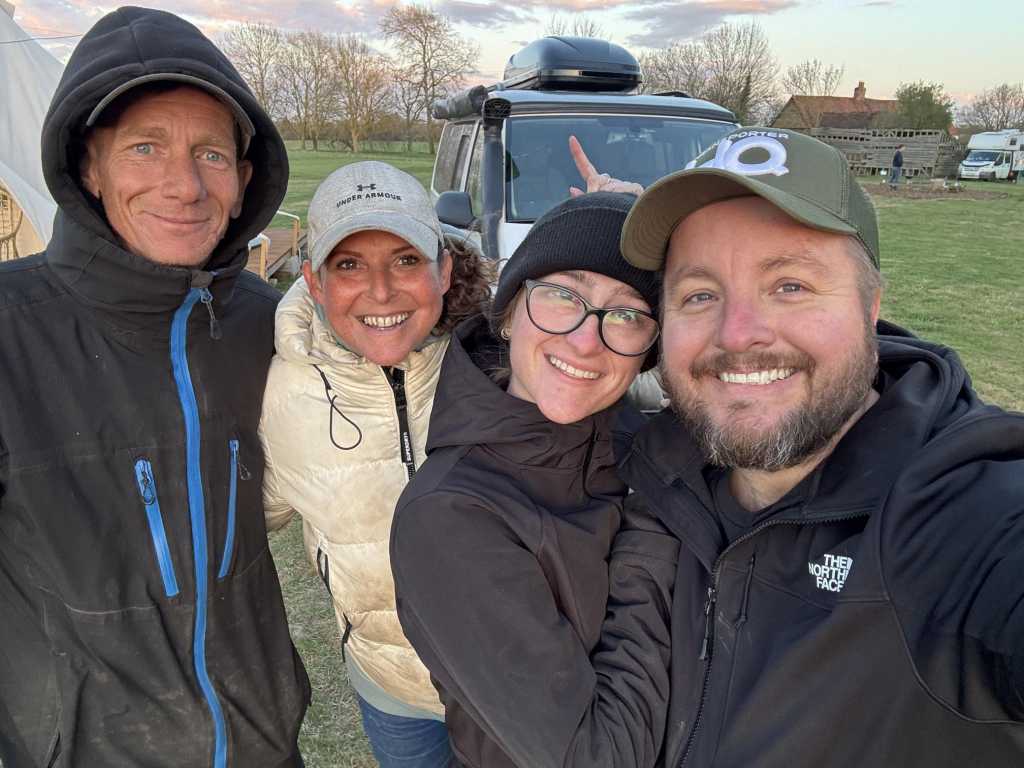
We collected the van, Sam gave me full tour on how to set it up and we slowly drove it back to to our Friends, Steve & Tobi from Truck Life Overlanders, head on over to check their page – https://www.facebook.com/Trucklifeoverlanders
Steve helped me install the kitchen unit, fridge, sink. We stayed at their beautiful Glamping site and helped a bit around the farm.

After our visit we made our way back to Poland, and had to show off our new van. Its funny, no one envisioned the van like I have and when opened up they were all amazed at how good it looked!
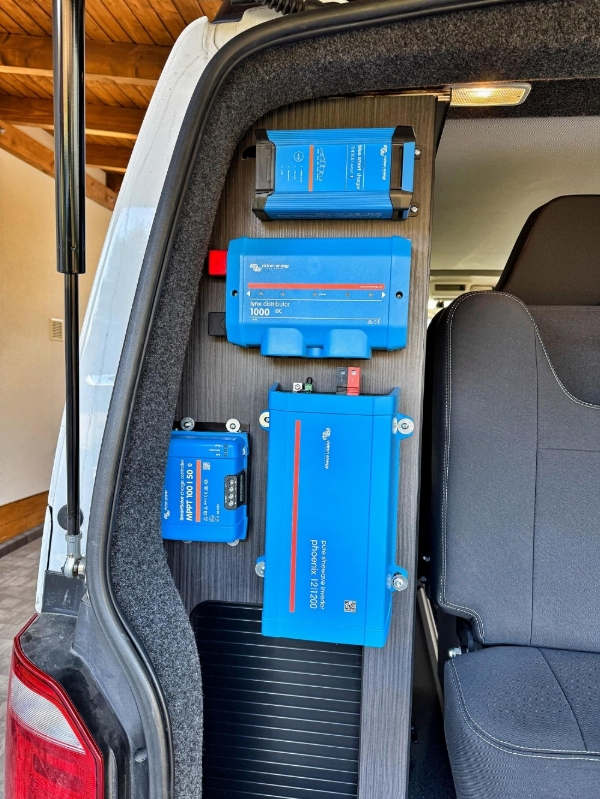
Now that the van was really starting to take shape, we had a clear idea of our power requirements, so it was time to order all the Victron hardware. The biggest challenge was not choosing the components, but working out where everything would live. With the weather being pretty miserable, I grabbed a sheet of paper, traced out the space where the system would be installed, and spent a good while sliding paper cut outs of each component around until the layout made practical sense.
Our requirements were straightforward but non negotiable. We wanted full shore power charging, DC to DC charging while driving, and solar capability for off grid use. Based on previous experience, the choice of brand was easy. I have used Victron equipment in some pretty harsh environments in Africa, and it has always been rock solid.
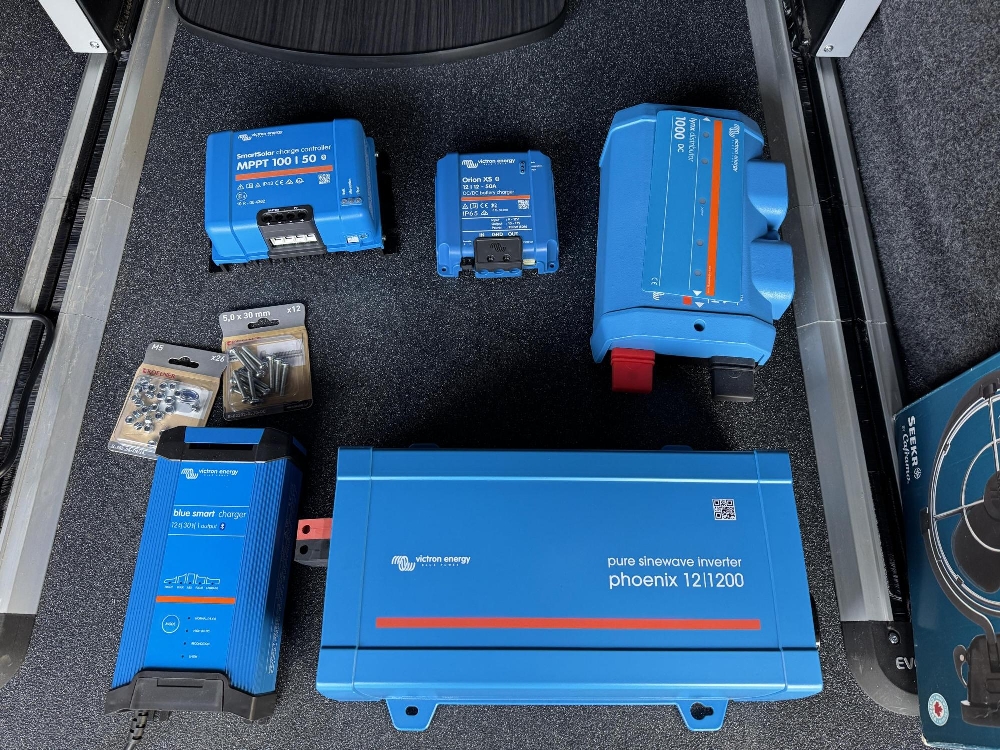
The final Victron setup consists of:
- SmartSolar MPPT 100/50 solar charge controller
- Orion XS 12/12-50A DC-DC charger for alternator charging while driving
- SmartShunt 1000A battery monitor with Bluetooth
- Blue Smart IP22 Charger 12/30 for shore power charging
- Phoenix Inverter 12/1200 pure sine wave inverter
All of the components are Bluetooth enabled, which makes monitoring and configuration simple through the Victron app and ties in neatly with the rest of the system. Planning everything properly at this stage took time, but it meant there were no surprises later when it came to actually installing the system.
This was one of those jobs where a bit of patience and planning paid off massively.
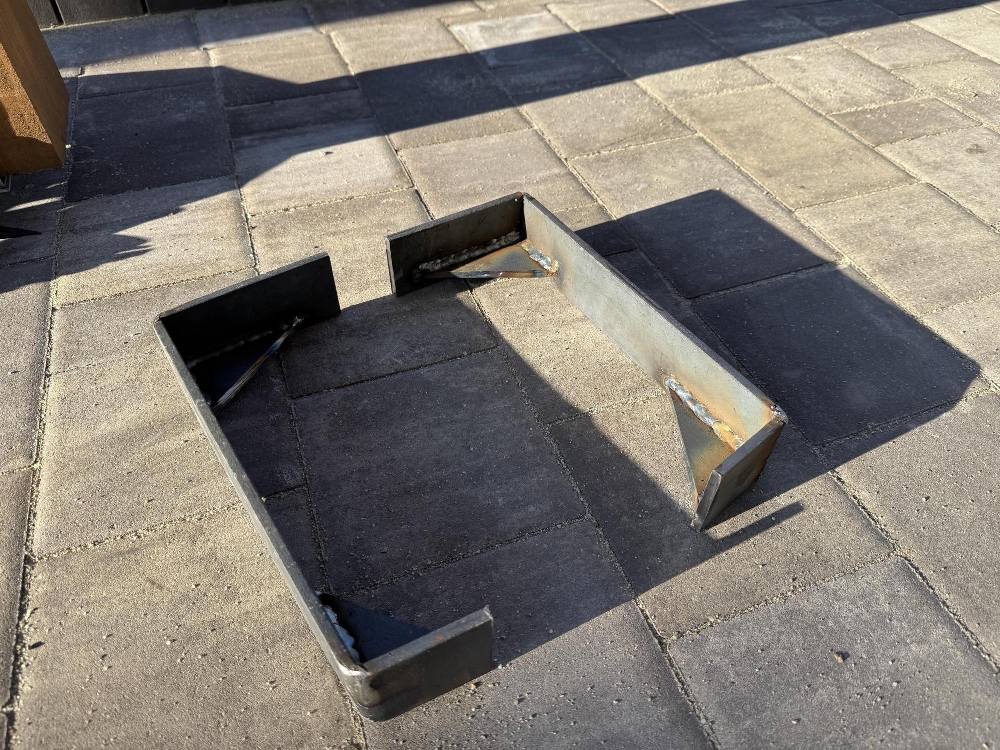
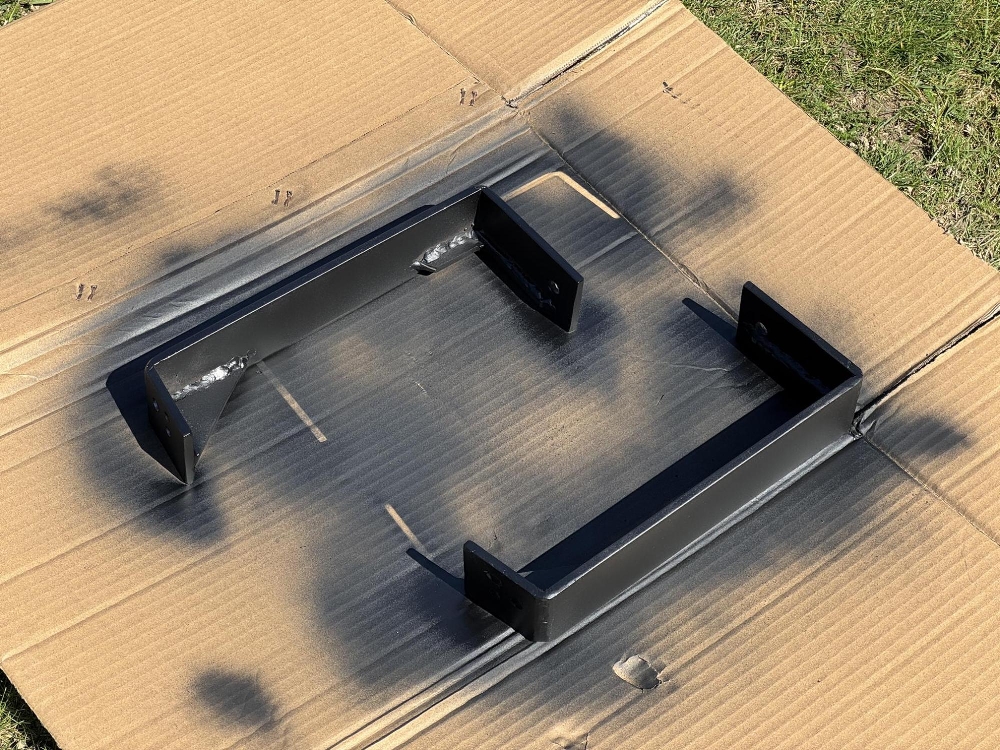
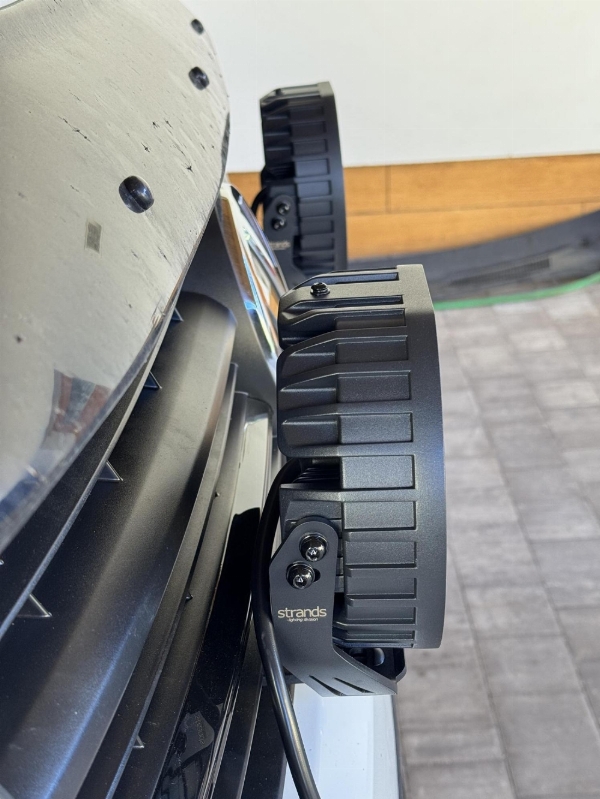
With better weather finally rolling in, I could get started on the front bumper and, more specifically, on fabricating the brackets for the spotlights. I could not find anything available off the shelf that met my requirements, and simply bolting them straight to the bumper was never an option.
I am very pleased with the end result, and even happier that I decided to move away from the Lazer lamps. Some might say the brackets are over engineered or heavier than strictly necessary, but that was entirely intentional. The last thing I wanted was spotlights that vibrate, bounce or shake themselves loose on rough roads. Solid, stable and rattle free was always the goal.


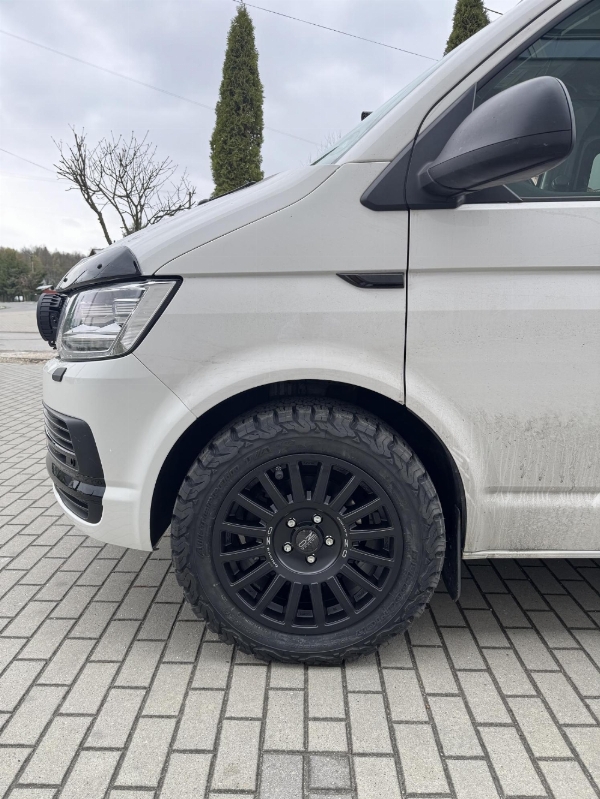
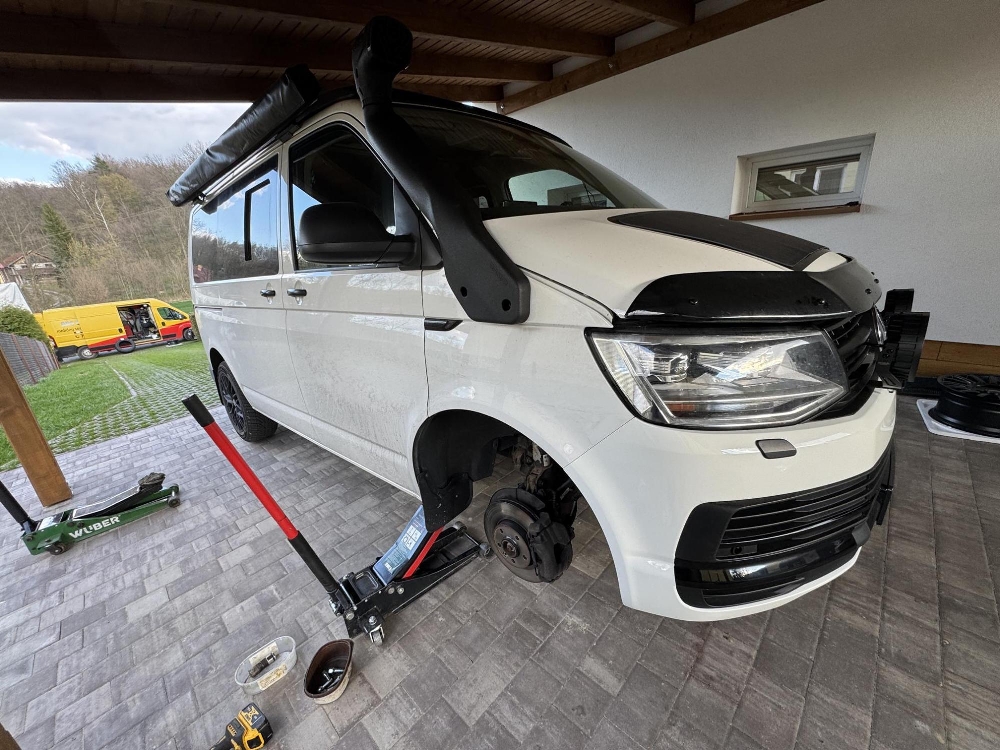
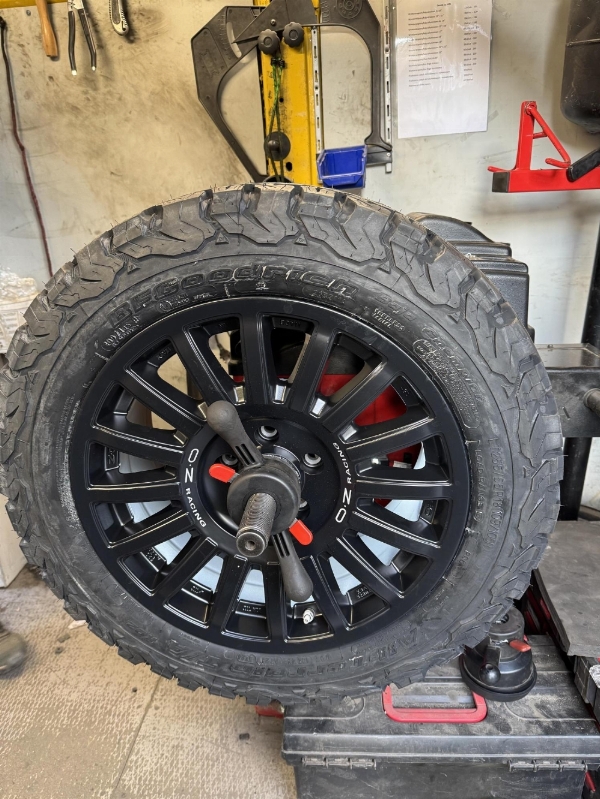
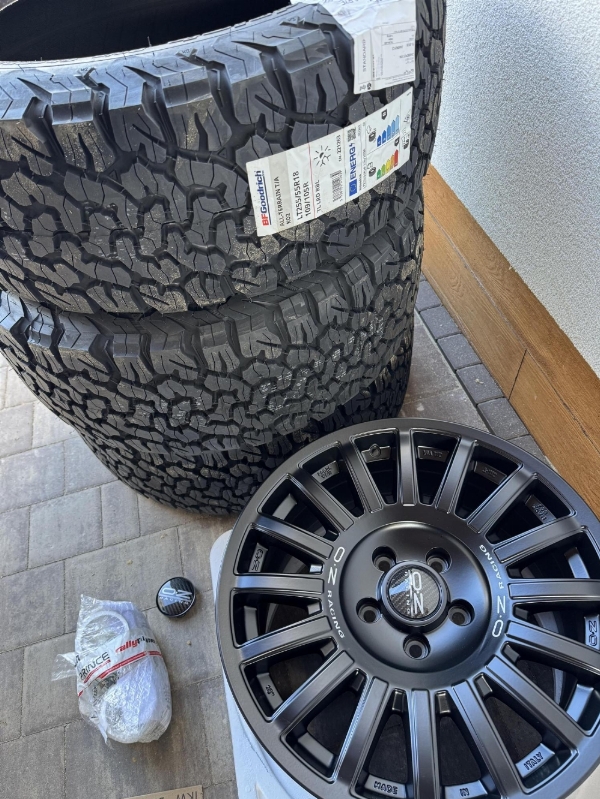
Now that the exterior work as been done, the next upgrade is installing those Offroad wheels & tyres. for the image I went with:
OZ RALLY RAID 8.50×18 5×120.0 ET 38
BF Goodrich 255/55R18 KO2s
At the moment on standard suspension, no rubbing on full lock, no issues.
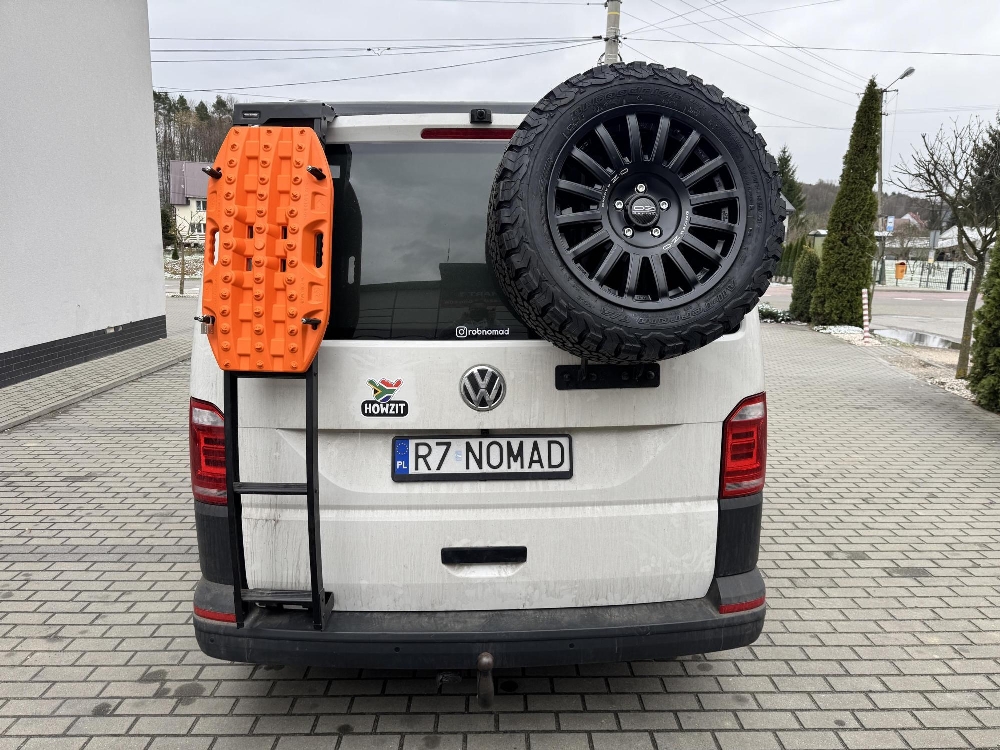


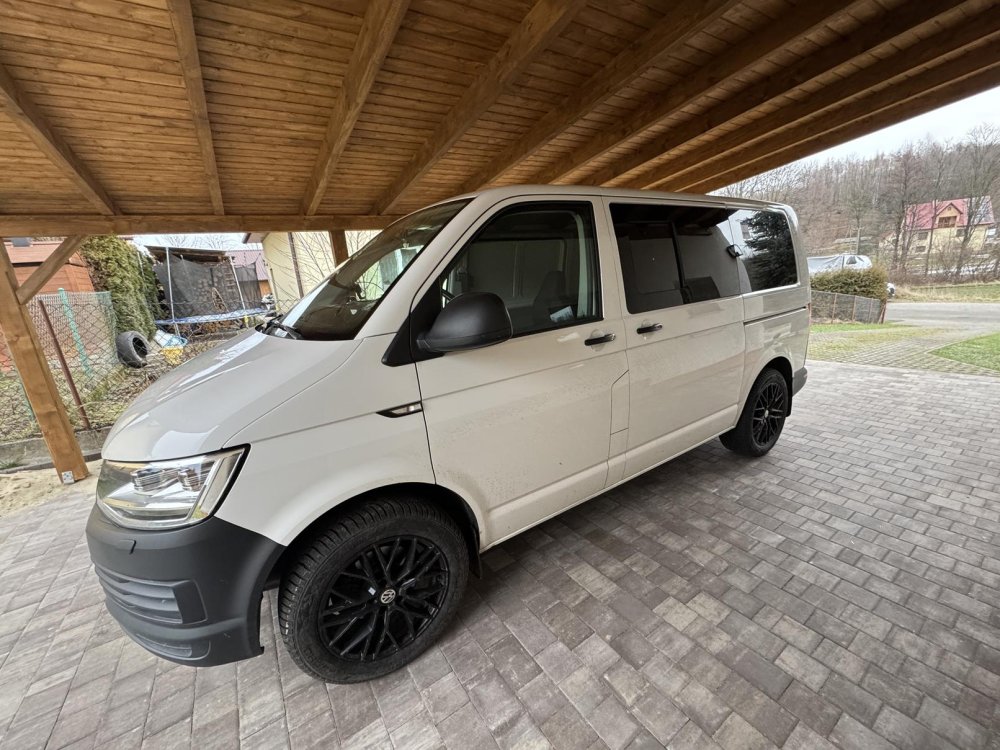
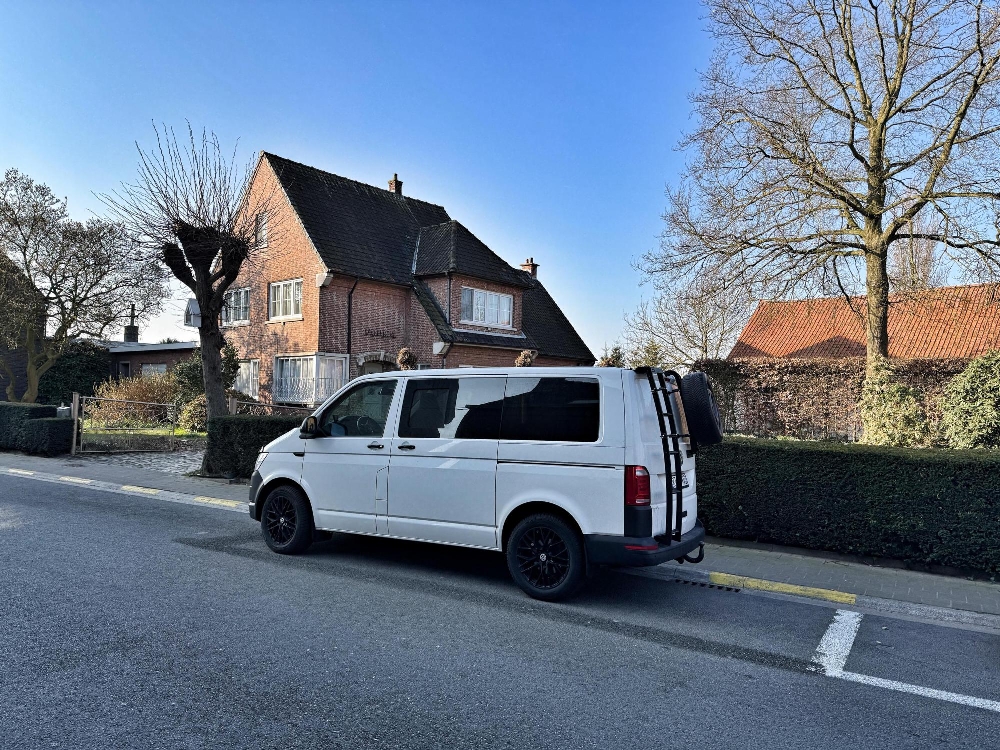
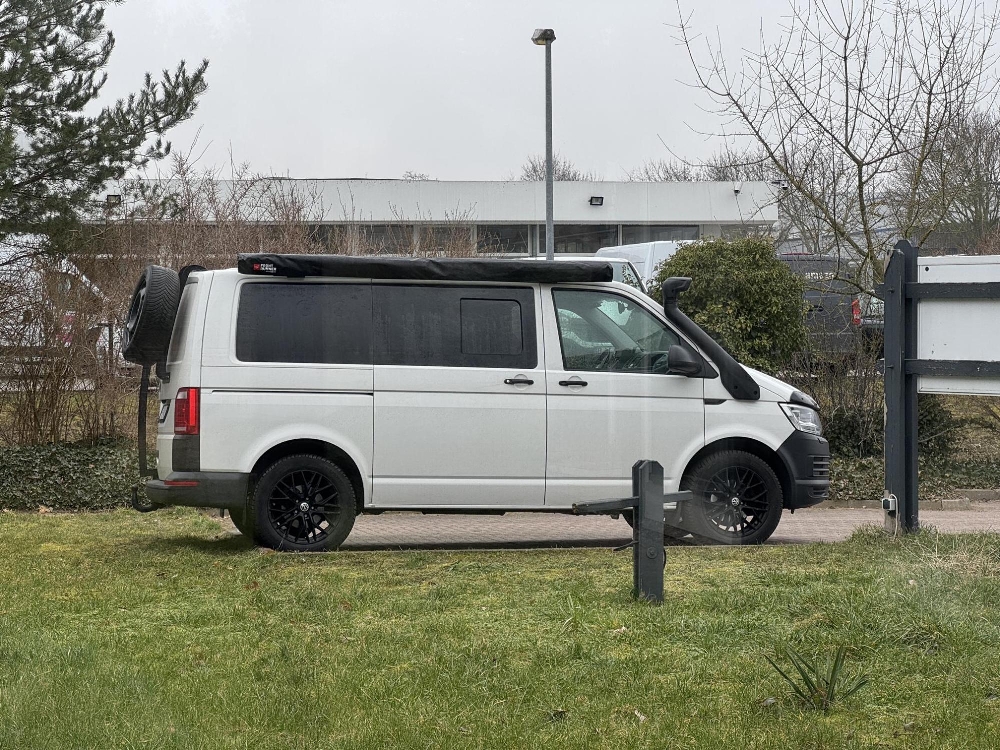
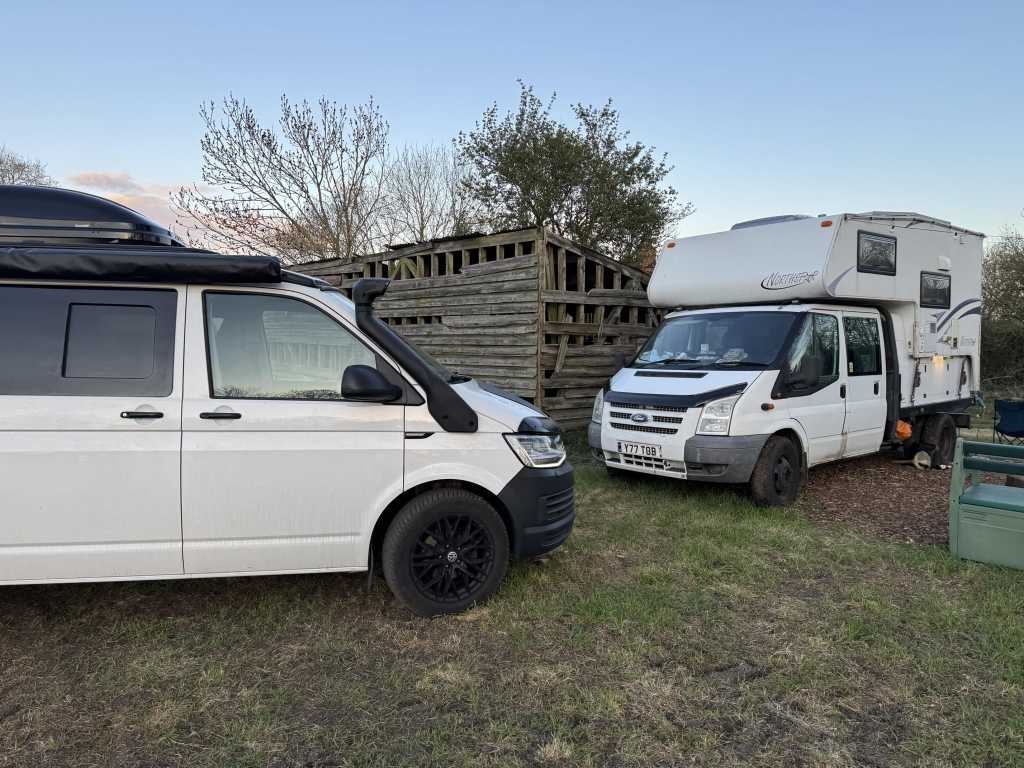
Here is a little gallery of how the van looks so far

3 x 175W Solar panels fitted on the roof
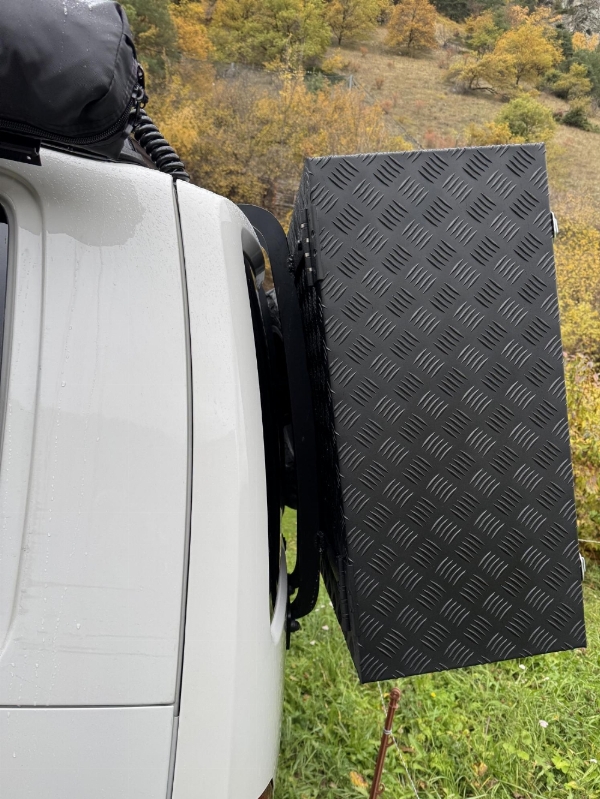
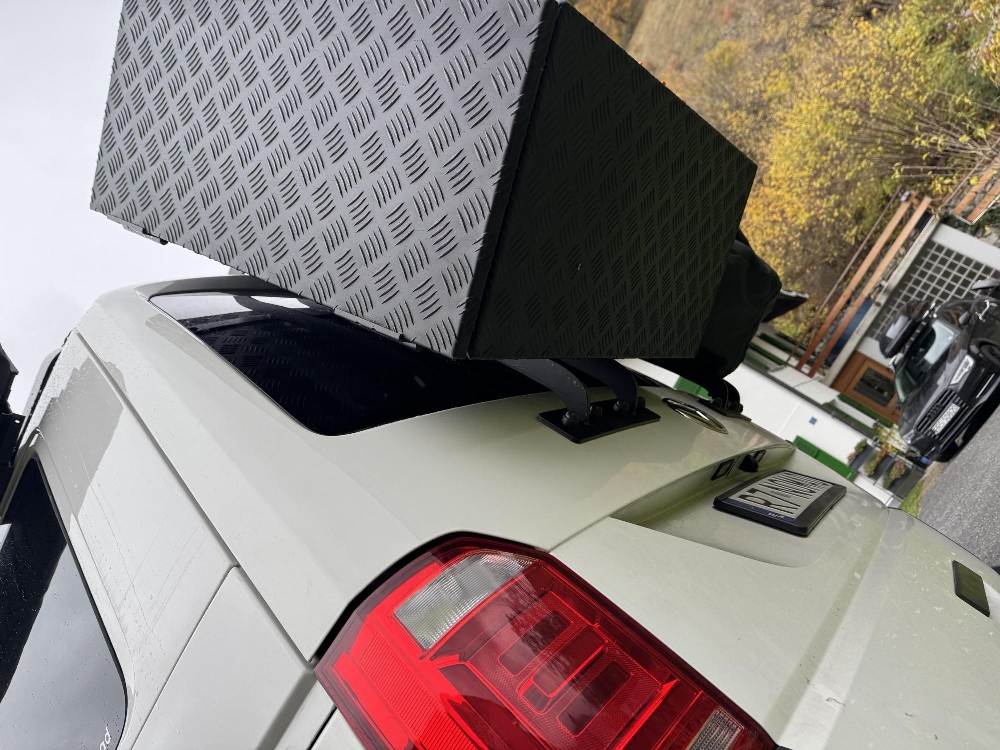
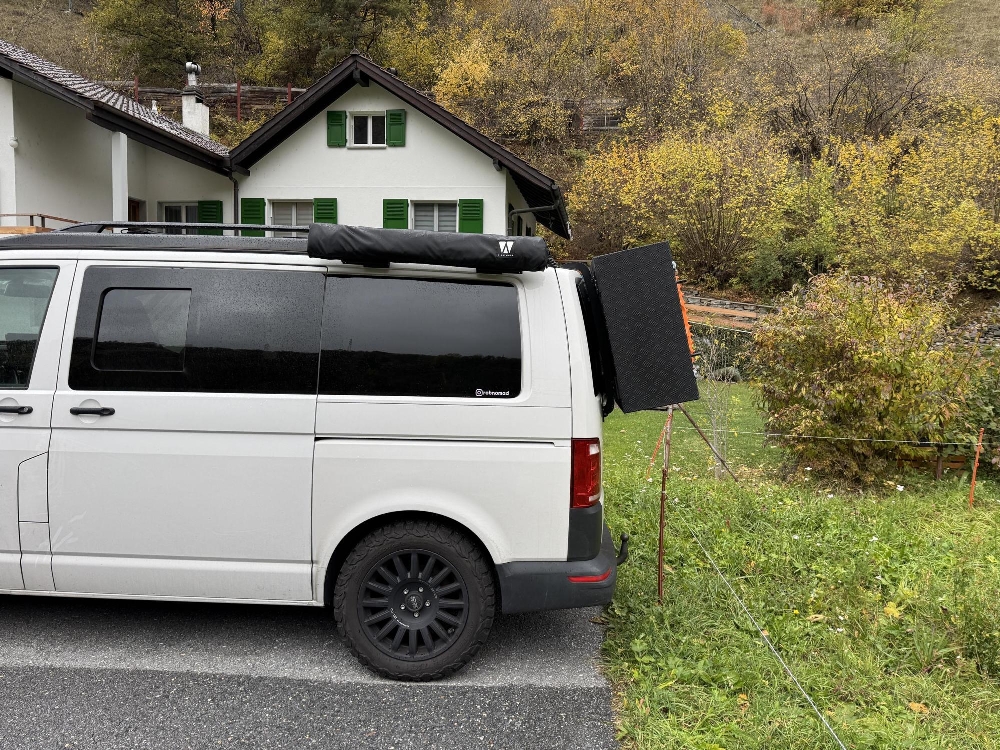
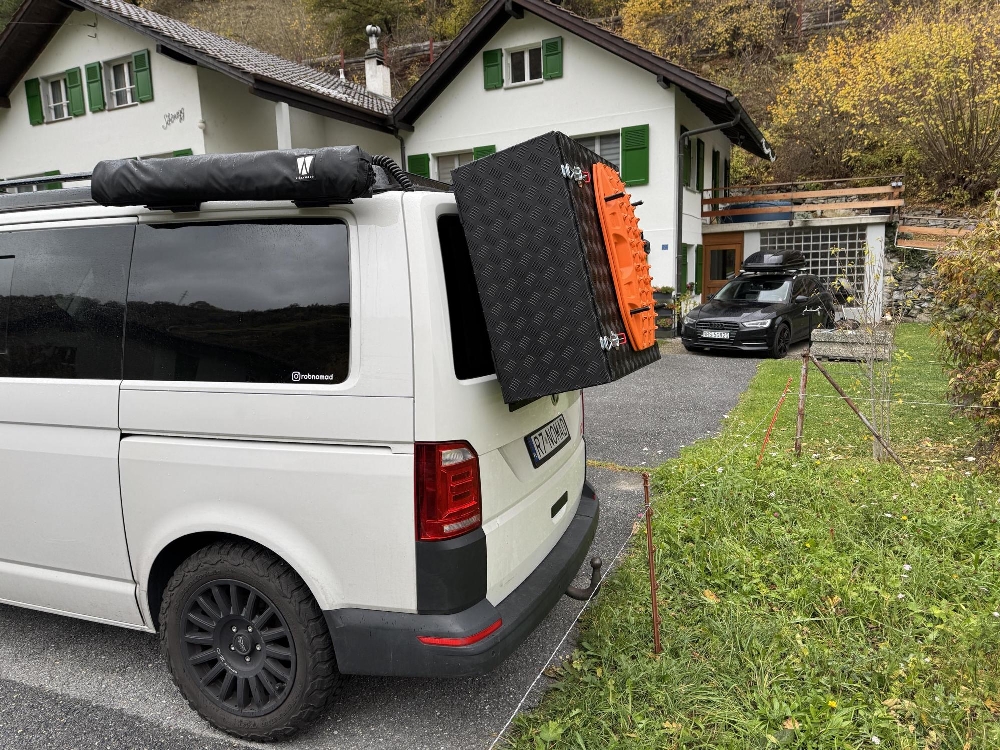
After using the van for a while, it became obvious that we had a lot of camping gear floating around inside. At the same time, the rear ladder turned out to be a pretty pointless addition, so it made sense to rethink that whole setup.
We decided to have a custom sized aluminium storage box made for the back of the van. I have always been impressed with the build quality of the spare wheel carrier from UB Components, so I bought another one of their brackets, cut it up and welded a bespoke mount to support the box.
I am really pleased with how it turned out. The box now neatly holds our camping table, two chairs, levelling blocks, awning sides, ground sheet and all the camp electrics. Basically, everything we need to set up a comfortable campsite now lives outside the van, exactly where it should.

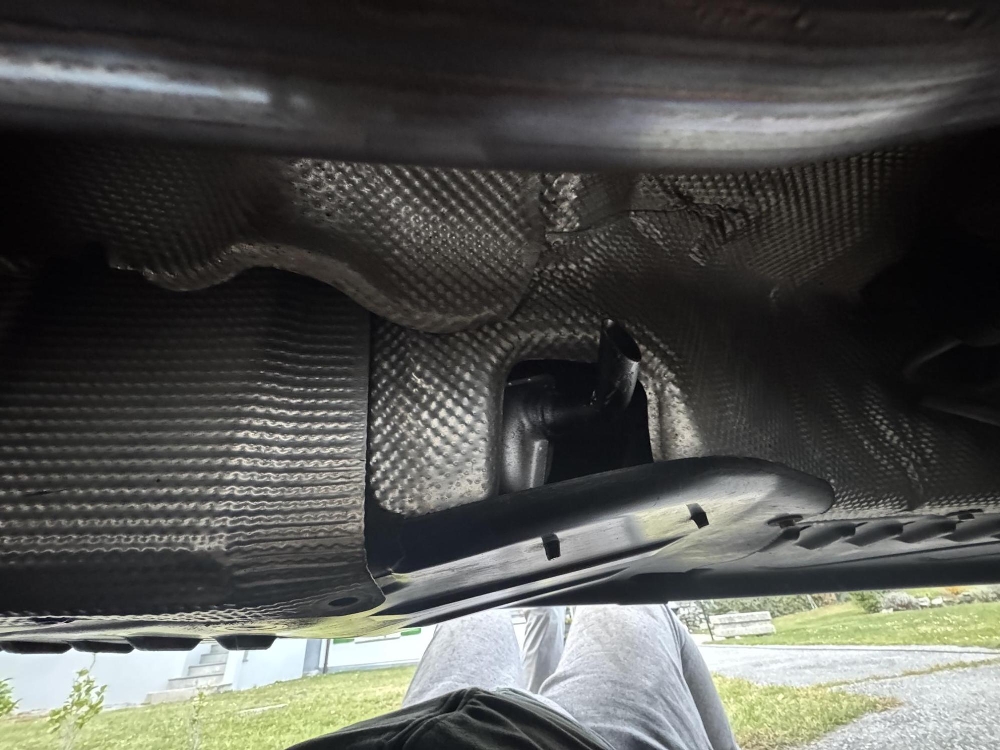
Got some work done on the van, starting with installing the Webasto ST 2000 heater under the passenger seat. The next step is to prime the fuel system and make sure everything is running properly. Once it is up and running, I will grab a few photos before refitting the underbody covers.
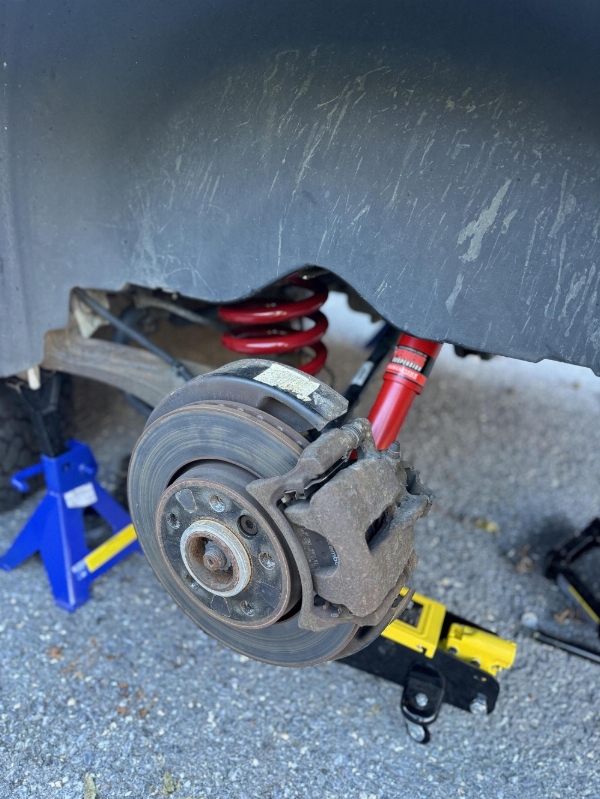
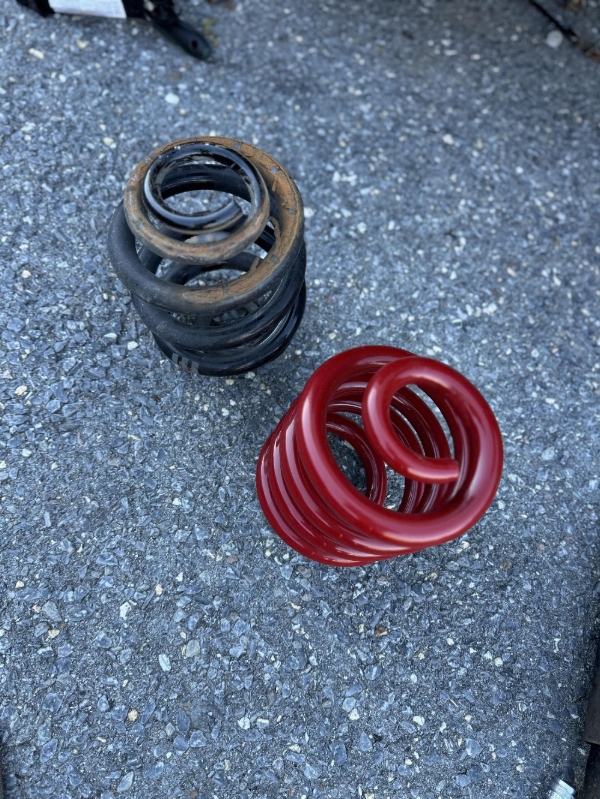
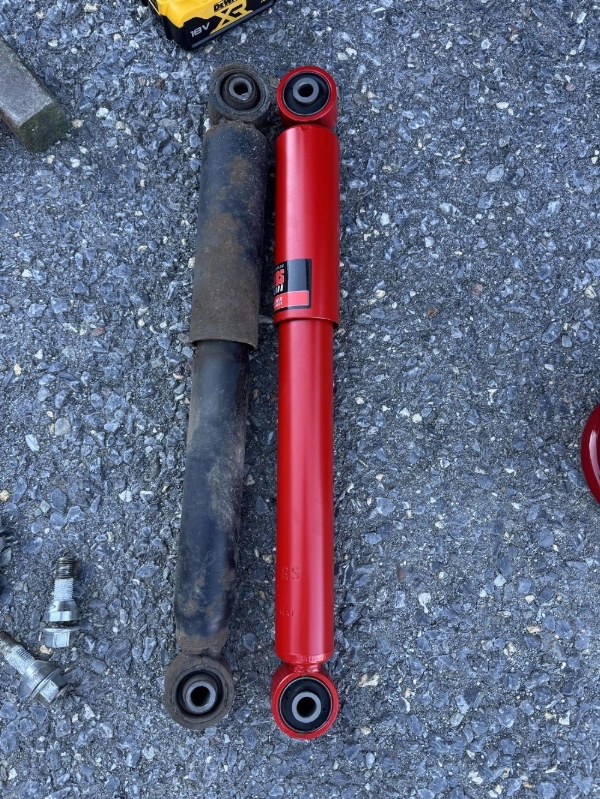
While I was at it, I also noticed the rear of the van had started to sag under the extra weight of the conversion. The standard suspension was clearly struggling, so I replaced the rear springs and shocks first. That has made a big difference and the van now sits level again. The front shocks will be next on the list.

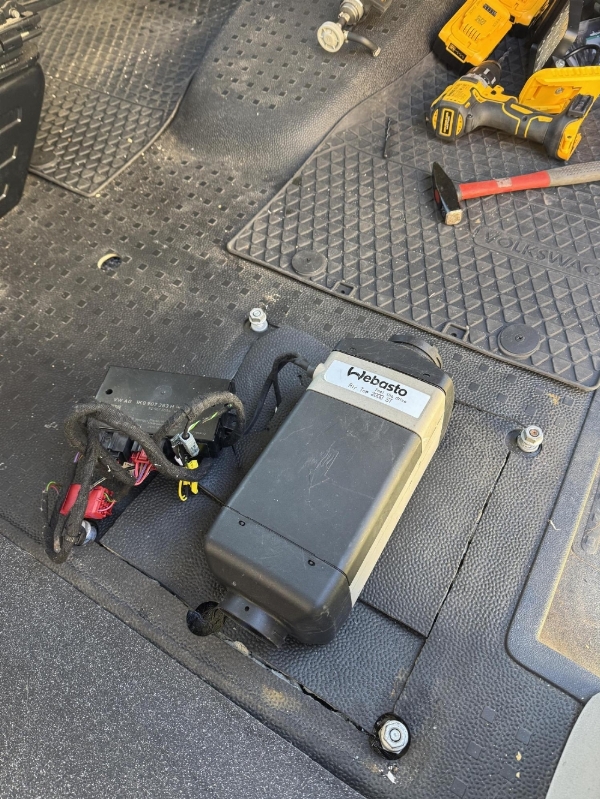
The Webasto AirTop 2000 ST heater installation is now complete. I had to fabricate a few custom brackets to mount the fuel pump, cold air intake and exhaust underneath the van, but it all came together nicely. I am pretty chuffed with how it turned out.
There were a few hiccups along the way, with the heater constantly throwing an H88 error. After retracing my steps, I realised I had plugged the fuel pump connector in the wrong way round. A quick fix later and it was happily heating the cabin exactly as it should.

Leave a Comment